We may receive a commission when you use our affiliate links. However, this does not impact our recommendations.
 There are many ways to cut this popular edge-to-edge joint.
by Bill Hylton
from the April 2005 issue
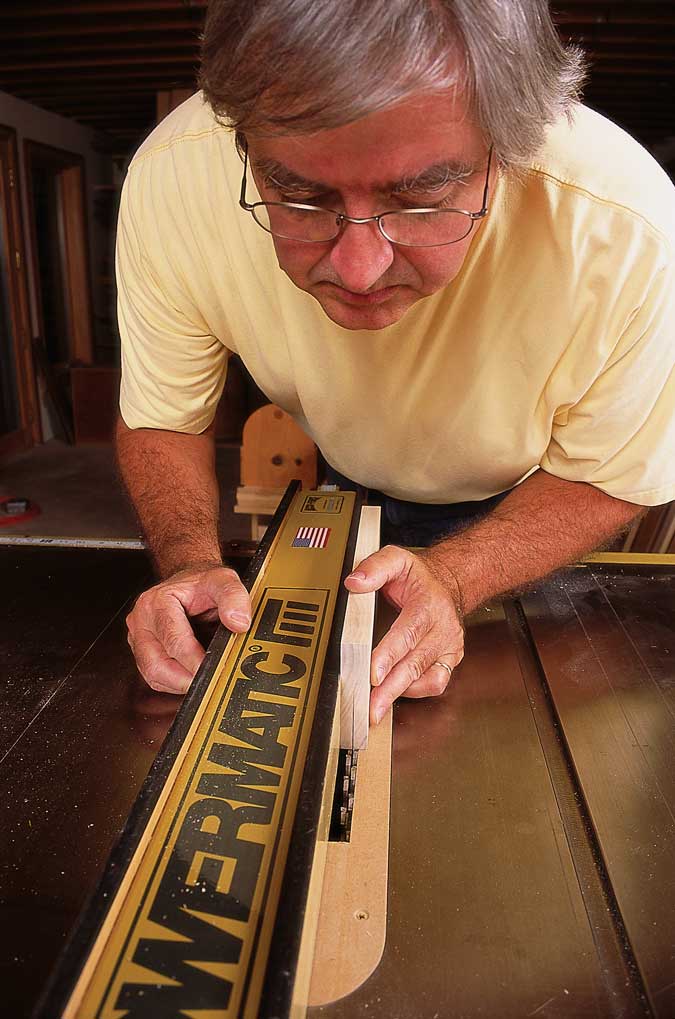
When setting up the table saw to cut the joint, just eyeball the rip-fence position for the groove. Sight down across the end of the stock and align a centerline drawn on it with the center of the cutter. A two-pass work routine centers the groove and eliminates the need for test cuts. When making the joint (right), a snug press fit is your goal. This is a first try – honest!
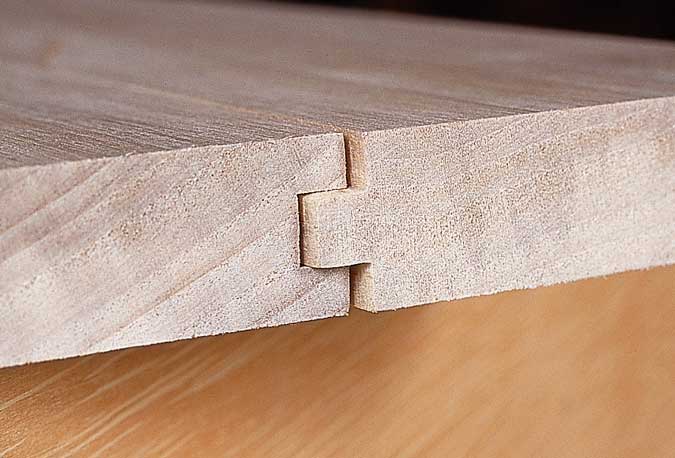
A tongue-and-groove joint is an edge joint with a mechanical interlock. The edge of one board has a groove. A matching tongue is formed on the edge of the mating board. The tongue goes into the groove, and the boards are joined.
You probably are most familiar with the joint’s many applications in building construction, such as strip flooring and paneling. In furnituremaking, the tongue and groove is excellent for edge-to-edge glue-ups. If cut precisely, the joint ensures that the faces of adjoining boards come flush easily and that they can’t creep out of alignment as you position and tighten clamps. When the clamps come off, a little scraping and hand-sanding is all that’s needed before moving on.
Cutting the Joint
Consider the design of the joint before you set up to cut it. Good proportions are essential to produce a strong joint, but the intent of the joint also is important. The general rule says you should have a square tongue that’s roughly one-third of the stock thickness and centered on the edge. Working with 3⁄4″ stock, that plays out to a 1⁄4″-thick by 1⁄4″-long tongue, and a matching groove.
A longer tongue (one that’s 1⁄2″ long for example) is prone to break at the shoulder. Also, the walls of a deep groove may crack. But a tongue and groove for a panel glue-up – just to register and align the faces – requires only a small tongue. All it takes is 1⁄8″.
The joint should be a firm press fit: If you have to knock the pieces together, then struggle to pull them apart, the joint’s too tight. A tongue that’s a hair too fat for the groove may actually seat, but it will stress the groove sidewalls and may, in time, prompt them to split. On the other hand, you don’t want the tongue to rattle in the groove, especially where the joint is intended to register and align the faces during assembly.
You can cut tongue-and-groove joints with a table saw, shaper or router, either hand-held or table-mounted. I’m going to focus on the table saw and the router.
There’s no hard rule on which half of the joint you cut first. I prefer to make the groove first, because I think it’s easier to fit the tongue to it than the other way around.
On the Table Saw
To produce a tongue and groove on the table saw, use a dado cutter rather than your everyday blade (unless your stock is 3⁄8″ or less in thickness). I use the two outside cutters to produce a 1⁄4″ cut width when working 3⁄4″ stock. Thicker stock calls for a wider groove.
A sacrificial facing on the rip fence preserves the dado cutter and the fence, yet allows cut width adjustment using the fence position. More than just a facing, mine straddles the fence; one out-of-the-way clamp immobilizes it.
Set the cutter height next – 1⁄4″ to 3⁄8″ is optimal for a joint that’s to be assembled without glue. If you’re making a glue joint, a shallow 1⁄8″ groove is all that’s needed.
Bring the rip fence into position, endeavoring to position it to center the groove on the working stock. Make a test cut and measure the groove shoulders with dial calipers. Adjust the fence setting to center the cut as close as possible, then center it by making two passes on each board. When you’re content with the samples, cut a groove on each workpiece.

Use a grooved piece to set the fence for the tongue cuts. Align the outermost cutter tooth with the inner wall of the groove. A test cut and some fine-tuning may be required at this stage to fit the joint properly.
To switch to the tongue-forming setup there are no changes in the cutter height. Use a sample groove to position the fence, aligning the outside edge of the cutter with the edge of the sample’s groove as shown below. You will probably need a sacrificial facing on your fence, as shown in the photos.

A rabbet cut into each edge of the board forms the tongue. It’s smart to cut a sample and check its fit before cutting all your work.
Cut a sample tongue and fit it to the groove. Slide the work along the fence, cutting one shoulder, then spin the work around and repeat the cut to form the second shoulder, as shown below. Adjust the fence position as necessary to get a good fit.
With a Router
Using a router gives you more options in terms of the approach and the cutters. You can do the work on the router table or you can move a portable router across planted boards.
If you’re going to use the former approach, you can cut tongue-and-groove joints with a straight bit, a slot cutter or a dedicated tongue-and-groove cutter assembly or set. If you want to use a portable router, then I’d recommend using the slot cutter.
When you’re using a straight bit, repositioning the fence for cutting tongues can be an optical challenge. Sight across the bit to the grooved sample to make an initial setting. Cut a sample tongue, and adjust the fence position if necessary based on a test fitting.
Using a straight bit: On the plus side, you use a commonplace bit that has a multiplicity of applications. On the negative side, you may, depending on the hardness of your stock, need to make more than one pass per cut to reach the full depth. That can trigger work sequence woes, especially on a job with lots of pieces. Specifically, you have to make a pass on each workpiece, adjust the cut depth, then make a second pass on each piece.
Using a straight bit to cut a tongue-and-groove joint in a portable router requires balancing the tool on narrow edges, a tough assignment. Cutting the joint on the router table with a straight bit mimics using a dado cutter on the table saw.
The cut controls are these: The bit’s extension above the tabletop governs the tongue length/groove depth. Fence position controls lateral placement of the cut. You cut both elements with the work on edge, with the face tight against the fence.
Two passes form the tongue. Note that the cut is on the fence side of the work. In addition, the table is set up to prevent stalled cuts. While not zero-clearance, the opening in the tabletop is minimized and the fence facing is seamless.
The setup sequence and cutting routine also mimic those of the table saw approach:
• Install the bit and set its extension.
• Position the fence for the grooves. With one end of the fence secured, swing the free end to align the centerline on a sample workpiece with the bit’s center. Auxiliary coverings on the fence and tabletop downsize or eliminate the bit opening to forestall workpiece hangups.
• Rout the grooves, centering them most easily by making two passes.
• Reposition the fence for the tongues.
• Rout the tongues by making two passes on each workpiece.
Using a slot cutter: An alternative, one that works equally well in table-mounted and portable routers, is the slot cutter. On the positive side, it will cut a full-depth groove easily. It’s a good choice for thin stock, because a variety of slot widths less than 1⁄4″ are available. However, there aren’t single cutters available in widths greater than 1⁄4″. To produce a wider-than-1⁄4″ groove requires an assembly with two or more cutters on its arbor.
The tongue-and-groove joint requires preciseness of fit rather than preciseness of dimension. As with other setups, I eyeball the slot cutter elevation in relation to a centerline marked on a work sample. The groove is centered using the two-pass work sequence, and the exact groove width is only marginally relevant.
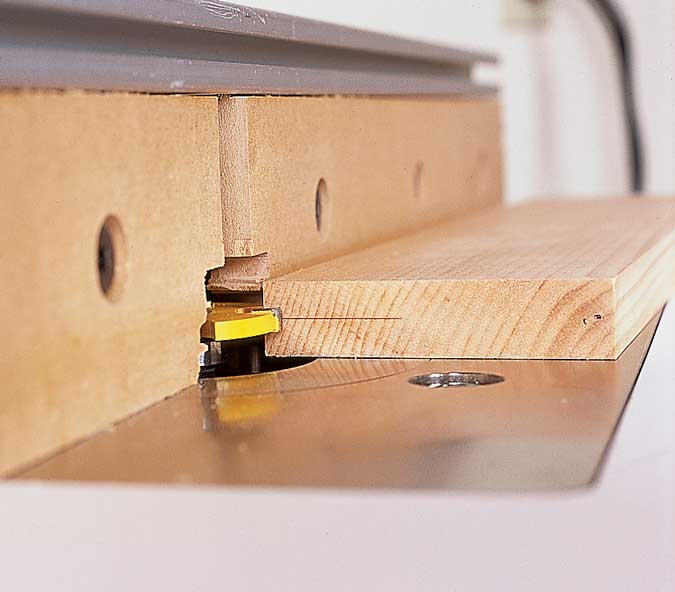
When cutting with the slotter, the tongue length/groove depth is controlled by the pilot bearing or the fence, while the position of the cuts on the edge of the work is controlled by the bit-extension adjustment. All the cuts are made with the work flat on the tabletop or the router on the face of the board.
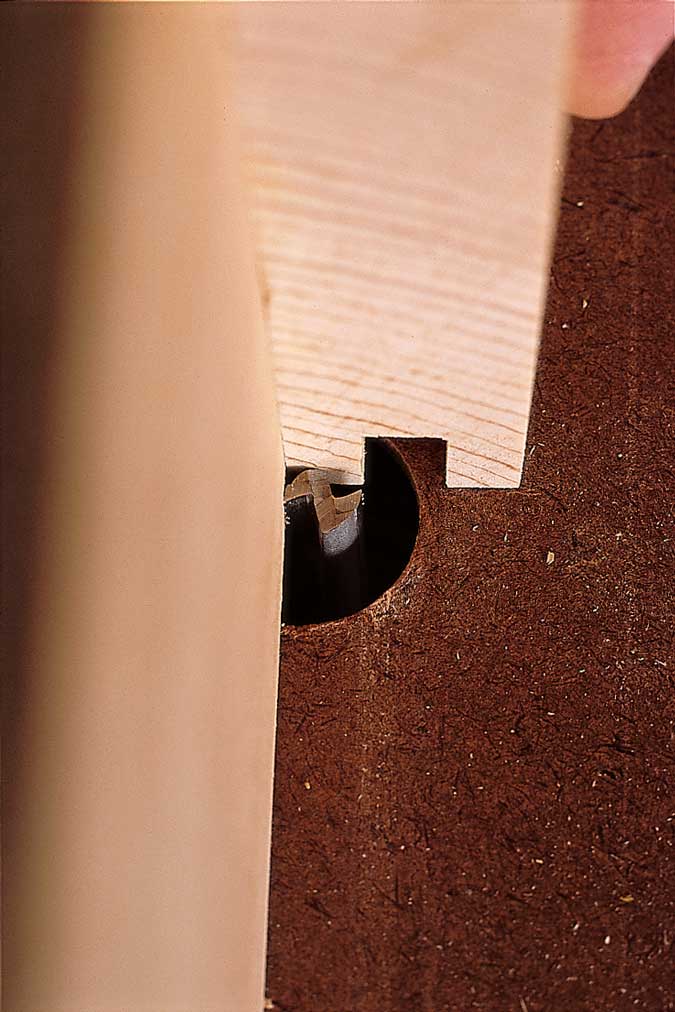
Start by cutting the groove. Rest the stock flat on the tabletop by the cutter, and raise or lower the cutter until its tip is centered on the stock’s edge. Adjust the fence for the desired depth of cut. Feed the stock across the tabletop, its edge tight against the fence, to make the cut.
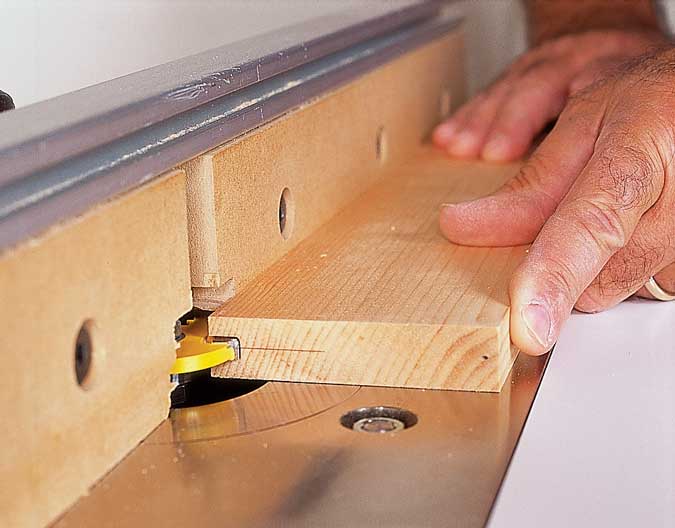
With a slot cutter, the work rests flat on the tabletop throughout the cut. Center the cut accurately in the usual way: Make passes referencing both faces. The second pass will probably widen the groove slightly, but it will ensure it is centered.
As with the straight bit, you can use a two-pass approach to center the groove. Make one pass with the face against the tabletop, the second with the back against the tabletop. The groove will be slightly wider than 1⁄4″, most likely, but it’ll be centered. Then fit the tongue to that groove.
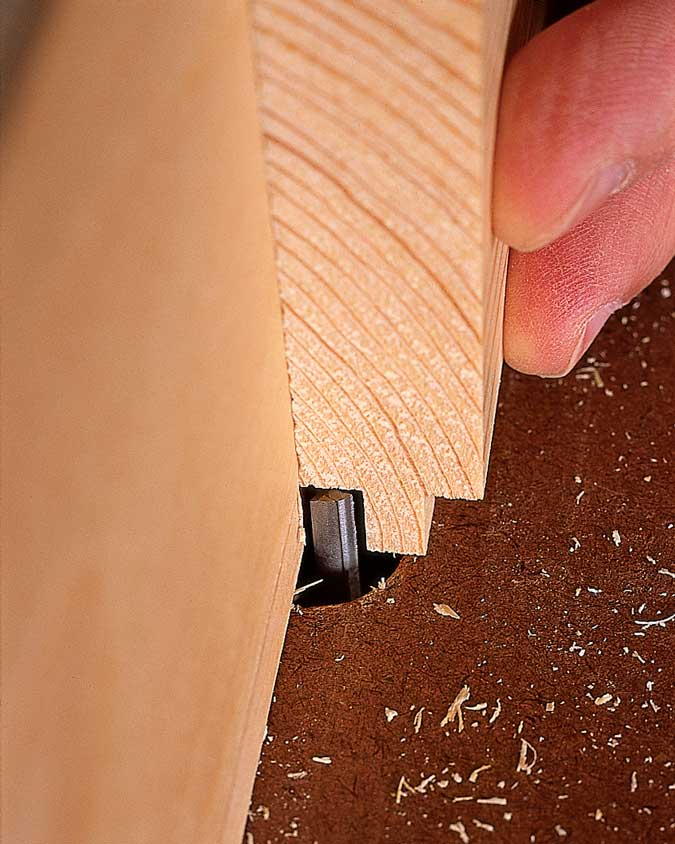
When you switch the setup for cutting the tongues, leave the fence setting alone. Lay your grooved sample beside the bit and lower it until the cutting tip aligns with the groove wall that’s closest to the tabletop. (You don’t want to trap the work.) Cut a test tongue and adjust the setup as necessary to fit the tongue to the grooves.

Always make the tongue-forming cuts with the cutter lowered to the table, rather than trapping the work between it and the table. As with the other tool setups, you use a grooved sample piece for the initial setting. (This router table has a topside adjuster.)
Dedicated tongue-and-groove cutters: Most bit manufacturers sell individual bits or sets of bits designed specifically for cutting tongue-and-groove joints. Most give you two separate bits, one for cutting the grooves, the other for the tongue. The benefits are:
• You shouldn’t have to “fit” the tongue to the groove. Out of the box, the cutters will produce the optimally fitted joint. Provided the bits have sufficient capacity to work stock more than 3⁄4″ thick, and provided you mark a reference – and mind the marks as you work – having the groove and tongue off-center shouldn’t be a problem.
• Set up two tables, one for each bit, and you can mill stock in production mode.
But unless you do a lot of tongue-and-groove joinery these dedicated cutters aren’t a worthwhile investment in my opinion. PWM
Editor’s note: For more expert joinery instruction, read “Bill Hylton’s Power-Tool Joinery.”
Here are some supplies and tools we find essential in our everyday work around the shop. We may receive a commission from sales referred by our links; however, we have carefully selected these products for their usefulness and quality.