Introduction to the Windows 8 Start Screen
Lawrence Abrams
- October 18, 2012
- Read 126,183 times
Table of Contents
- Introduction to the Windows 8 Start screen
- Windows Apps and the Microsoft Store
- Your settings travel with you
- Using the Start Screen
- Charms Bar
- The Start Screen Start Menu
- Further Reading
- Conclusion
Introduction to the Windows 8 Start screen
Windows 8 comes with a new user interface called the Windows Start Screen that is the first thing you see when you login to Windows 8. This is the main interface that Windows 8 user's use to launch applications, search for files, and browse the web. This Start screen contain tiles that represent different programs that you can launch by clicking on the title. One of the features of this new interface is that the tiles themselves are able to show you real-time information directly on the Start screen. This will allow you to use the Start screen not only as a way to start an application, but also as a way to quickly see data such as the weather, e-mail information, new RSS feed articles, etc. For example, the weather tile will not only allow you to launch the main Weather application, but will also display your actual weather conditions directly on the Windows 8 Start screen. This type of real-time information can be seen in the image of the Windows 8 Start Screen that is shown below.
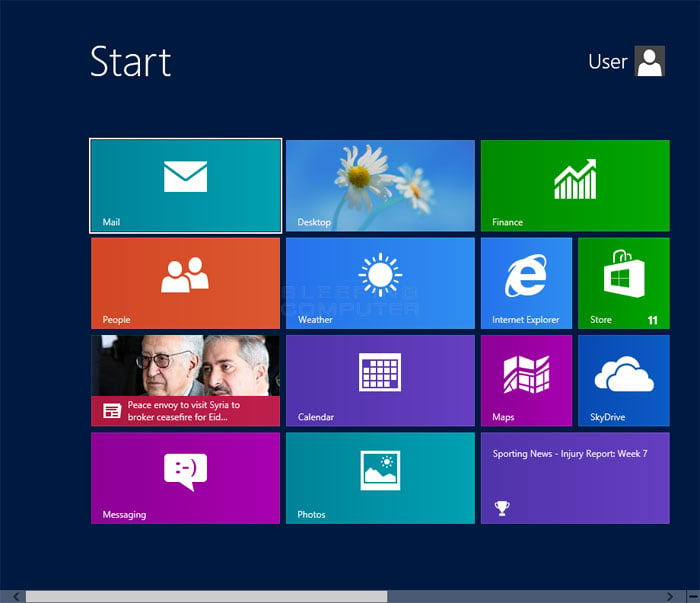
Programs that are designed for the Start Screen interface are called Apps . These Apps are designed to work with the Start Screen so that you can share information with other Apps , synchronize them with other computers, and easily be deployed via the Windows Store.
Windows Apps and the Microsoft Store
With the release of Windows 8, Microsoft also introduced a new Windows Store. The Windows Store allows you to download and purchase apps that are designed to operate in the Start Screen. Similar to the iTunes Store, you are able to login to the Windows Store and download free Apps and trials that you can run on your computer. If you decide to purchase an app, then it will be automatically downloaded and installed on your computer and you will be able to use it on 4 other Windows 8 computers as well.
When you create an account in Windows 8 you will have the option to make your account a local account or a Microsoft account. If you choose to create a local account, then this account will only be able to logon to your local computer and your information will not be synchronized with other computers you may use. On the other hand, if you choose to create a Microsoft account then Windows 8 will synchronize certain data, such as app settings, profile pictures, and passwords to the Microsoft Cloud. This data will then be synchronized to other computers that you use with the same Microsoft account allowing a desktop experience that travels with you from computer to computer.
In order to use this feature you will need to have the same Microsoft account on every computer you use. You will then need to enable synchronization through the Sync PC settings settings area. Once synchronization is enabled you can then fine tune what you want synchronized between the various computers.
It is important to note that you do not need to use a @live.com or @hotmail.com e-mail address in order to use this feature. All you need is an e-mail address that you control and that has been registered as a Microsoft account at Live.com.
Using the Windows Start screen
The Start Screen is a very simple interface to navigate. When you first install Windows 8, your start screen will be comprised of various Apps designed for the Start Screen as well as programs that you can launch from the classic Windows desktop. Each of these programs or Apps are represented as a tile. These tiles can be configured to display as a small square or a rectangle. If the title is set to be the square, then it will just act as a program launcher when you click it. If you make the tile into the rectangle, though, then this tile will display real-time information, if available, from the application directly onto the start screen.
The Start screen also has numerous pages, where each page contain different tiles. Therefore if you run out of room on one page, then you can simply start adding tiles to other pages. To organize your tiles based on how often you use them, or by a particular category, you can move the tiles between groups or pages and even create brand new groups of tiles. Information on how to do this can be found in the further reading section of this tutorial.
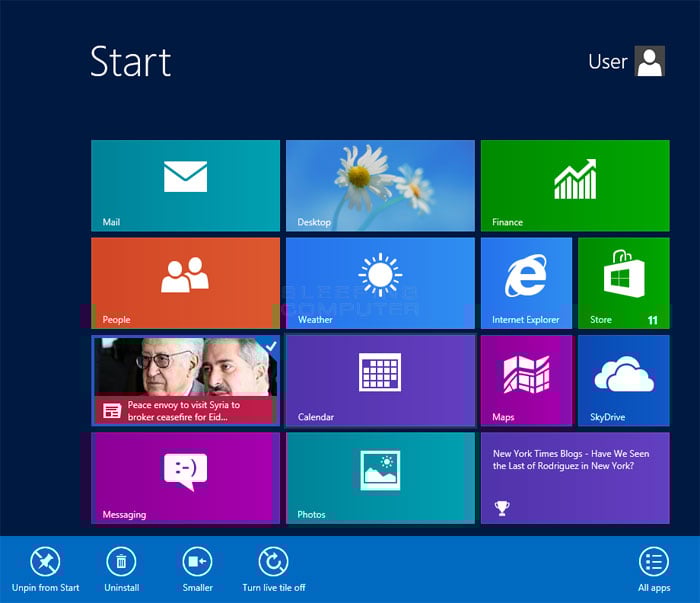
To configure the characteristics of a particular tile, you can hold down a particular tile with your finger or right-click on it with your mouse. Once you do that, the tile will become checked and a new panel will be displayed at the bottom of the Start screen where you can change various characteristics. These characteristics include pinning or unpinning the tile, the size of the tile, and various advanced characteristics such as running the program as an Administrator. An example of this panel can be seen below.
It is also possible to redirect the output of any App you are using to a connected projector by pressing the Windows key and the P key at the same time. When you do this , a new screen will be displayed asking how you would like the screen to be displayed on the projector.
Finally, when using a particular App you can also modify its settings from within the application by pressing the Windows key and the I key at the same time or by using the Start Menu that is described below. More information about the Start Menu and App settings can be found in the next section.
The Windows 8 Charms Bar is a small menu that appears when you hover your mouse over the bottom right corner or the upper right of the screen or by pressing the Windows and C key at the same time. This menu contains five options labeled Search, Share, Start, Devices, and Settings. An example of the Charms Bar can be seen in the image below.
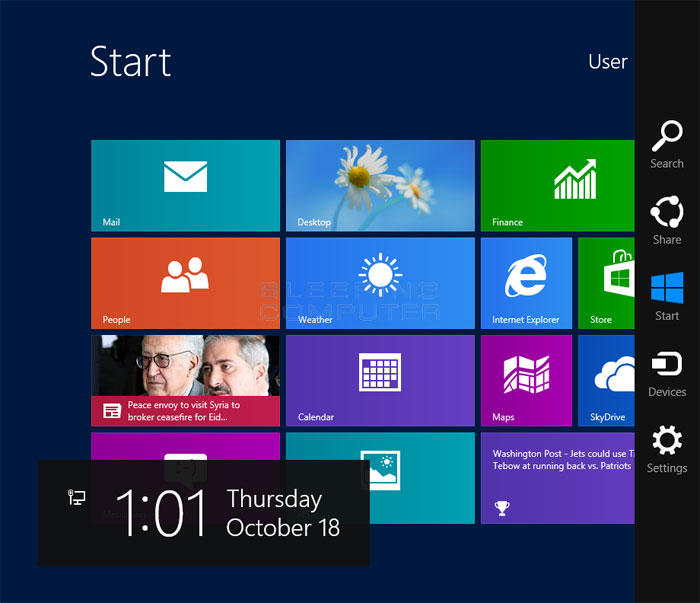
Below are descriptions of what each menu option performs in the Start Screen.
Clicking on the search option displays the search interface. From here you can type in a keyword and Windows 8 will search through your Apps , files, and Settings for items that match the keyword. You can then select the Apps , Files, or Settings categories to see what was found for each of them.
Clicking on the share option allows you to share the data from the various Apps with another App, program, or service. For example, when in the Weather app you can share a screen shot with others and in Internet Explorer you can share that page as a tweet in Twitter or a wall post in Facebook.
Clicking on the start option simply bring you to the classic Windows desktop.
Clicking on the devices option allows you to specify what devices you would like to play the App to. This would allow you to specify a device that a particular Apps will display its content on.
Clicking on the settings option allows you to configure the settings for any App that you are currently using. When using an App you can also access this Settings screen by pressing the Windows key and the I key at the same time. Once in the settings screen you modify various options for the App as well as change the volume, shutdown or restart the computer, change your language, enable notifications, and monitor network connections.
Though Windows 8 no longer has a Start Menu as we have known in the past, Windows does include a basic Start Menu that can be used to quick launch commonly used programs. To access this Start Menu, you should hover your mouse over the lower left hand corner of the desktop or Start Screen and then right-click on your mouse. This will open up the Start Menu as shown below:
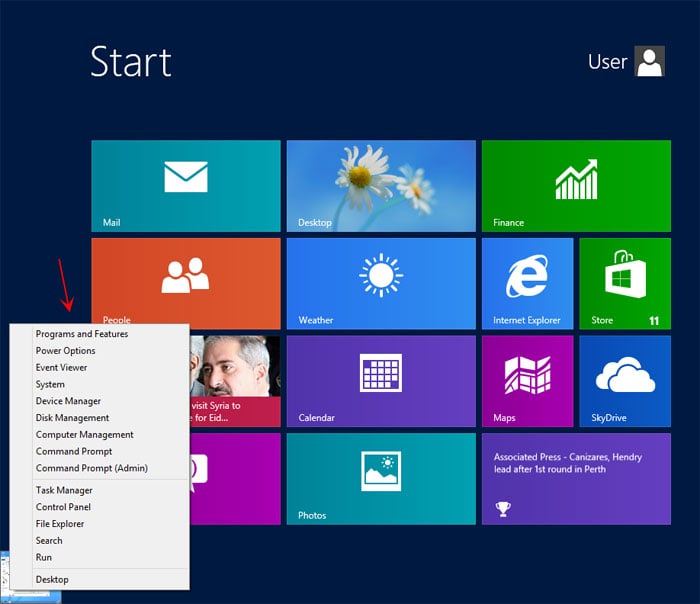
From the Start Menu you have quick access to various tasks and programs on your computer.
Below are other tutorials that discuss how to use the Windows 8 Start Screen as well as manipulate Apps:
- How to uninstall a Windows App in Windows 8
- Adding and removing Apps and programs from the Windows 8 Start Screen
- How to resize, move, and create new App tile groups in Windows 8
- How to name a group of tiles on the Windows 8 Start Screen
As you can see the Windows Start Screen was designed to be fully customized by the user so that they can use it in a way that is best for them. By arranging the tiles and deciding what tiles you wish to display real-time information on, you can effectively manage your screen space without losing access its benefits. If you have questions regarding this new interface or just want to chat with others about Windows 8, please feel free to post in our Windows 8 Forum.