


The part you need is the Green coolant temperature sensor. This is known as the G62 and they cost about $42 at the dealer where i got mine.

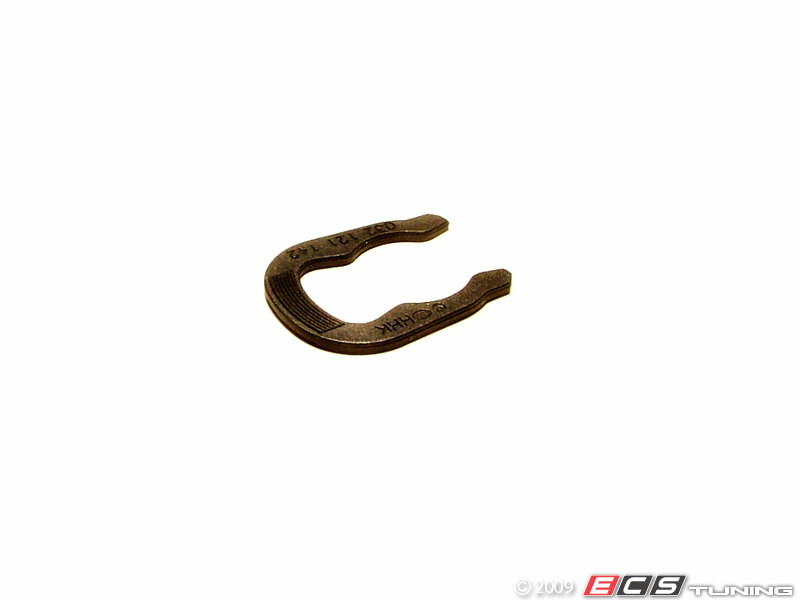
You also may need the clip that holds the sensor in. its not necessary but i just replaced it. the parts guy at my Audi dealer said that sometimes they get brittle over time and it is best to just replace it. I paid $1.20 at my dealer but ECS has it for .56
Tools you need: (note: these awesome tools are not mine, they are my friends tools)
3/8" Ratchet with a swivel head
5mm Allen head socket
10mm Socket
Philips screw driver
Pick to remove the old O-Ring
Clamp removal tool for clamps on intake hoses. (you can use vise-grips)

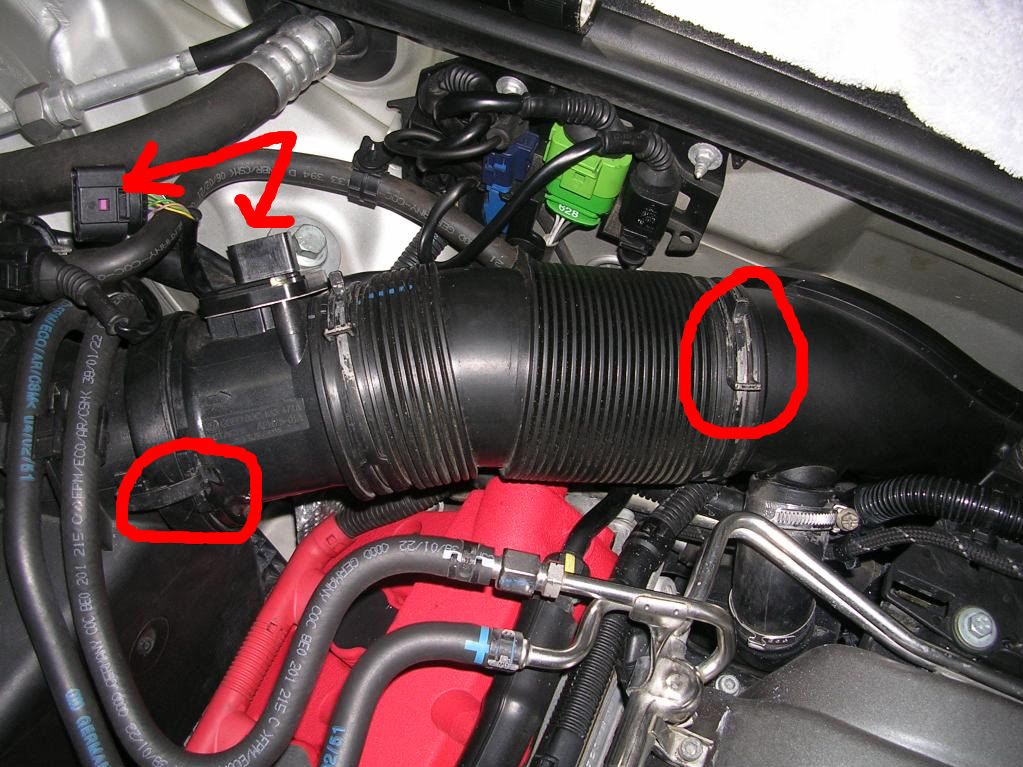
First, unplug the MAF sensor that the red arrows are pointing to. Once you do that, you need to un-clip the MAF sensor from the air box. There is one clip that is circled, the other on is on the opposite side. Then remove the big clamp circled on the right and just slide it onto the accordion hose.

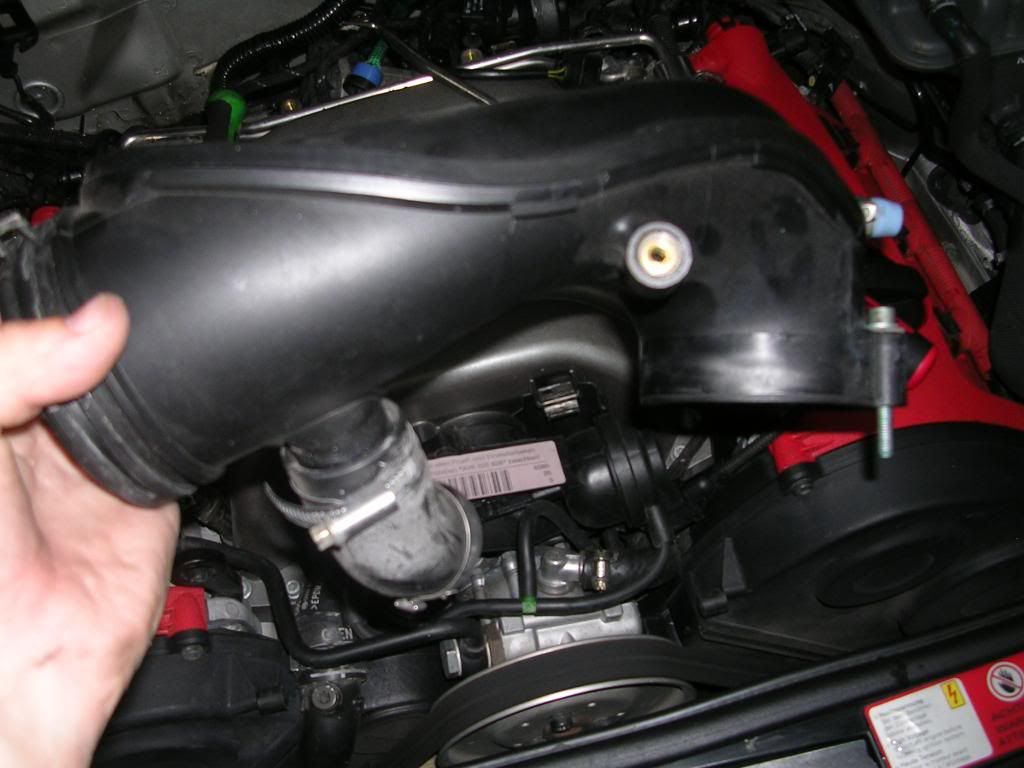
Now pull the whole assembly off and set it somewhere where you wont step on it.
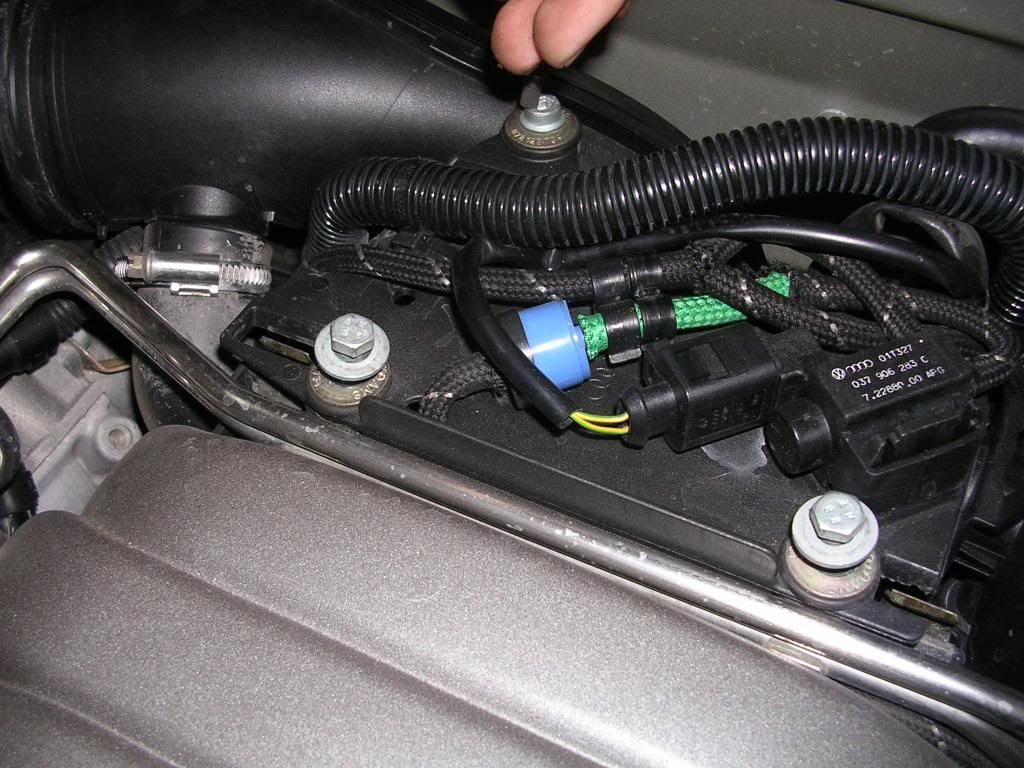
Now you need to tackle this mess.

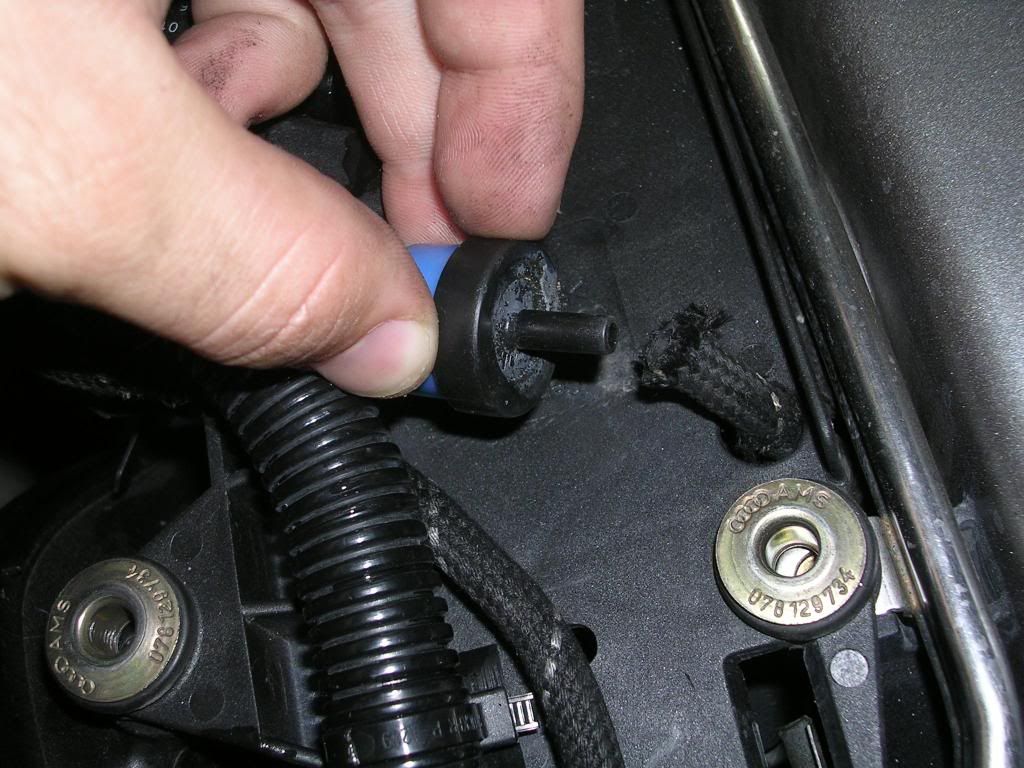
First unplug this little guy. You should use a flathead and sort of work the hose off of its fitting. don't try to pull it. doing that will only make the hose tighter and you might rip it or break the check valve.
Then unplug this thing, whatever it is
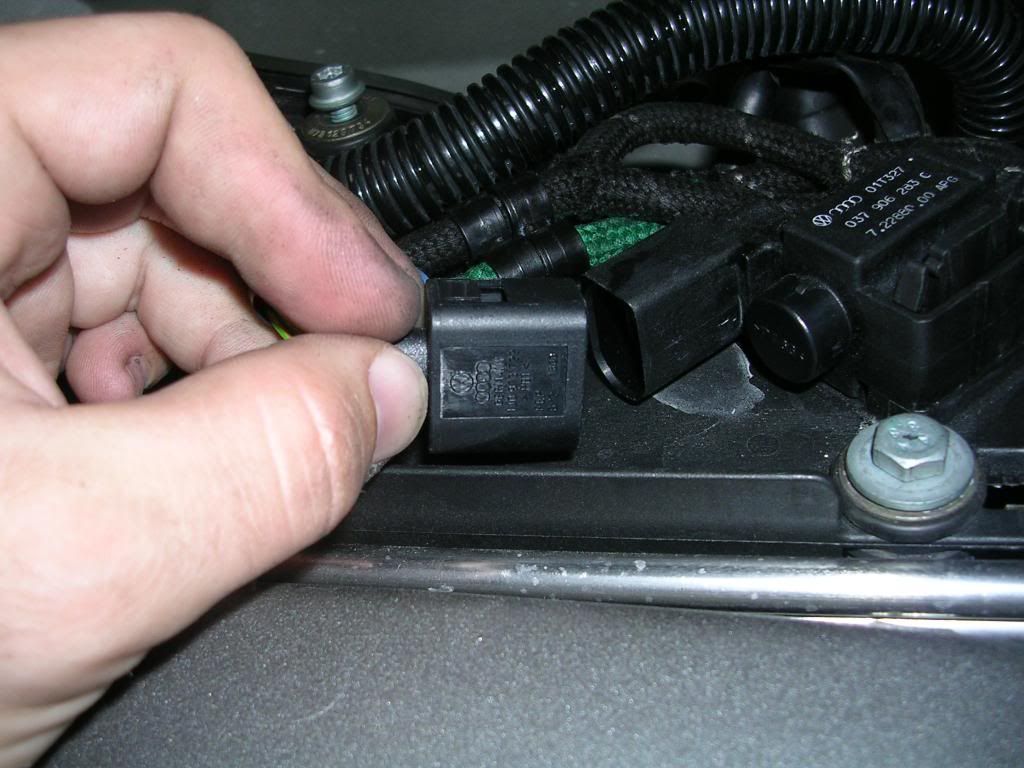
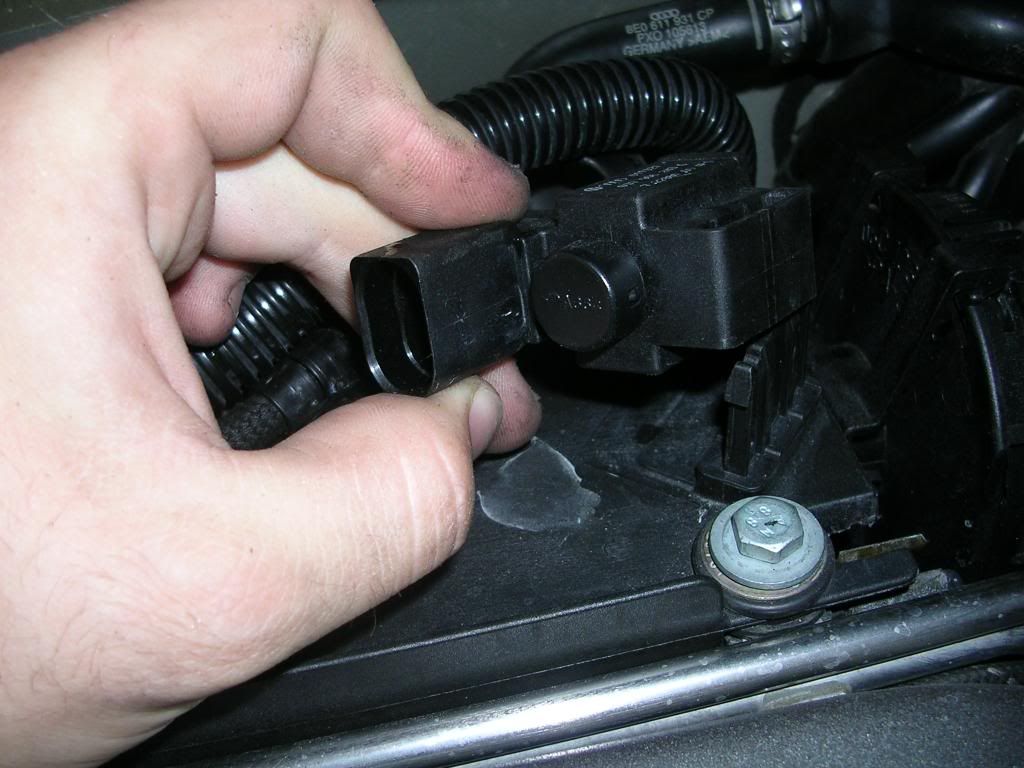
The remove the thing you just unplugged. it comes off the same way a buckle does.
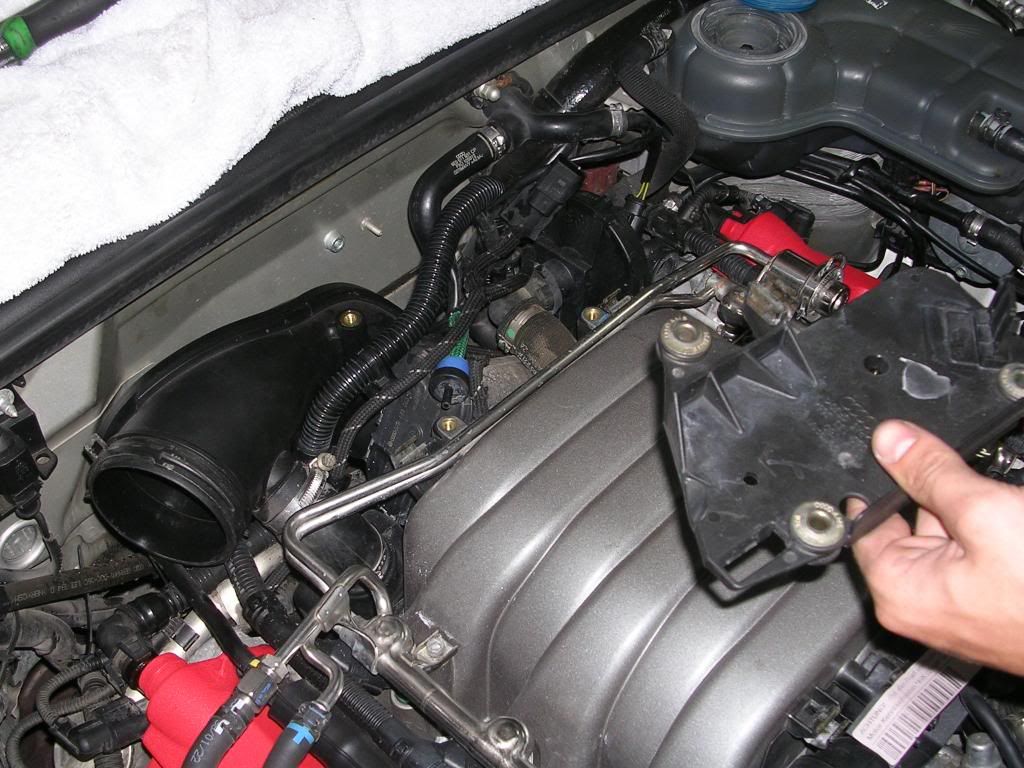
Now remove the bolts holding on the plate. the allen by the fire wall is a 5mm, and the two bolts in front are 10mm sockets. Then you will be able to wiggle the plate out of there. I did it by sliding it to the passenger side.
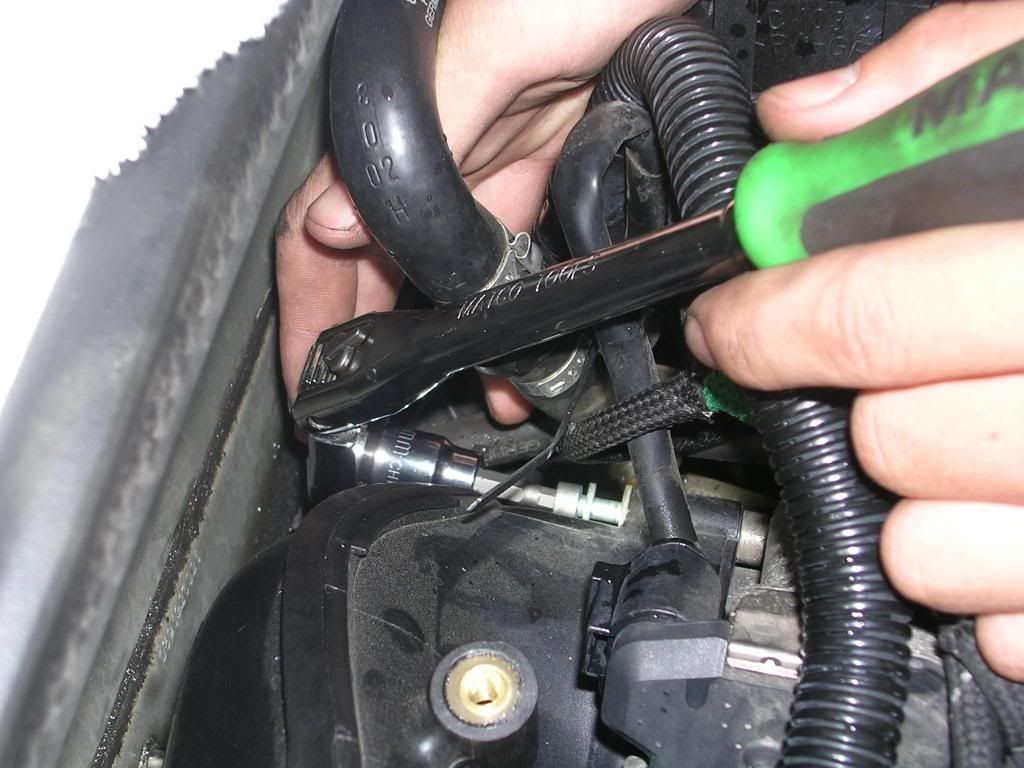
use a Philips and remove the clamp holding on the hose seen below
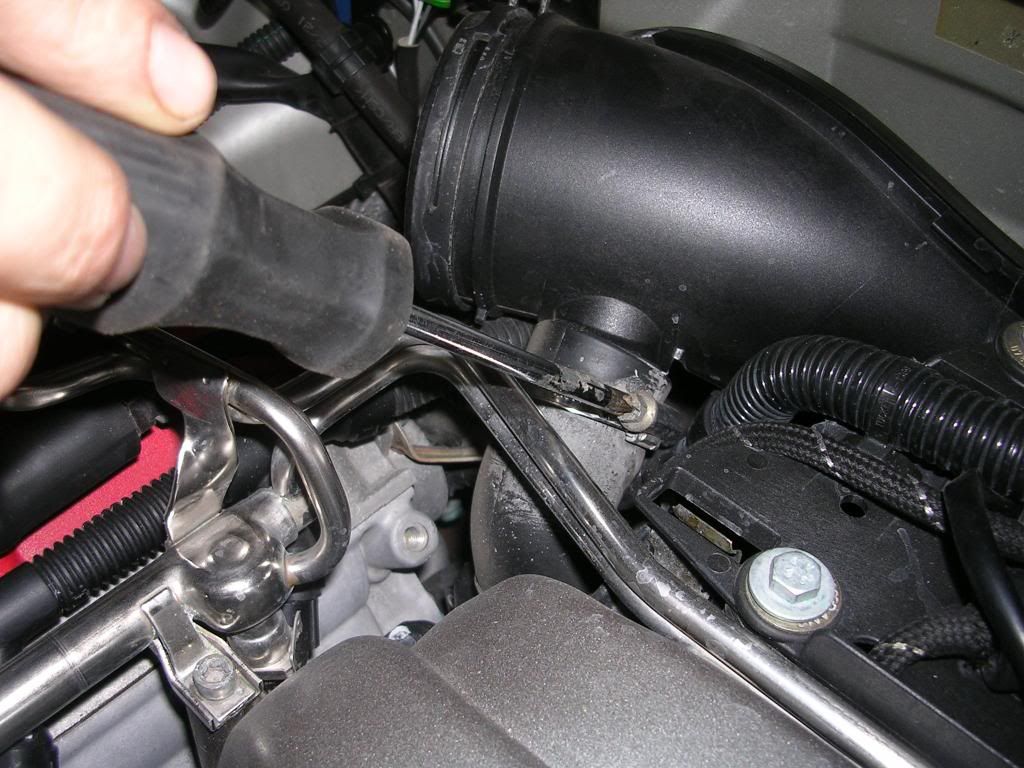
There is one bolt holding on the tube leading into the throttle body. Use a 5mm allen head socket and a ratchet with a swivel head. you may be able to do this with a standard ratchet, but the swivel head is pretty much necessary. Its a very long bolt!!!!!
this should give you a better idea of where the bolt is
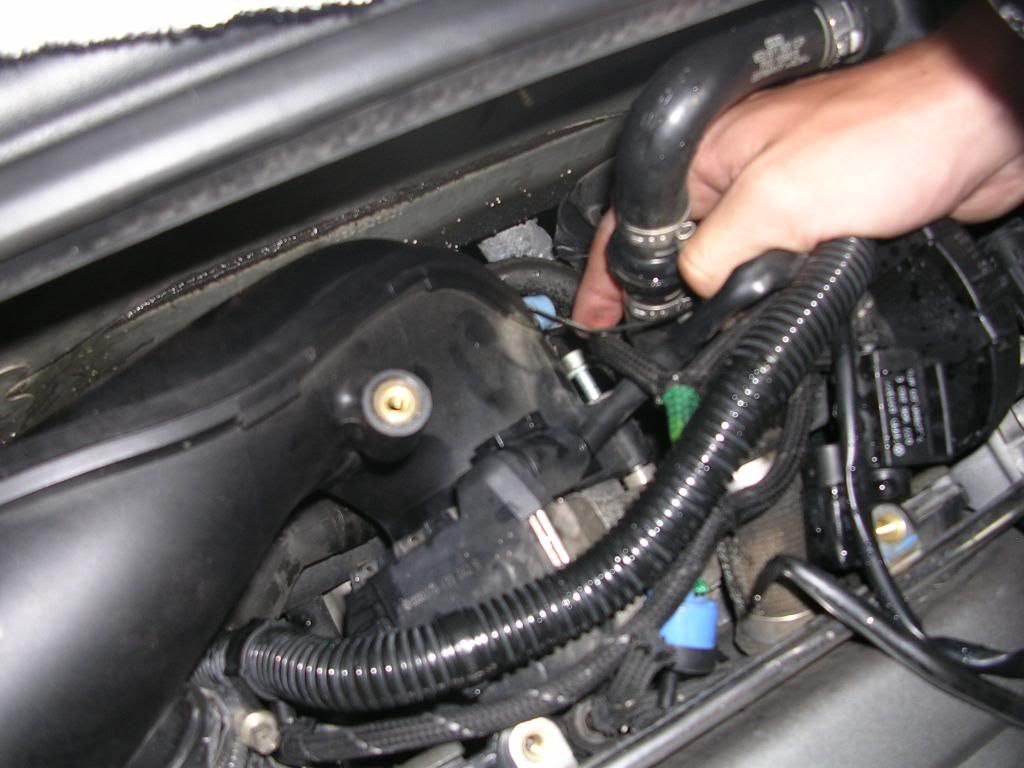
Now you should be able to pull the intake tube towards the firewall, then it should come right out
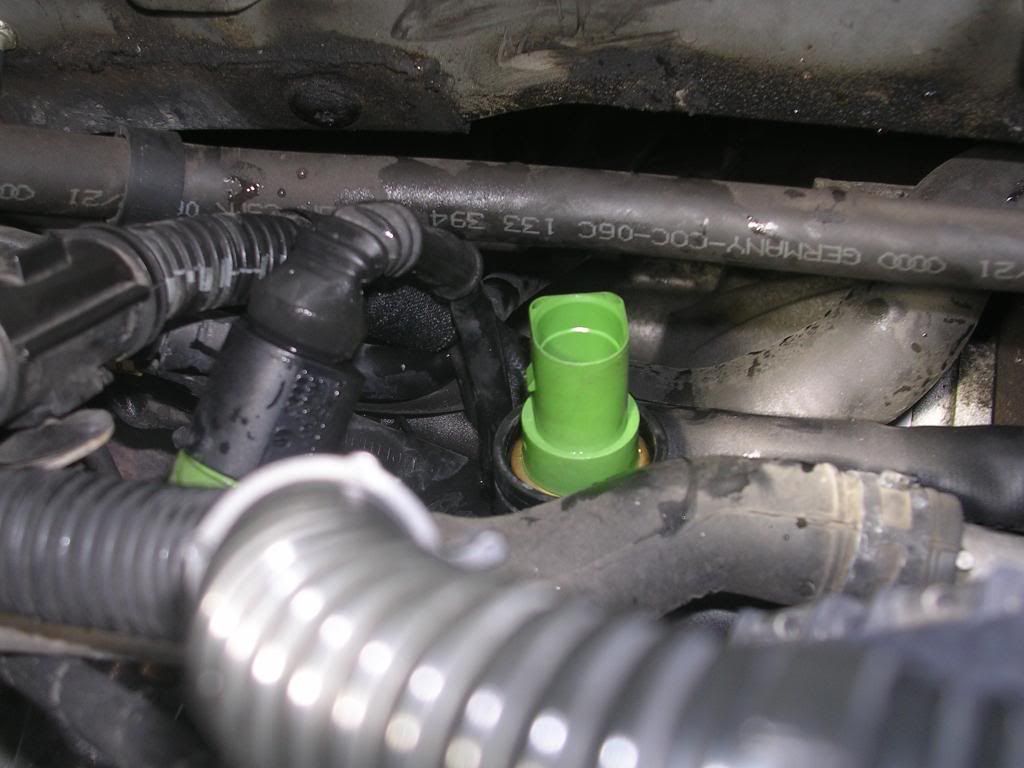
the sensor is located on the passenger side, pretty much right by the passenger side head. You will see it. its green so it's hard to miss
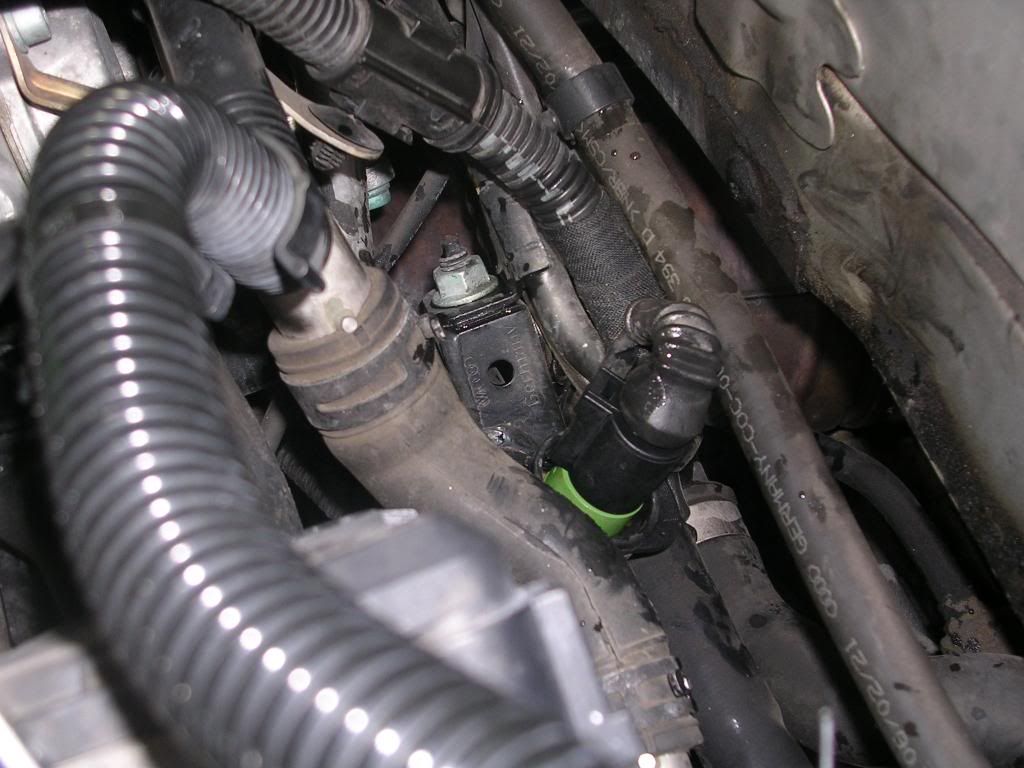
Unplug the harness on the sensor (i did not do this until later, bad idea) and then pull out the clip on the back side of it that holds it in. i wa sable to do it with my fingers.
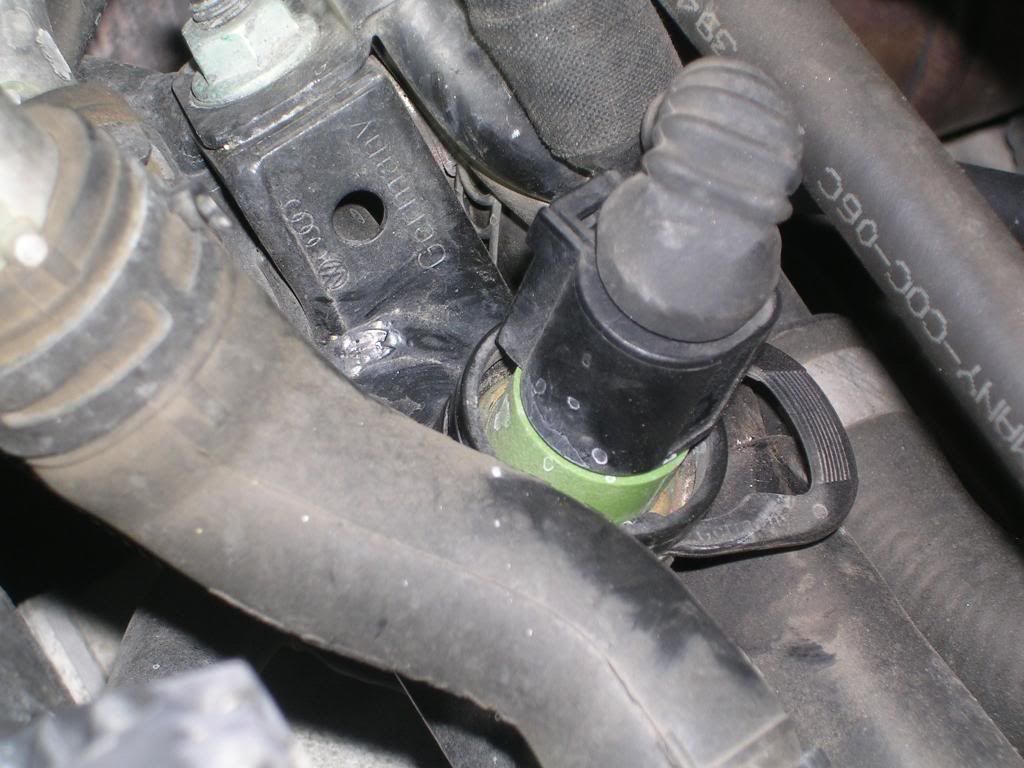
now pull the sensor out. i forgot if you have to turn it or not. be prepared for about 2 quarts of coolant to spill out.
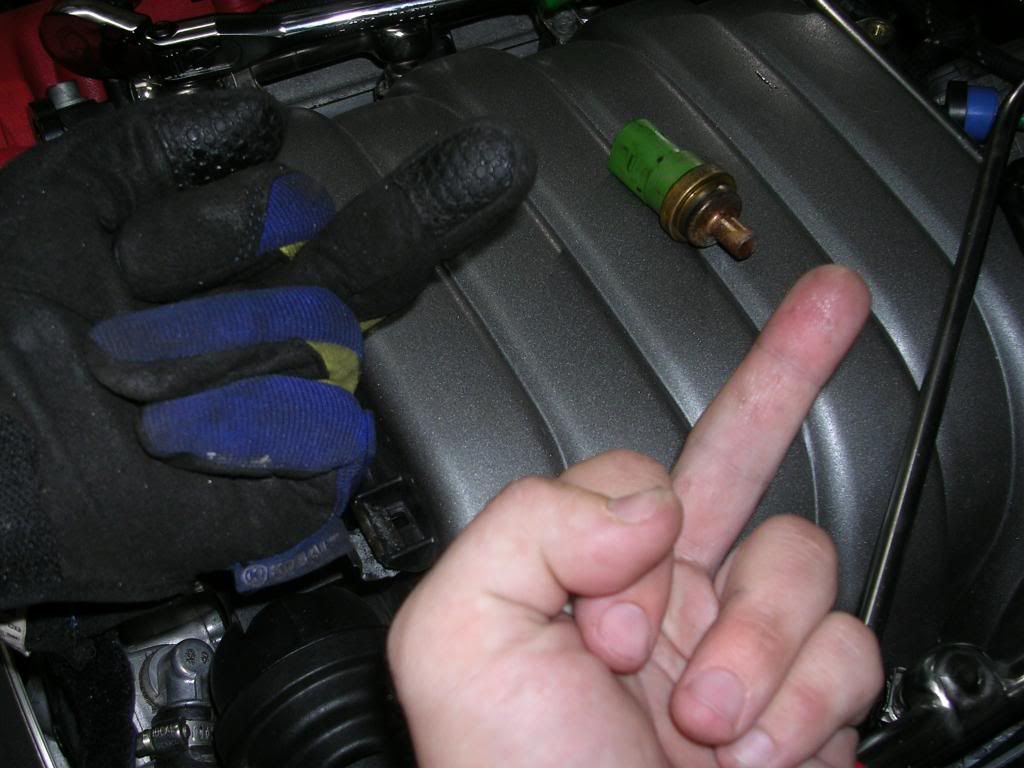
Use the pick tool to remove the old o-ring. chances are, it wont come off with the old sensor
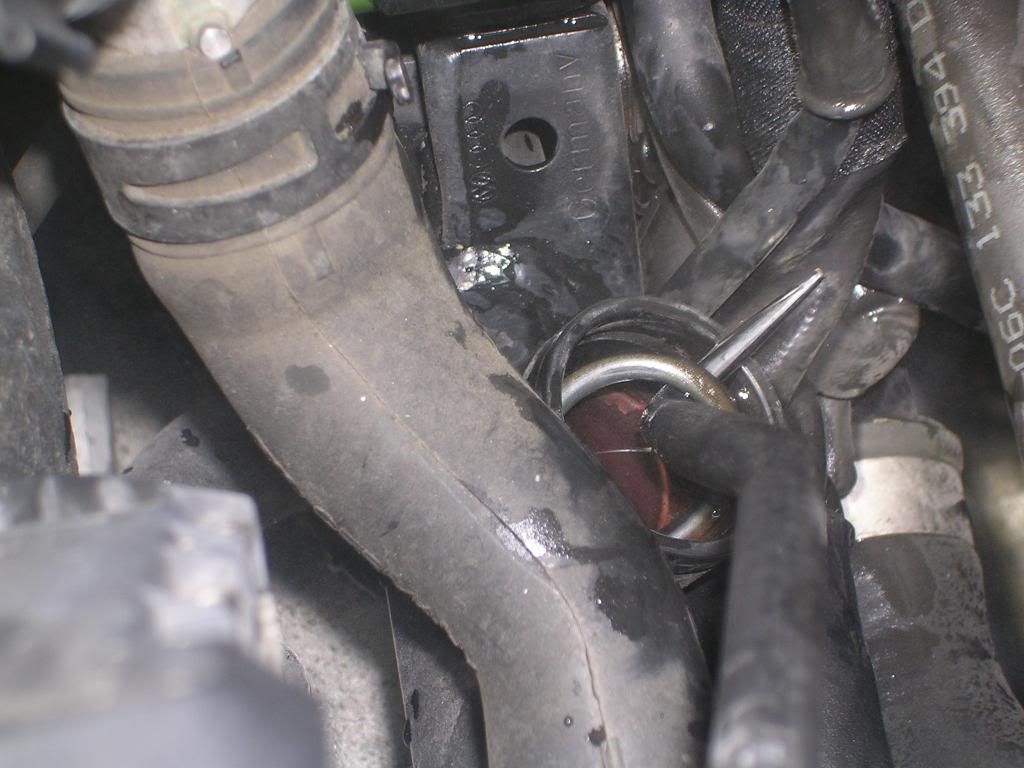
now put the new sensor in, this picture sort of shows the orientation; the flat side is facing the fire wall
now slide the new clip in to hold it in place and put the harness on the new one. get your garden hose and give the area a good rinse to get rid of the spilled coolant
Now go backwards int he DIY and install everything in reverse order.
Fill up the coolant resivour and leave the lid open!!
Start the car and set the climate control to HI. the blower does not need to be done. we are just doing this to get any air out of the heater core. hold the rpm's at about 2500 for a few minutes and watch for any bubbles in the resivour. when you see bubbles, you are purging air out of the system. when the bubbles go away, let the car idle for a few minutes. then, just to be sure, rev the engine a few times to get rid of any air pockets. I let the car idle for 10 minutes with the cap open while i was cleaning up. then i took it on a short test drive.

 Reply With Quote


Bookmarks