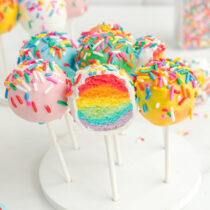
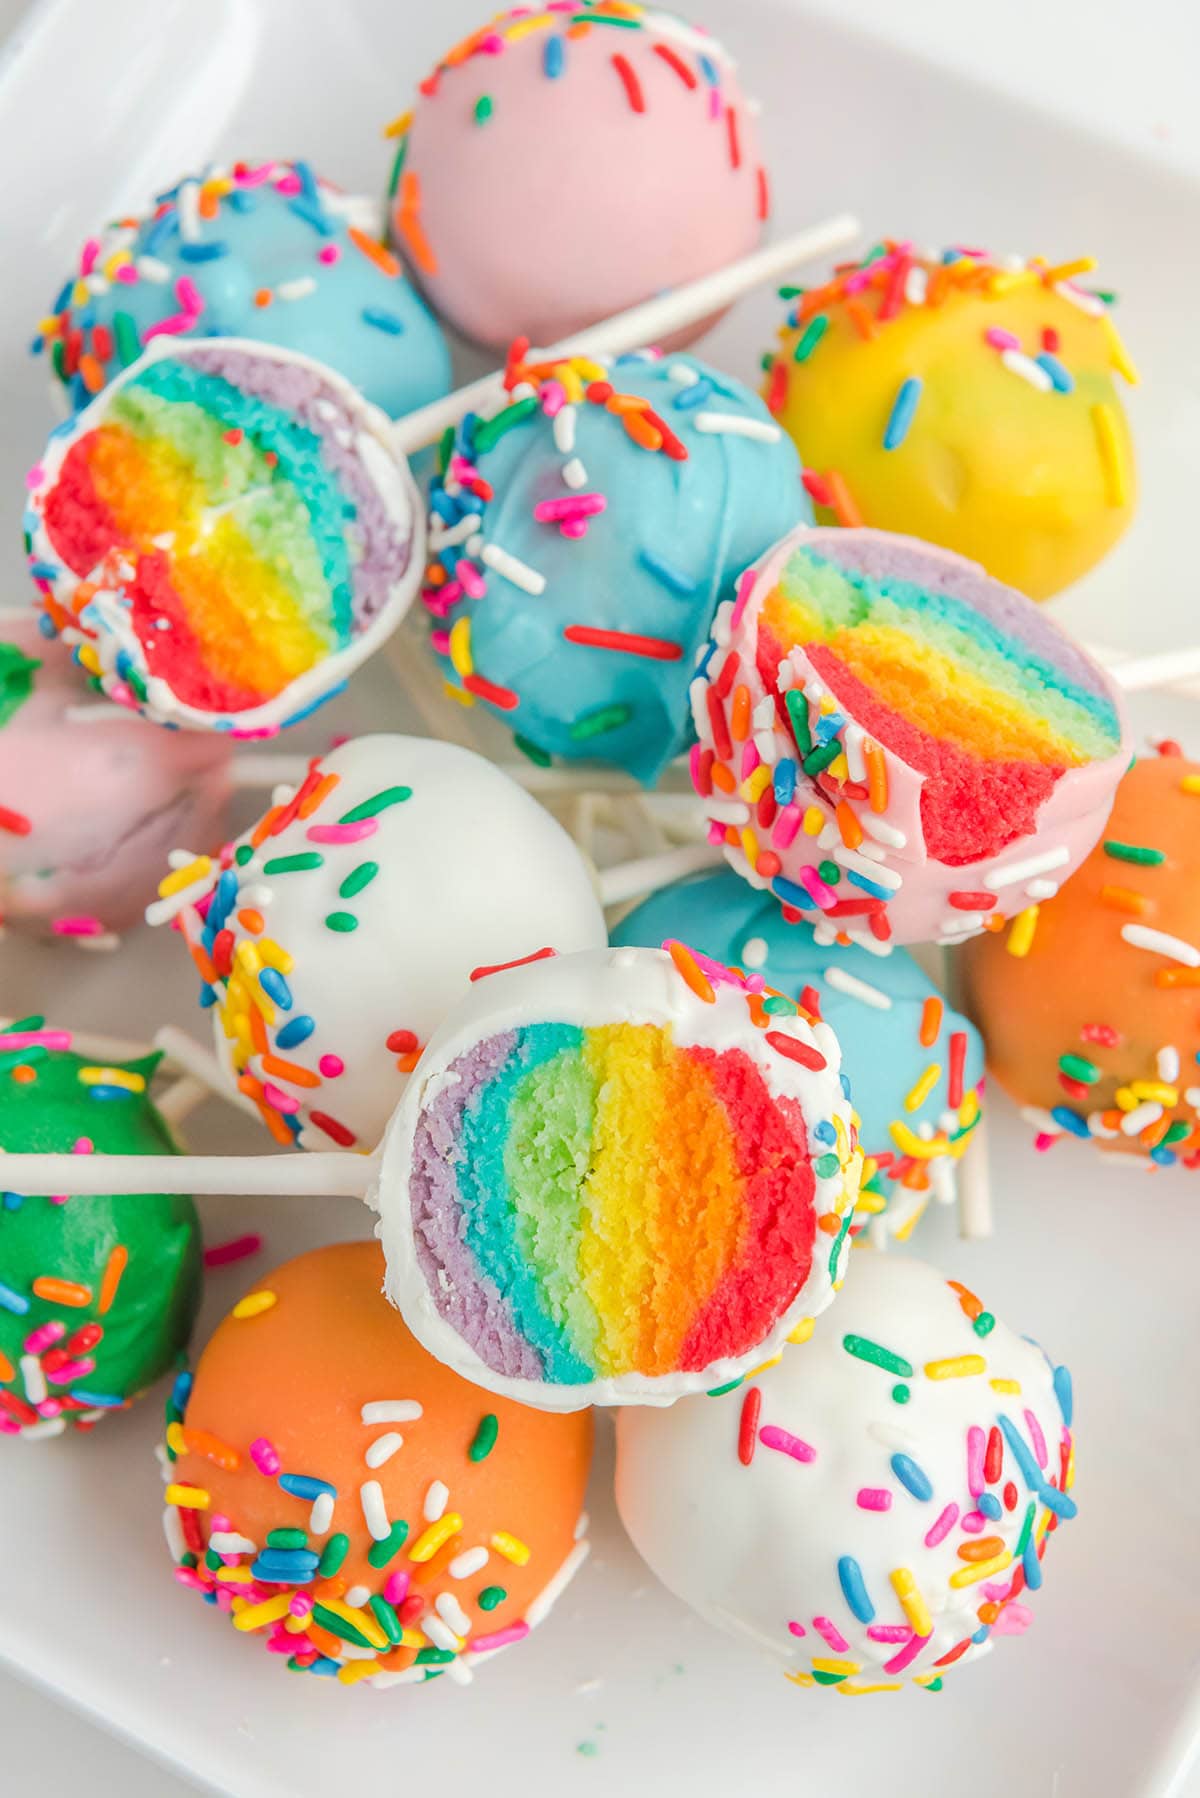
Make Rainbow Cake Pops, where each bite reveals moist and flavorful cake layers in a variety of vibrant colors, all covered in a sweet candy coating. Easy to prepare and perfect for any occasion.
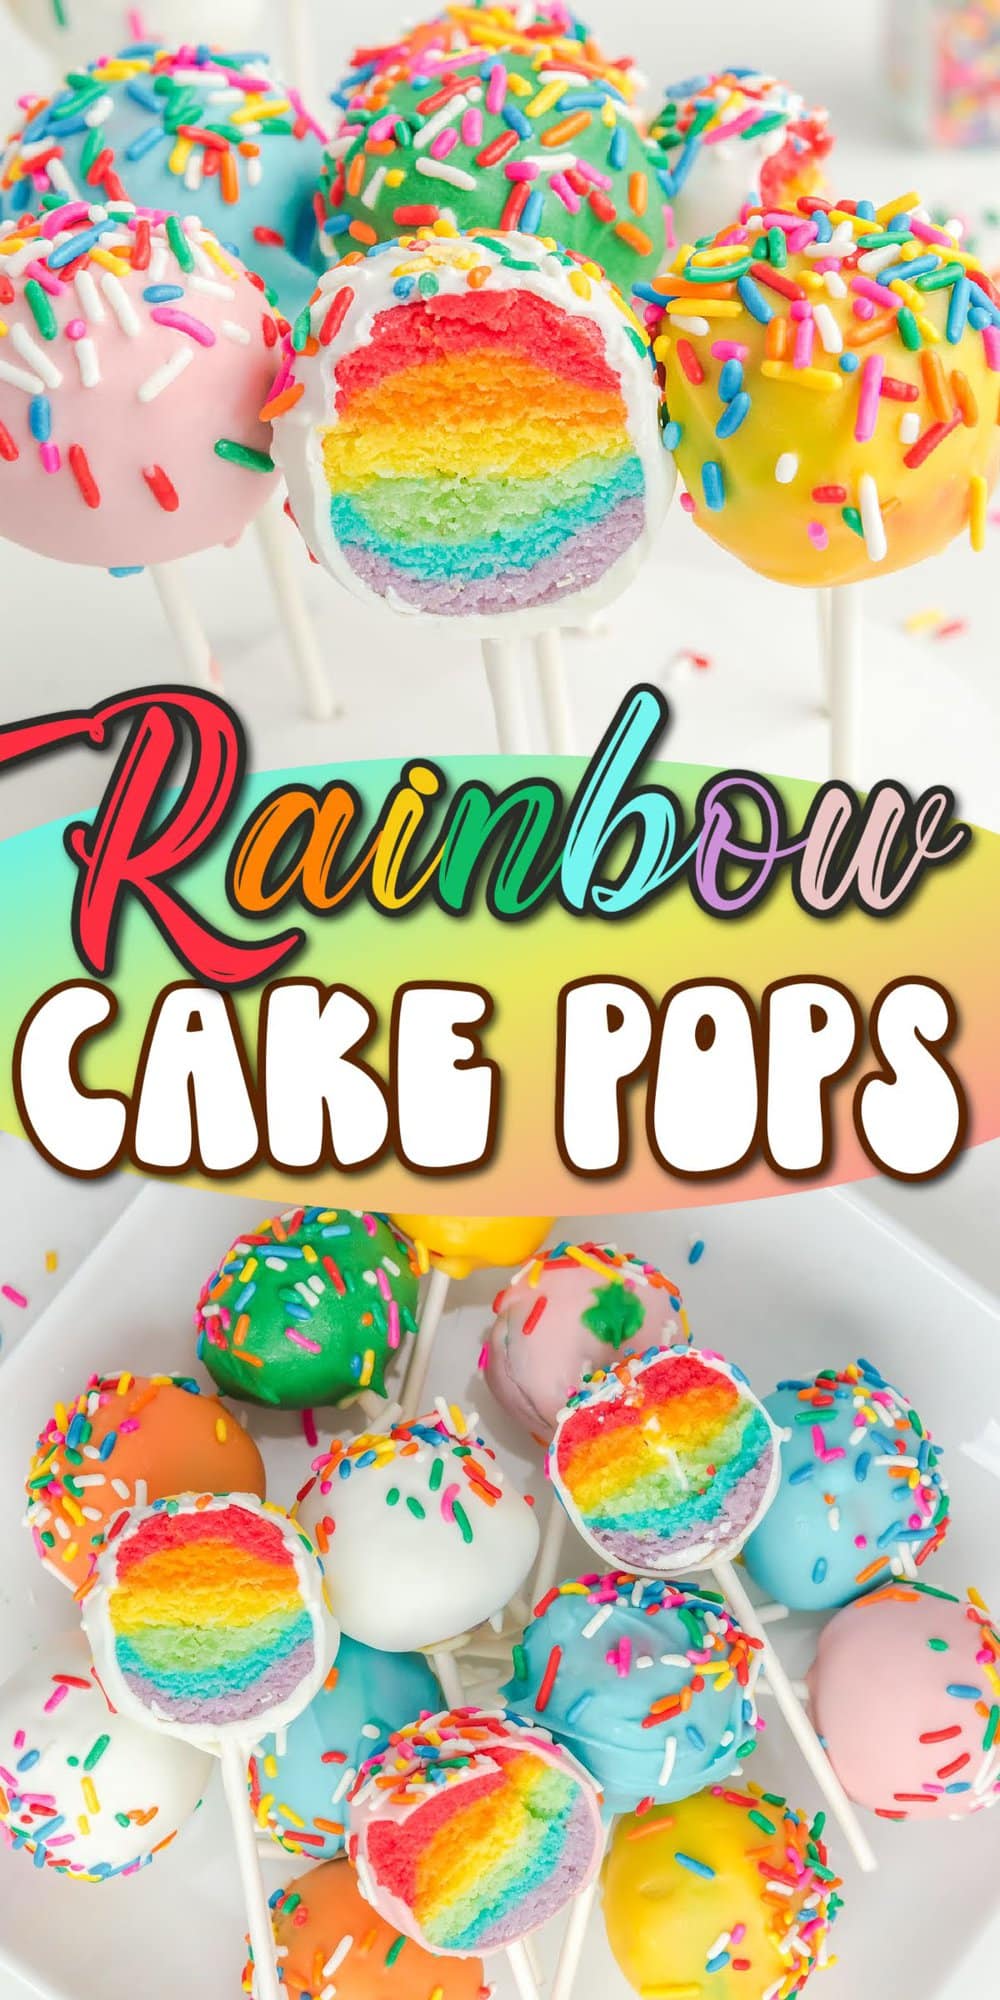
Surprise Rainbow Cake Pops
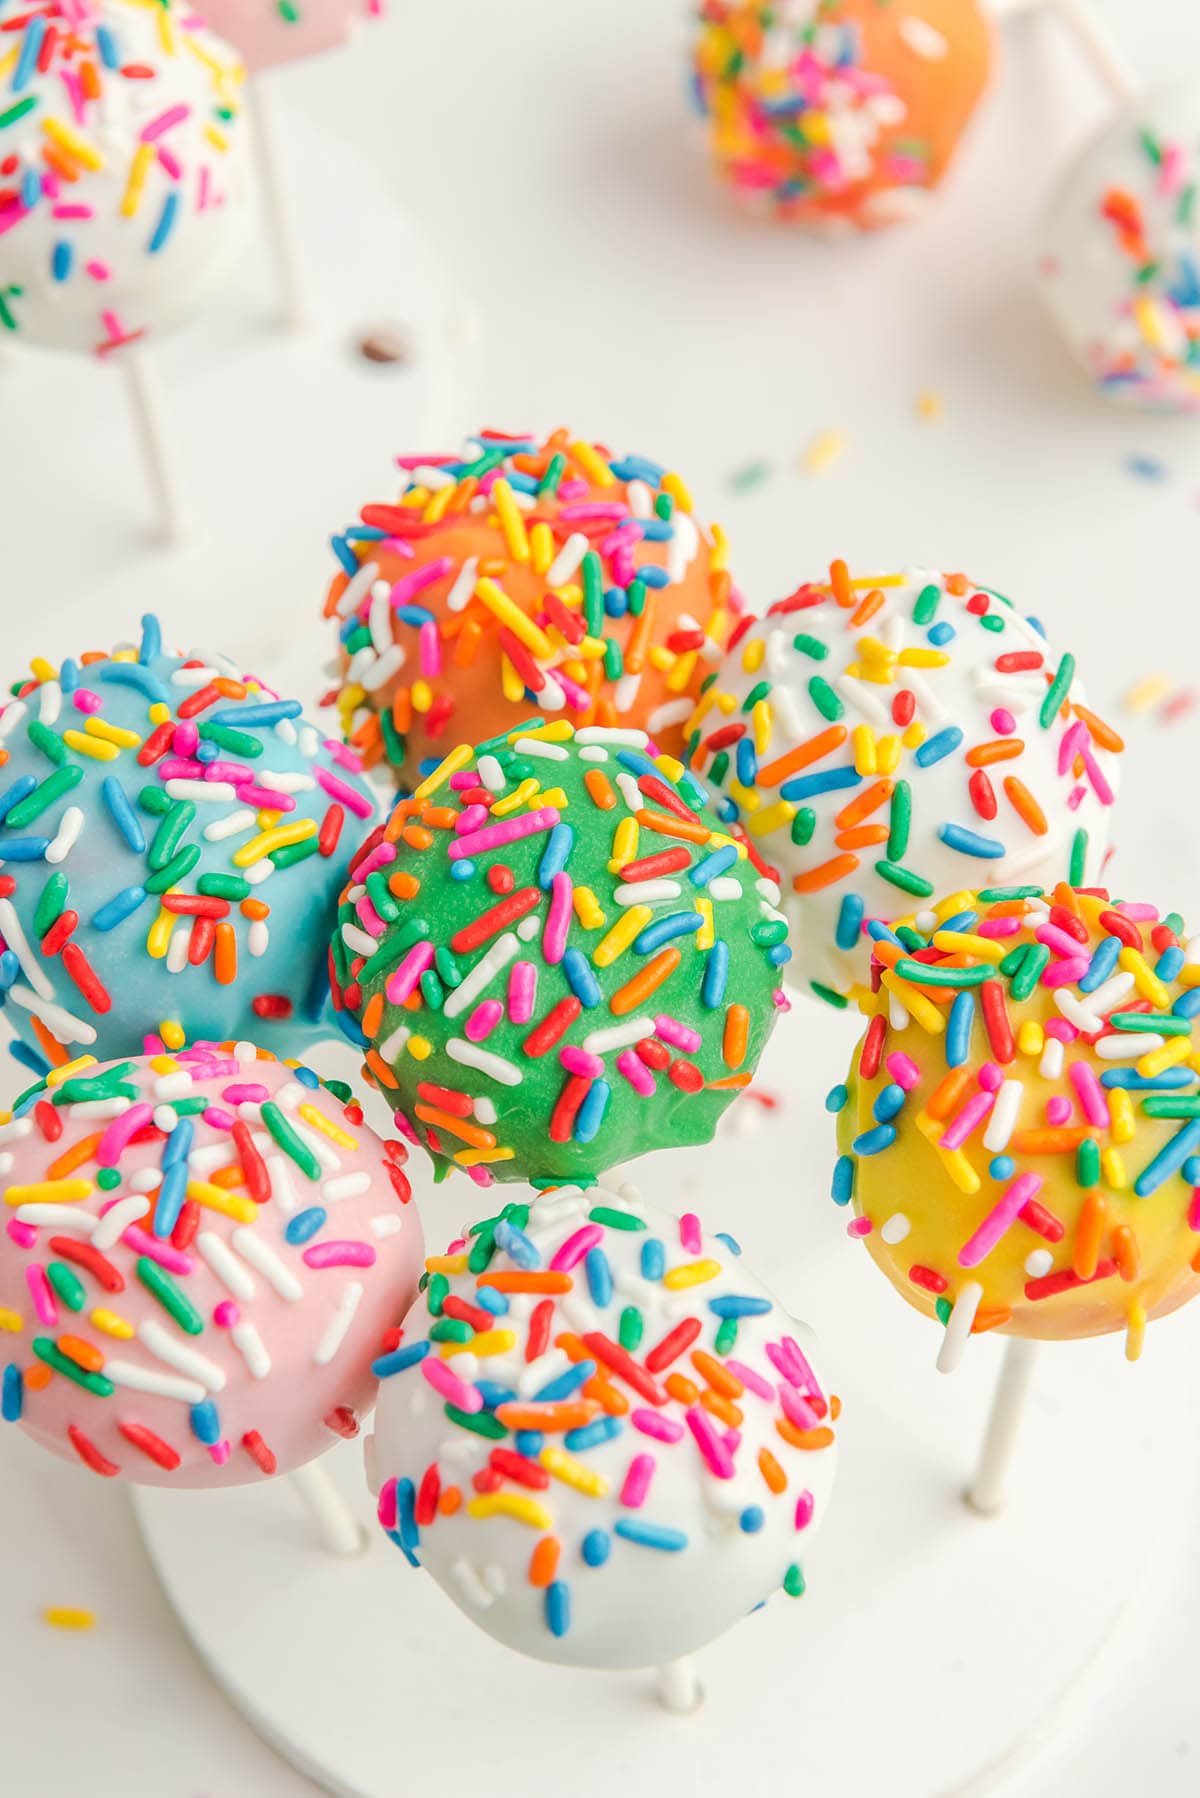
Our easy Rainbow Cake Pop recipe is a fun way to make colorful cake balls using a box of cake mix, food coloring, vanilla frosting, and melted chocolate for coating.
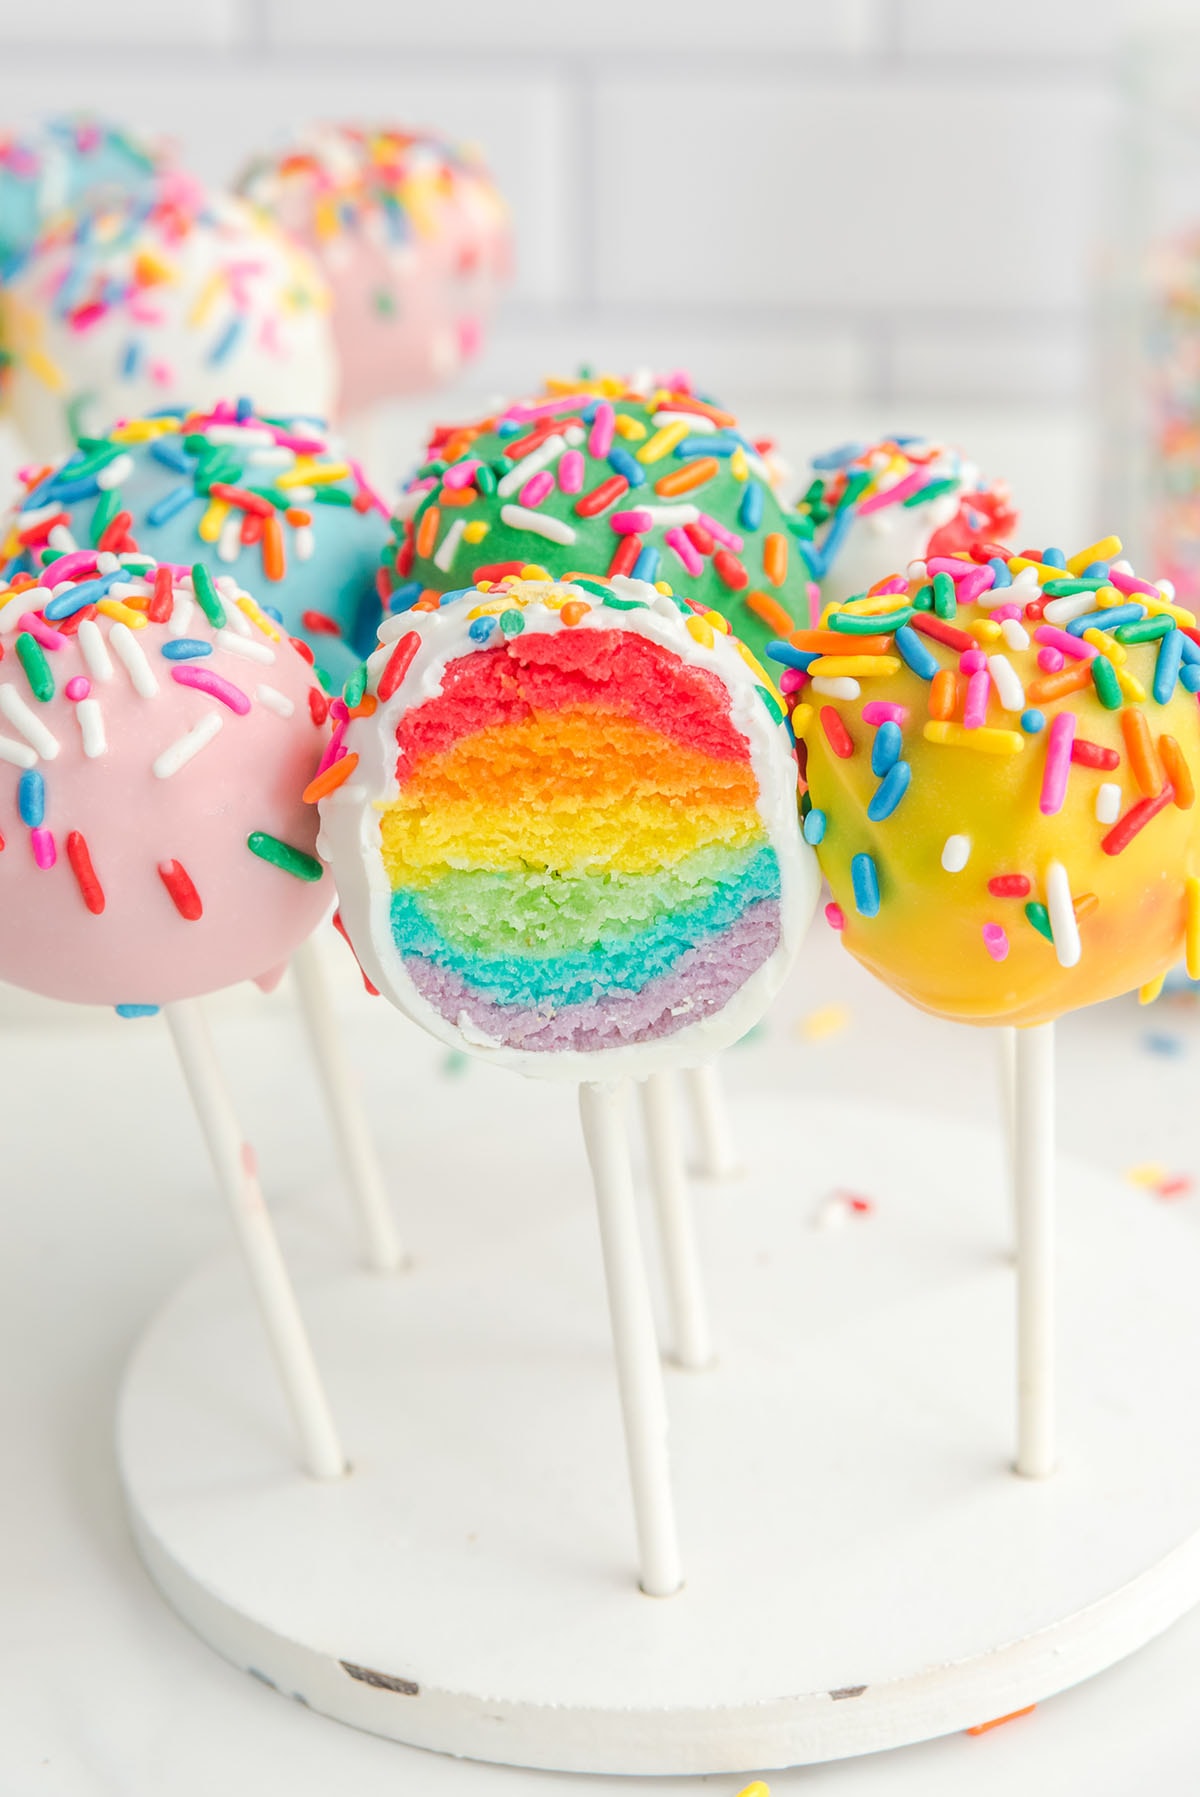
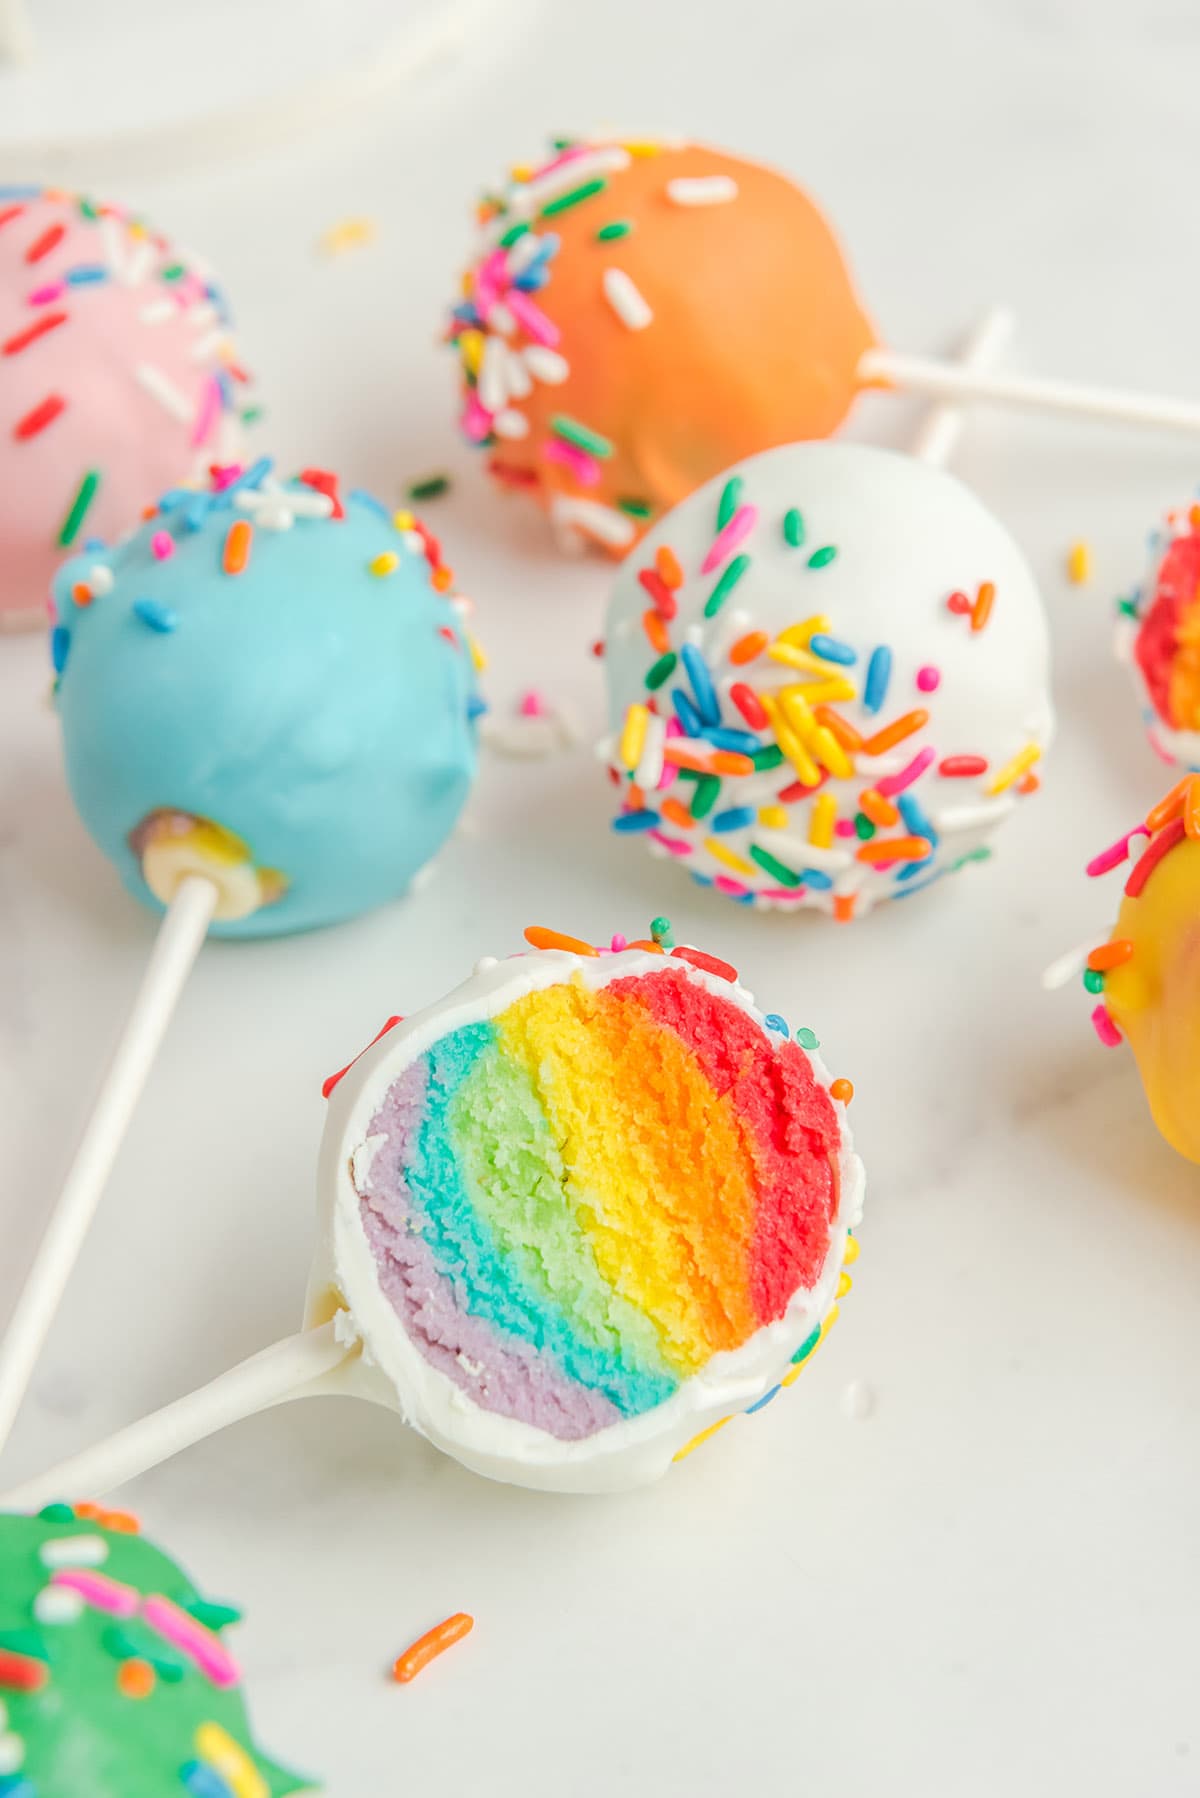
Biting into these rainbow cake balls reveals an array of beautiful multi-colored cake that’s been hidden beneath a chocolate candy coating and topped with sprinkles.
This recipe for rainbow cake pops is so easy to make simply by coloring a cake mix batter, baking it into cupcakes, combining the crumbs with frosting, stacking small discs of cake in the color order of the rainbow, and then rolling the tie-dye mixture into a round shape.
Why We Love Rainbow Cake Pops
- Easy to make and fun to decorate.
- Uses a handful of simple ingredients.
- Individually portioned, portable finger food is always fun to eat!
- Rainbow desserts are a delicious way to add a pop of color to any party.
- Perfectly pretty for birthdays, Rainbow parties, Pride celebrations, St. Patrick’s Day, or to make your day more colorful.
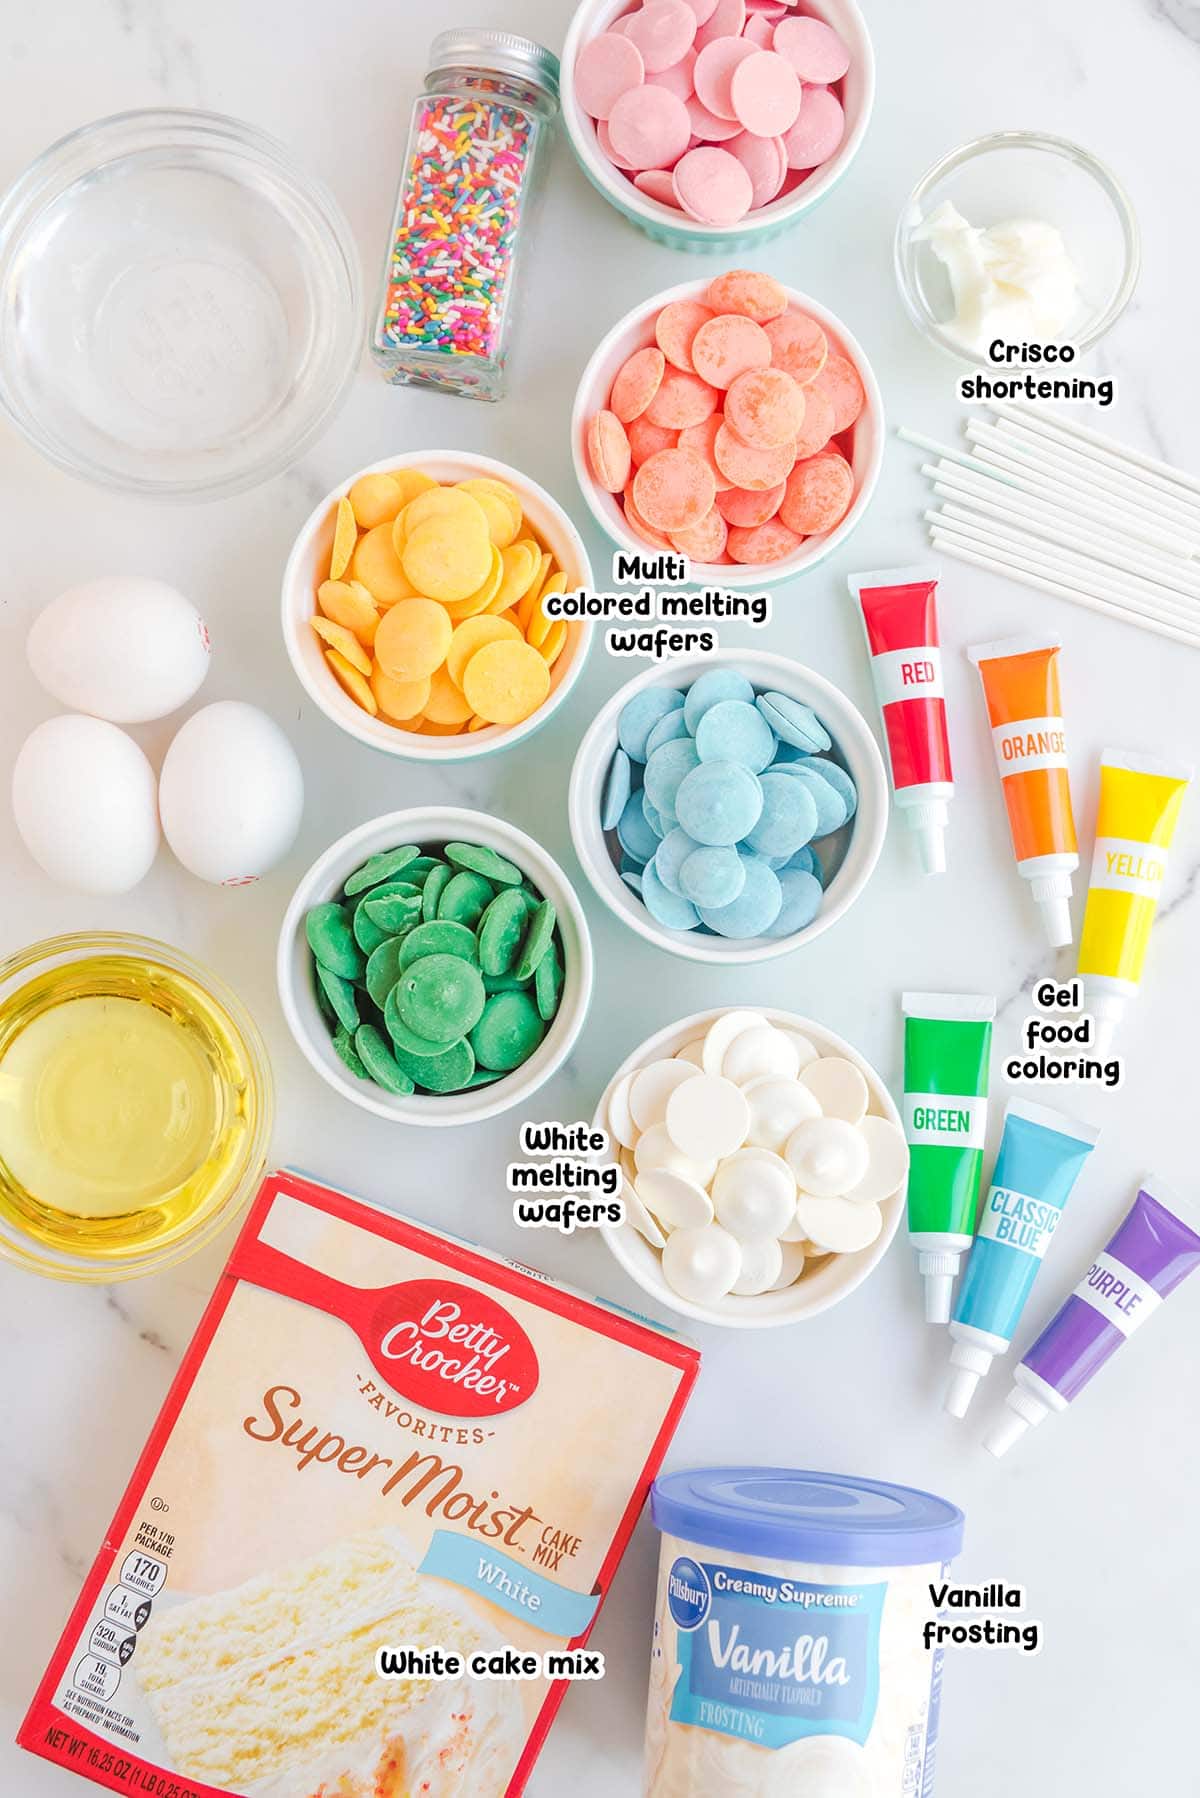
Rainbow Cake Pops Ingredients
- White cake mix (plus the ingredients on the back of the box)
- Vanilla frosting
- Red, orange, yellow, green, blue, & purple gel food coloring: Do not use food coloring drops for this recipe.
- White chocolate chips
- White melting wafers
- Multi-colored melting wafers: This recipe uses blue, pink, orange, yellow & green, but coloring your cakes is completely optional.
- Crisco shortening
Substitutions and Additions
- Choose Your Chocolate: You can use any baking chocolate, chocolate almond bark, vanilla almond bark, or melting chocolate to coat your truffles. I prefer not to use chocolate chips because the chocolate doesn’t turn out as smooth.
- Change The Cake Mix: Feel free to substitute a yellow or French vanilla cake mix for the white cake. Or use your favorite homemade recipe to make the cake from scratch.
- Skip the Stick: Serve these treats as cake balls, bites, or truffles.
Recommended Tools
- Cake pop sticks and stands
- 12-cup muffin tin
- Electric hand or stand mixer
- Non-stick cooking spray
- Mixing bowls
- 6 small-medium bowls
- Baking sheet
How to Make Rainbow Cake Pops
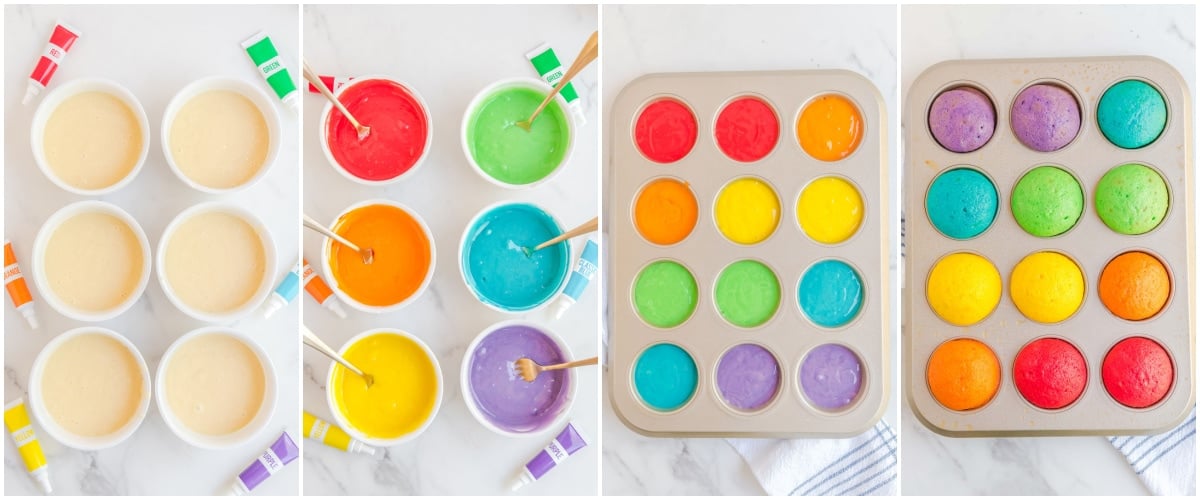
- Color The Cake: Prepare the cake mix according to the directions on the box for cupcakes. Separate the batter into six separate bowls. Mix in different drops of food color to each bowl.
Pro Tip: Each bowl will have about ⅔ cup of batter. - Bake Into Cupcakes: Fill cupcake tins with cake batter and bake according to the directions on the box. Cool completely.
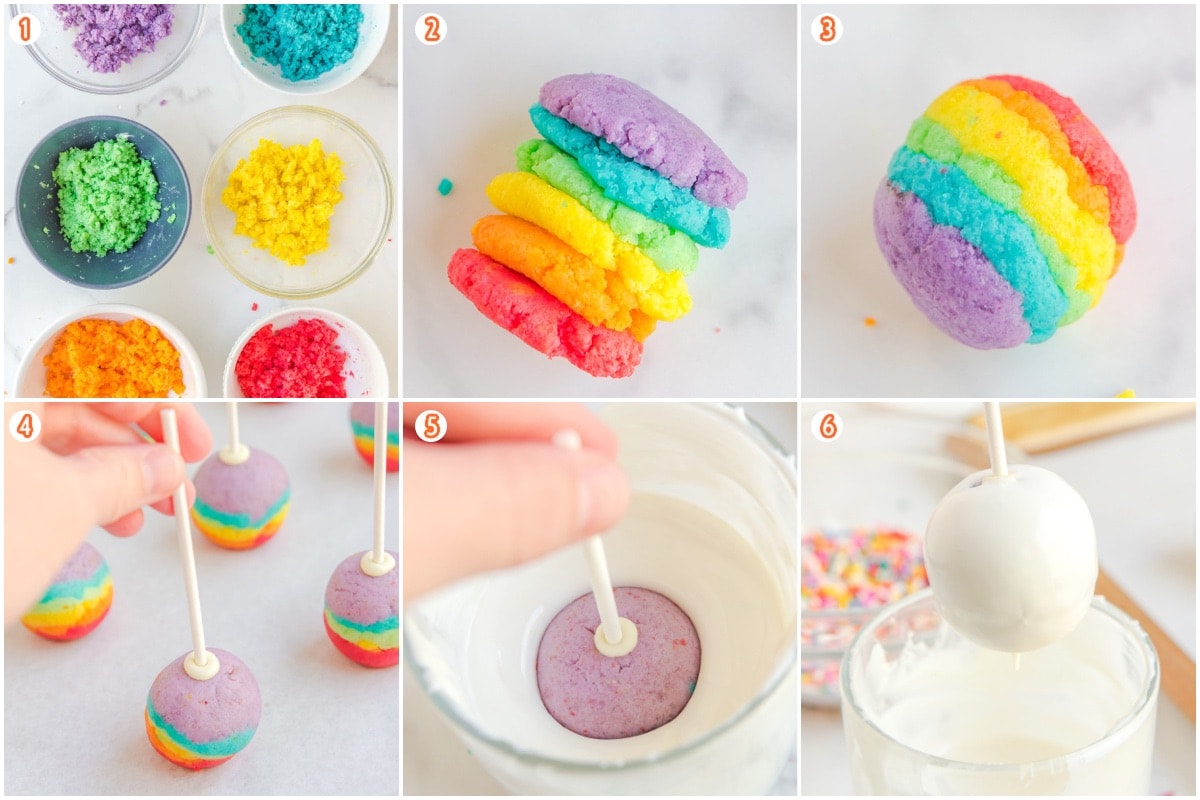
Pro Tip: Each color should be poured into (2) of the 12 cups (for a total of 24 cupcakes), ¾ of the way full. You can discard the remaining batter. - Make The Cake Mixture: Remove the harder edges around the cupcakes and discard them. Crumble cupcakes by colors into into 6 separate bowls and mix each cake crumb color with vanilla frosting until moist and dense.
Pro Tip: It shouldn’t be crumbly or too airy. Add more frosting if needed. - Stack Small Disks: Pinch mixture from each bowl and roll into small balls. Take one ball of each color, flatten, and stack them on top of one another starting with purple, then blue, green, yellow, orange, and ending with red on top.
- Roll Your Rainbows: Press all 6-pieces together and roll into one ball in the palm of your hands. Place balls on a baking sheet and chill in the refrigerator to chill for 4 hours or overnight.
Pro Tip: You should be able to create 18-20 rainbow balls, slightly smaller than a golf ball in size. - Add The Stick: Melt the chocolate chips in the microwave for 1 minute, stir, then continue in 30-second bursts until the chocolate is silky smooth. Poke a stick through the top of the chilled ball. Remove the stick, dip the tip into the melted chocolate, and then place the chocolate tip back inside the hole. Place the cake pops in the fridge to chill for 30-60 minutes.
- Coat The Cakes: Dip each cake pop into the melted chocolate, one at a time, and twirl the stick in between your fingers to even out the chocolate. Place cake pop upside into a cake pop stand and top with sprinkles.
- Serve: Place the dipped cake pops in the fridge for at least 30 minutes to allow chocolate to harden completely. Serve and enjoy!
How To Melt The Chocolate Wafers
Working one color at a time, add the melting wafers to a microwave-safe tumbler or glass (something somewhat deep so you can dip your cake pops somewhat easily). Heat on 50% power for 1 minute.
When done, stir, add ½ tablespoon of Crisco shortening and return to the microwave. Heat again in 30-second bursts on 50% power, stirring in between until the chocolate is silky smooth and falls off a fork easily.
If the chocolate is too thick, add ½ tablespoon more Crisco and heat on another 30-second burst. The consistency should be similar to chocolate sauce or dressing.
Tips For Making Rainbow Cake Pops
- You can purchase both a traditional and a neon-colored gel food coloring packet to achieve all 6 rainbow colors.
- This recipe requires longer prep time to create the different rainbow layers. I recommend working in batches rather than completing them all at once.
- When rolling your balls, if your layers tend to break apart, this means you may need to add more frosting to the colors that are breaking apart.
- Light compression is the key to turning the six small balls into flattened balls and then into one large ball. You must compress in order to combine.
- If you want your cake pops to start with red and go down to purple when standing upright, be sure the purple side of the cake pops are upright when you stab the stick in them.
- If you’re dipping your cake pops into multi-colored melted wafers and working in batches (recommended), keep cake pops inside the refrigerator while melting the next wafer color.
- Color candy wafers can be found in craft stores like Hobby Lobby or Michaels.
- You will have leftover melting wafers. This is necessary to get a clean dunking process for each cake pop.
- Your cake pops will pull off the stick if your melted chocolate mixture is not melted enough.
- Be sure to keep your cake pops inside the refrigerator when not in use to prevent them from sweating or cracking. You don’t want the undipped cake pops to get too warm, otherwise, they will have a harder time dunking and pulling out of the chocolate well.
How to Store Rainbow Cake Pops
- To Store: Store cake pops in an airtight covered container in the fridge for up to a week.
- To Freeze: These cake pops can be frozen in plastic wrap and placed in a freezer-safe bag for up to 2 months. Thaw in the refrigerator overnight before serving.
More Easy Rainbow Recipes

Other Easy Cake Pop Recipes
Rainbow Cake Pops
Ingredients
- 16.25 ounce box white cake mix +ingredients on back of box
- 6-8 tablespoons vanilla frosting
- Red, orange, yellow, green, blue, & purple gel food coloring (see notes)
- ¼ cup white chocolate chips
- 1 cup white melting wafers
- 1 cup each of multi colored melting wafers optional (this recipe uses blue, pink, orange, yellow & green)
- 3 tablespoons crisco shortening
Instructions
- Preheat the oven according to the directions on the backside of the box for cupcakes and prepare a 12-cup muffin tin with non-stick cooking spray.
- In a large mixing bowl, combine together all ingredients needed for the cake mix using an electric hand or stand mixer.
- Separate cup cake batter into 6 small-medium bowls (like cereal bowls). You will add about ⅔ cup of batter to each bowl. Add a color of food coloring to each bowl, mixing in about 8-10 inches at a time with a fork. Mix until the color is fully blended. Add more to reach desired shade, optional.
- Pour batters into the muffin tin. Each color should be poured into (2) of the 12 cups. You may have left over batter from a color. You can discard it. Fill each up about ¾ of the way. Repeat for each color.
- Bake cupcakes according to the bake time on the bake of the box.
- When the cupcakes are done, stick a toothpick down into the center of each cup cake and ensure it comes out dry. Allow the cupcakes to cool completely before continuing.
- When cupcakes have cooled, remove them from the baking sheet. Use a bread knife to carve the harder edges around the cupcakes and discard them.
- Then crumble the cupcakes into 6 separate bowls, one for each color.
- Add about 1 tablespoon of vanilla frosting to each bowl and mix together well. Mixing by hand works best. Mix until the mixture is moist and somewhat dense. It shouldn’t be crumbly or too airy. Add more frosting if needed. Repeat for each color.
- Pinch mixture from each bowl, rolling into ½ teaspoon sized balls. Do this for each coloring, batching or working one at a time.
- Take one ball of each color and gently flatten. Be sure not to make paper thin.
- Stacken the flatten balls on top of one another starting with purple. Stack then blue, green, yellow, orange, and top lastly with red.
- Gently press all 6-pieces together first starting from top to bottom. Then press together the sides, moving the pieces together in the palm of your hand. Do this until you’re able to roll different pieces all into one ball, rolling it in the palm of your hands. It should be slightly smaller than a golf ball.
- Do this until you run out of mixture. You should be able to create 18-20 rainbow balls.
- When done, place balls on a baking sheet and place inside the refrigerator to chill for 4 hours or overnight.
- When you’re ready to continue, add chocolate chips to a small microwave safe bowl.
- Microwave on 50% power for 1 minute. Stir afterwards then microwave in 30-second bursts, on 50% power, stirring in between, until the chocolate is silky smooth.
- Remove rainbow balls from the refrigerator. Take a cake pop stick and poke the stick about ⅔ through the top of the ball. See notes for styling tips here.
- Remove the stick and dip the tip into the melted chocolate, covering ¼ – ½ inch of the stick. Then place the melted chocolate tip back inside the hole you created with the stick. Repeat for each cake pop.
- Place the cake pops back inside the refrigerator to chill for 30-60 minutes.
- Near the end of the chill time, begin to prepare the remaining wafers, one color at a time. Add one color of melting wafers to a microwave safe tumbler or glass (something somewhat deep so you can dip your cake pops somewhat easily). Heat on 50% power for 1 minute. When done stir, add ½ tablespoon of crisco shortening and return to the microwave. Heat again in 30-second bursts on 50% power stirring in between until the chocolate is silky smooth and falls off a fork easily.– If the chocolate is too thick, add ½ tablespoon more crisco and heat on another 30-second burst.-The consistency should be similar to chocolate sauce, or dressing.
- Working one at a time, dunk a cake pop into the melted mixture and carefully pull out, allowing excess to drip off and gently twirl the cake pop stick in between your fingers to even out the chocolat and sling off excess.
- Place cake pop upside into a cake pop stand and immediately top with sprinkles. Repeat this process for each cake pop.
- Place cake pops inside the refrigerator to chill for another 30 minutes before serving.
Jenn’s Notes
- To Store: Store cake pops in an airtight covered container in the fridge for up to a week.
- To Freeze: These cake pops can be frozen in plastic wrap and placed in a freezer-safe bag for up to 2 months. Thaw in the refrigerator overnight before serving.
- You can purchase a traditional and a neon colored gel food coloring packet to achieve all 6 colors of the rainbow.
- Do not use food coloring drops for this recipe.
- This recipe does require a longer prep time to create the different rainbow layers. I recommend doing this recipe in batches rather than all at once.
- You will need to purchase cake pop sticks and stands for this recipe. If you do not have stands and only have sticks, you can simulate cake pop stands in creative ways.
- Use an upside down box and poke hole for the cake sticks. Be sure the sticks have something under the box to hold the wait of them so the melted chocolate doesn’t touch the box.
- When rolling your balls, if your layers tend to break apart, this means you may need to add more frosting to the colors that are breaking apart.
- Light compression is the key to turning the 6 balls into flatten balls then into one large ball. Be sure to compress in order to combine.
- If you want your cake pops to start with red and go down to purple when standing upright, be sure the purple side of the cake pops are upright then you stab the stick in them.
- If you’re dipping your cake pops into multi-colored melted wafers and working in batches (recommended), keep cake pops inside the refrigerator while melting the next wafer color.
- Color candy wafers can be found in craft stores like Hobby Lobby or Michaels.
- You will have left over melting wafers. However, this is necessary so you get a clean dunking process for each cake pop.
- Your cake pops will pull off if your melted chocolate mixture is not melted enough.
- Be sure to hold cake pops inside the refrigerator when not in use to prevent them from sweating or cracking. You don’t want the undunked cake pops to get too warm, otherwise they will have a harder time dunking and pulling out of the chocolate well.


I want it