
It’s a question I get asked all the time – How to Strike Cymbidium Back-Bulbs?
But firstly, what is a back-bulb? Cymbidium Back-Bulbs are the seemingly dormant, brown, leafless pseudobulb you see on all Cymbidium orchid plants. These are the old bulbs that no longer produce leaves or flowers, but are still connected to the main plant. They may look like dead bulbs, but they are still very much alive, and provide nutrient to the plant if needed. ‘Striking’ is the term we use to encourage the bulb to grow a new shoot.

When we re-pot or divide an orchid it is sometimes either necessary or desirable to remove one or more back-bulbs. This helps to clean up the plant or reduce its size to fit it in the pot. Once removed, it is possible for these Cymbidium back bulbs to produce, propagate, or ‘strike’, a new growth.
In time this will give you a whole new plant, that is an exact copy of the plant it came from and is a great way to expand your collection over time for free!
I love this part of orchid growing as it enables me to have many plants of my favourite flower. And when they flower together, it provides a wonderful display!
So how do you strike Cymbidium Back-Bulbs?
If you have the patience, it’s a simple procedure.
When re-potting or dividing a large plant, simply sever the rhizome connecting the back-bulb to the other bulbs. This is preferably done by using a sterile knife or scissors. It is also possible to break off the old back-bulb by levering it apart it until the rhizome breaks, and this is generally what I end up doing. Select only the strongest bulbs, the bigger, hard back-bulbs. Any that are softening are likely on their way out and will probably just rot and not produce any new shoots for you.
Once your back-bulbs have been separated from the rest of the plant, they need a clean up. Peel off most of any leaf husk remaining. This will keep the bulb clean and prevent scale or any other insect from affecting your bulb. Some will then tell you to seal the rhizome break to prevent infection with a sealing paste or fungicide; however, I never really bother with that step. It believe it will heal on its own, and I can’t remember the last time I lost a back-bulb to infection. However, this may vary in other climate types.
Most growers will then tell you to trim any roots back to the base of the bulb. This will encourage it to strike a new shoot, which will then grow new roots of its own.
Patience is essential as it takes time to grow new shoots!
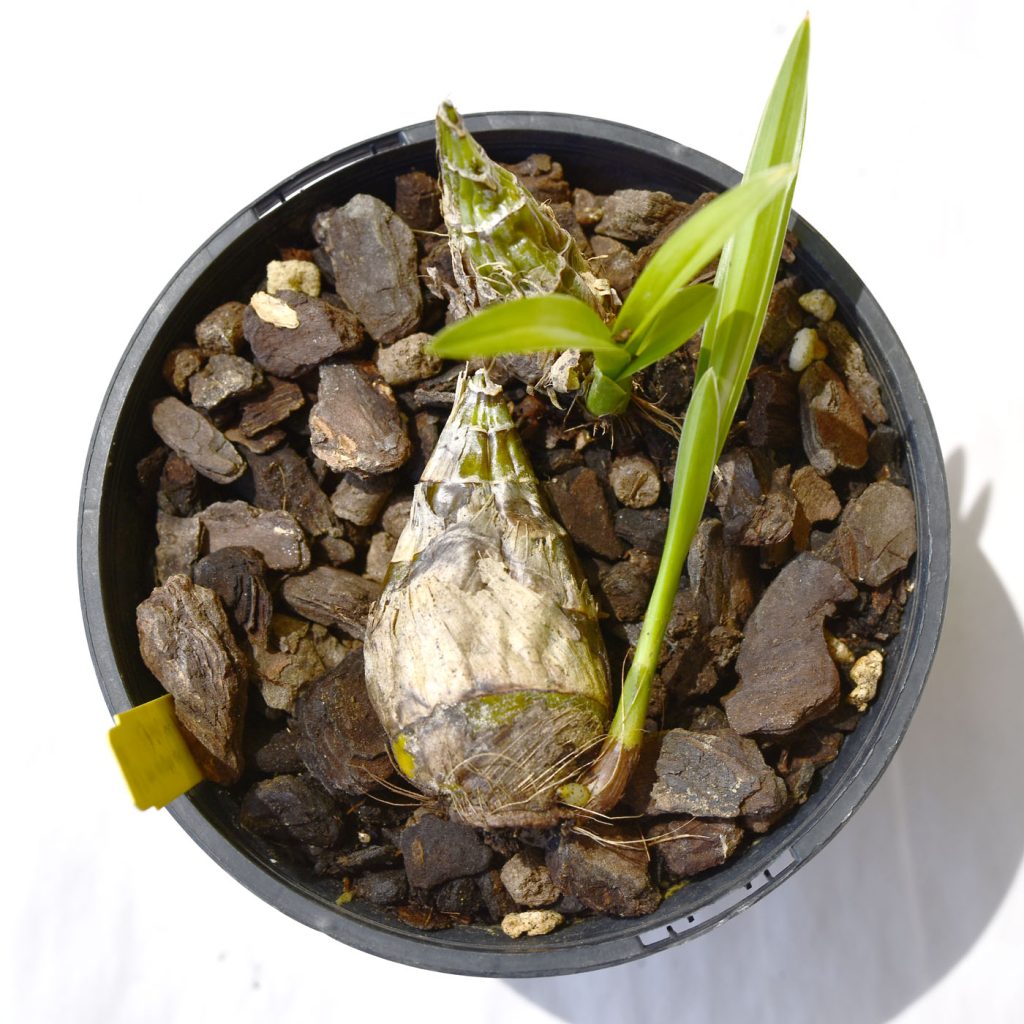
The simplest method to striking a back-bulb is to then just put it in a pot; using the same medium/mix you put your other orchids in. Bury it about half deep in the mix and wait!
I put my re-potted back-bulbs in a little more shade to begin with than my other orchids. But I do water them a little more often than my other plants to keep the humidity higher to prevent them from drying out too quick.
Make sure they still get good light levels though.
It generally takes three to six months for an old back-bulb to strike a new growth. And maybe longer for a stubborn bulb! But remember that not all back-bulbs will strike, so it’s a bit of pot luck.
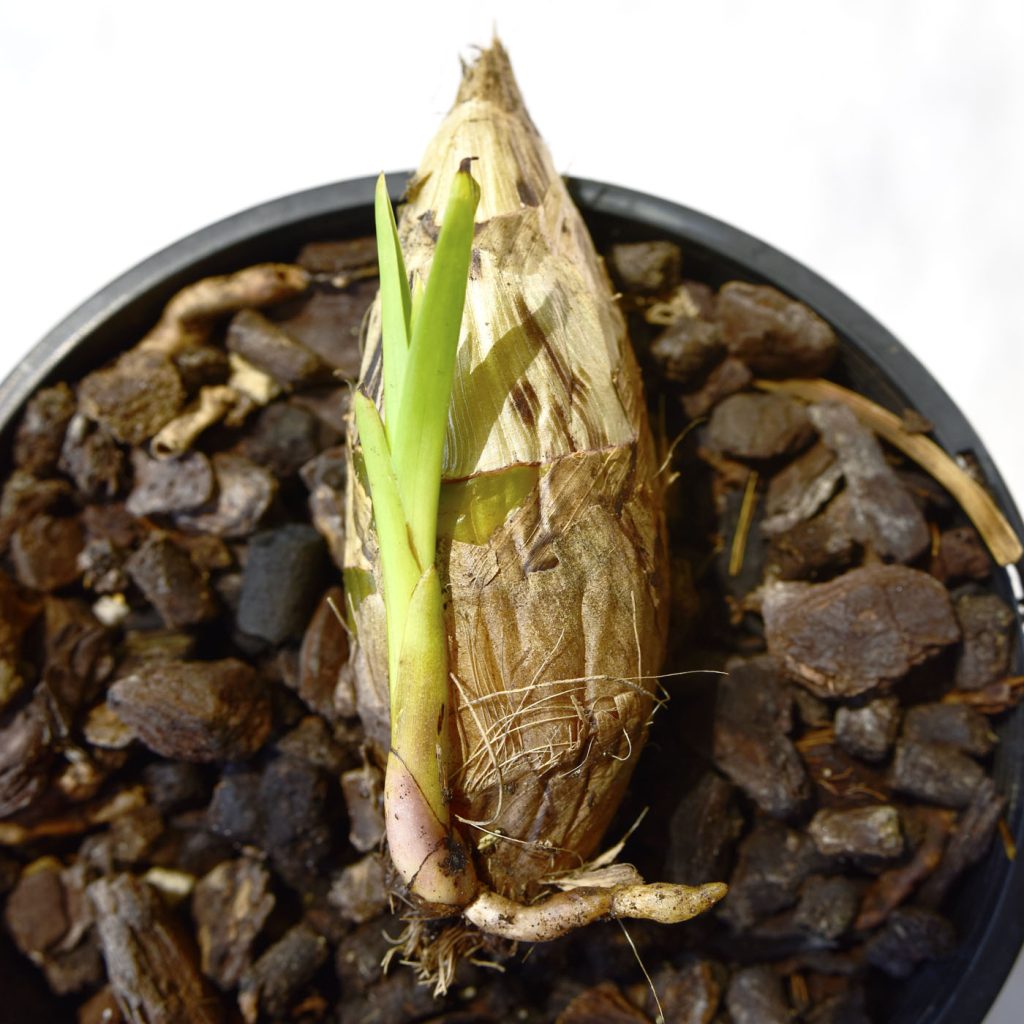
Your back-bulb will just shoot when it is ready
Once new growth is seen, I dilute some liquid fertiliser and spray it over the shoot so the leaves absorb it. There aren’t any roots at this point, so a non foliar fertiliser is pretty much a waste of time.
Soon, the new growth will form roots. At that point I show it some love and hit it with some slow release fertiliser pellets in the pot. This allows the new roots to start absorbing food and grow stronger faster. I use a Neutrog Strike Back pellet fertiliser which has worked well for me. This feeding also puts less strain on the back-bulb, helping to save energy for the possibility of striking another shoot after removing the new one. I have managed this a few times using large sized Cymbidium Back-Bulbs and is really satisfying! It’s a 2 for 1! And who doesn’t love that?!
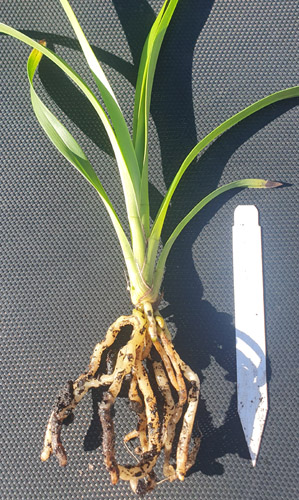
After a time, the new shoot will be big enough and will have enough roots to support itself. I’d wait until the shoot is quite tall. I prefer at least 6 inches and there are many healthy roots. Up to this point, the back-bulb is still providing some nutrient to the shoot, and if you are unsure, wait a bit longer. I think roots at least 3-4inches long are satisfactory. But the longer, the better.
When your shoot is showing some good strong roots the new growth can be separated from the back-bulb. Depending on the condition of the back-bulb, it could even be put back into your medium to strike another shoot. Generally this will only work with larger back-bulbs that have more stored energy, but if you have a big one, give it a shot, you just never know!
Personally, in Adelaide, Australia, I’ve had more than an 80% success rate in the last 5 years with this above method, so I know it works.
In my experience it doesn’t seem to matter much when you split off Cymbidium Back-Bulbs and plant them. I think a back-bulb will just shoot when its ready, however, I would recommend separating and potting it in the warmer growing months to give it the best chance of shooting. Winter is not really a growing time for Cyms. My climate here would definitely influence my success, so in colder climates, I would avoid winter dividing unless necessary.
Other tried and tested methods…
Some growers put their separated Cymbidium Back-Bulbs into a pot of standard medium and put the pot in a plastic resealable bag to provide some warmth and humidity. And this is a great idea for the Winter months.
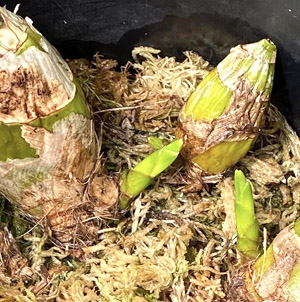
Other growers put their back bulbs into a pot filled with sphagnum moss, and let them shoot.
Some growers put the separated back-bulb into a plastic resealable bag with some damp sphagnum moss for moisture. They then hang the bag in a shade house.
Or you could try to half fill the bag with your normal growing medium and place the back-bulb in the mix, add a little water and seal the top. Then hang the back in a shade house. This bag provides good humidity to enable your back-bulb to strike that new growth.
In colder climates it is also a great idea to put these pots/bags into a warmer area with plenty of indirect light in order to encourage them to strike. In all instances, once the roots of the new shoot are healthy enough they can be potted up into your normal medium to grow on.
I really love striking a bunch of back-bulbs of my favourite Cymbidium orchids!
Once potted up, it will take a few years for your new plant to grow big enough to flower so be patient. A Cymbidium orchid generally needs to have at least 3-4 decent sized green bulbs growing to have enough stored energy to flower, maybe more. Continue to give it plenty of light, food and water over the next few years as it grows, and continue this right through its life.
If you continue to strike your back-bulbs you will have an ever increasing collection of the same plant to either keep, swap or sell. It’s a great way to grow the diversity of your collection of Cymbidium orchids!
So give it a try. You’ve got nothing to lose!
Thanks for all the good information
Thank you, we hope it helps. Please check back often for new articles and updated growing information as we go, as well as new release breeding and the direction Cymbidium Orchid growing is heading.
Thank you for great guideline on how to strike cymbidium back-bulbs.
Pingback: Seedling and Mericlone – What is the Difference?
Thanks! No mention of moisture or watering, can you elaborate please?
Thanks for your question, and I have updated the article. I do water them a little more often than my other plants to keep the humidity higher to prevent them drying out too quick.