Skip to content

Kungsleden: Kvikkjokk to Abisko

Distance (km)
0
Days on the trail
0
Lake crossings
0

About Kungsleden: The most famous trekking route of Sweden, Kungsleden is a trail, featured on many “to hike” lists. It stands out from other European trails because of its location – most of the trail is within the Arctic Circle, ensuring unique and remote landscapes. The remoteness will also provide solitude as most of the time you will have the trail all to yourself. The whole trail spans 440km from Hemavan to Abisko (or vice versa), while I hiked from Kvikkjokk to Abisko (193km). Therefore, the information in this guide page is dedicated for this particular section only. 

How long does it take? I’d say that this section can be covered in 8 to 12 days. 8 days might be possible for those who are fine with combining two stages into one day and are used to long days of hiking. 12 days is the default duration of this section as each stage is designed to end in accommodation with no options in between (I told you it’s remote). I did the hike in 10 days and found this duration very comfortable with an average of 7 hours of hiking per day. In general, the duration will depend on your physical shape, accommodation choices, and logistics (more on that in the Itinerary section below).

Difficulty: Kungsleden has a fairly gentle elevation profile, compared with other popular European hikes such as Tour du Mont Blanc or Walker’s Haute Route, so elevation will not be a challenge. What makes it tricky is the uneven and rocky terrain, which sometimes felt a bit taxing. Also, on this trip, my backpack was much heavier as I had to carry a lot of food and warmer gear since I hiked in September. Apart from that, I consider this trail moderately difficult. It was tougher mentally than physically, especially during bad weather. 

Itinerary

North-bound or south-bound? The most common way to hike Kungsleden is south-bound (which means starting in Abisko). Most of the guidebooks are written for south-bounders, but recently north-bound direction has gained more popularity. I even met a German guide who was writing a guidebook for north-bound hikers. I was hiking north-bound.

Why I chose north-bound direction: 

  • I wanted to keep the dramatic landscapes for the end.
  • As I hiked in September, I wanted to make sure I do all the mandatory boat crossings before the season ends. 
  • I wanted to have easy logistics after the trip. Abisko is way easier to reach/leave than Kvikkjokk.  
  • I was hoping to see Northern Lights and so wanted to reach the north as late as possible.

Other north-bounders have indicated that there’s more chance to find two rowing boats as the majority of people are hiking south. I did not get this advantage, there was always only one boat on my side. 

Before the trip, I was worried that I’ll be completely alone since I went in the less popular direction and at the end of the season. However, I met quite a few fellow hikers walking in my direction and had someone to chat with every day. 

How to get to Kvikkjokk. It is a remote place and unless you have a helicopter, there’s no easy way to get there. My own trip to Kvikkjokk took 3 days because I decided to travel there by train. That duration was all the way from the Netherlands, so for you, it might look quite different if you decide to fly to Stockholm instead.

From Stockholm there’s pretty much only one option to continue – trains and busses:

  • Stockholm – Boden (a night train)
  • Boden – Murjek (train)
  • Murjek – Jokkmokk (bus)
  • Jokkmokk – Kvikkjokk (bus)

I departed Stockholm at 22:30 and arrived at Kvikkjokk the next day at 17:45. In September there was only one bus per day, so there is no way to make it faster as there is only one option 🙂 You just need to be patient and embrace the tranquility of the north. For me, all the switches went smooth and all the journeys felt very comfortable.

My trip itinerary

DayStartFinishDuration (h:mm)Distance Elevation gain/lossAccommodation
1KvikkjokkPårte7:3017km260m/90mWind camping
2PårteAktse8:3018km490m/420mAktse fjällstuga
3AktseSitojaure (via Skierffe)7:4024km1020m/960mCamping at Sitojaure fjällstuga
4SitojaureSaltoluokta6:1520km185m/425mSaltoluokta fjällstation
5SaltoluoktaTeusajaure5:3017km610m/580mWild camping
6TeusajaureKaitumjaure3:159km320m/200mKaitumjaure fjällstuga
7Kaitumjaure Sälka8:4025km320m/125mSälka fjällstuga
8SälkaAlesjaure9:3026km345m/380mWild camping
9AlesjaureAbiskojaure6:0022km55m/345mCamping at Abiskojaure fjällstuga
10AbiskojaureAbisko4:0015km10m/115mAbisko Mountain Lodge
Epic views sections:

  • Aktse – Skierffe (day 3 detour)
  • Avtsusjvágge emergency shelter – Saltoluokta (day 4)
  • Vakkotavare – Teusajaure (day 5)
  • Tjäktja pass – Tjäktja (day 8)
  • Alesjaure – Abiskojaure (day 9)

Trail logistics. While Kungsleden is not a particularly difficult trail to hike, its logistics can create some stress or delays if not prepared well. The points below will cost you extra time and some of them are out of your control, so keep them in mind when planning your Kungsleden trip.

  • Mandatory lake crossings. There will be 4 mandatory lake crossings between Kvikkjokk and Abisko. No way around it, you need to cross them, which also means the extra time needed in your itinerary. The lakes can be crossed by either a private motorboat or rowing boat.
      • Private boats operate a few times per day in summer and mostly two times per day in September on a fixed schedule. Check the Swedish Tourist Association website for more details. Most of the time payment is in cash and varies between 100 to 300 SEK (~10-30 EUR). These boats are subject to weather, so if it’s very windy, the boat can be canceled. When planning my trip I didn’t have any buffer for such delays, which I’d say is quite risky. 
      • Rowing boats are free and can be found next to every lake, except for Saltoluokta. The only thing to keep in mind is that every shore needs to have at least one boat (there are three in total). So if you find one boat on your side, you need to row to the other shore, pick a second boat, row back with the second boat, leave it there and then row back to your destination. Three rows in total! In case of bad weather, those boats are also removed, so don’t consider them as your plan B. Before you take a rowing boat, please make sure you know what you’re doing and you trust yourself to have enough energy and strength. Lakes have currents, which can make it tricky to stick to a straight line. 

Mandatory lake crossing sections between Kvikkjokk and Abisko: 

  1. Pårte – Aktse, both private and rowing boat. To indicate that you want to take a private boat, you need to raise a white bidon (ala flag), payment is in cash.
  2. Aktse – Sitojaure, both private and rowing boats.  For the private boat, you need to call Anna. Anna and her husband cannot see the other shore, so they will never know that you’re waiting if you didn’t call. As they have two boats for different capacities, that also helps them to decide which one to take. As each trip is very expensive, they want to minimize the number of rides. You can get their number from the hut in Aktse and they also have a wooden sign on the trail, indicating the number. You’ll have a signal most of the time at the top, so call before descending towards the pier. Payment for the boat is in cash.
  3. Saltoluokta – Vakkotavare – only private boat is available. That’s also where you’ll catch a bus to Vakkotavare (see an extra note below). A boat ticket can be bought at the Saltoluokta hut (and paid for by card).
  4. Vakkotavare – Teusajaure – your final mandatory boat crossing before Abisko (woohoo). Both private and rowing boats are available. For the private boat, you can pay by card or cash.
  • Extra note on Saltoluokta – Vakkotavare section. Kungsleden is interrupted by a 32 km road between Saltoluokta and Vakkotavare, requiring to take a bus. You could walk this distance, but that would take a full day on its own. From Saltoluokta you need to take a motorboat across a lake, from where a bus will pick you up and bring you to Vakkotavare and back on Kungsleden. As I hiked in September, there was only one bus per day, in a late afternoon, which meant that I’d lose a full day just by transitioning. Some fellow hikers decided to do that, while I got a hitch from two Swedish ladies. During high season the bus will go to Vakkotavare in the morning as well, just keep in mind that the whole transition will still take you around 2 hours and as the morning boat departs at 11:00, you can only start your hike after 13:00. 
The cozy Fjällstuga of Kaitumjaure

Accommodation

Accommodation overview. I combined camping with staying at fjällstugas (Swedish mountain cabins). I wanted to experience the Swedish Fjällstugas and add them to my mountain hut expertise list 🙂 Those two types also happened to be the only accommodation options on the trail. 

Camping. Kungsleden is ideal for camping as wild camping is allowed almost everywhere. I came across a lot of great spots and had no difficulties or worries when wild camping. Due to the abundance of water, I was always within a couple of meters of a water source. I felt very safe and was not scared to camp in the middle of nowhere all by myself. 

One time I camped next to a fjällstuga, which meant that I had to pay a fee (20-25 Eur) for which I could use all the facilities of the fjällstuga, including the main area and the kitchen. It came in very handy as the weather outside was horrible and I could escape it by sitting warm inside. 

As I hiked in September, the temperature at night sometimes dropped below zero. My camping gear was not exactly made for freezing temperatures, so I had a few very cold nights. That is also why I stayed in fjällstugas more than one night, I was simply escaping the cold. I think that with four-season gear, camping in September would have been still very comfortable. 

Fjällstugas. Swedish mountain huts are quite different from the refuges in the Alps. Fjällstugas are very basic, there is no electricity or gas and the guests are expected to do their fair share of chores, e.g. cut and fetch the wood to be used for a stove, fetch the water for washing and cooking, put on the fire in the stove and sweep the room before leaving.

Of course, if you don’t know how to do some of these things, fellow guests or wardens can help you. This also means that the warden is there to maintain the overall functioning of the fjällstuga and not to serve the guests. Wardens are actually volunteers, so this setup kind of makes sense. Some of the fjällstugas have little shops with food and hiking essentials. Almost every hut has a bastu (sauna), though they were closed when I hiked due to the Covid pandemic.

What makes sense less is the price of a night at fjällstuga, which is approximately 50 Eur. What you get is a roof and a bed (in a multi-bedroom), while food and even heating are something you need to take care of yourself. After Swedish huts, I really cannot complain about the prices of refuges in France or Switzerland, where for the same 50 Eur I would get a bed, a 3-course meal and have a toilet inside the building.

I did enjoy staying at the fjällstugas though, I liked the simplicity and being back to basics. I just didn’t like the price 🙂 Below you can find an overview of the four fjällstugas, where I stayed. One of them is actually a fjällstation which is much bigger and more modern, something like a hotel in the mountains with extra facilities compared with fjällstugas.

My impressions on fjällstugas, where I stayed 

Overall impression: As my first fjällstuga even, Aktse has a special charm. It is a very cozy hut. The section of the house where I stayed had a kitchen and two sleeping rooms facing the kitchen. Each room had 4 beds and I had one of them to myself (the perks of hiking at the end of the season). 

Facilities: There is a little food shop, a bastu, card payments are accepted. 

Price: 50 Eur 

Overall impression: As a fjällstation, Saltoluokta is a complex of buildings with accommodation style for any taste. I decided to pamper myself and stayed in a twin room. To me Saltoluokta felt more commercial and less homy than fjällstugas, but it was great to have a warm shower and a room.  

Facilities: There is a restaurant, large (for mountain standards) grocery store, a bastu, electricity (!),  bank cards are accepted. 

Price: 98 Eur (ouch, privacy is expensive)

Overall impression: I decided to stay at this fjällstuga spontaneously as the warden told me that they have no reservations for that night. Having the whole fjällstuga all to myself was too tempting to pass. It was a room of similar style to Aktse, just it had bigger sleeping areas. Again, it was a great and cozy stay. 

Facilities: There is a decent-size food shop, a bastu, card payments are accepted.

Price: 55 Eur as I didn’t have a reservation (which is a Covid restriction, not a normal practice)

Overall impression: In this fjällstuga, each room has its own stove and little kitchen. There were 6 beds in my room, I shared it with one another hiker. Of all fjällstugas this one felt the oldest and for some reason the room did not get warm no matter how much wood we burned. 

Facilities: There is a food shop, a bastu, card payments are accepted.

Price: 50 Eur 

Gear

Weight. My base weight (excluding things I wear and food) was 8.4 kg. The total weight was 13.5 kg, of which 3 kg was food. You can find the full gear list here. Compared with other hikers, my backpack was one of the lightest on the trail, while I would have loved to get it even lighter. As I hiked in September with below 0 temperatures at night, I had to take extra gear to keep myself warm. Looking back, I wish I had more time to upgrade my gear to a 4-season gear as I still found the nights very cold to my taste. 

Resupplying on the trail. As food in the fjällstugas is expensive, I wanted to take with me as much as possible. Therefore, I started with 3kg of food and hoped to resupply some things on the way. In my first fjällstuga, I found out that resupplying will be tricky. Since I hiked at the end of the season, most of the food stores in fjällstugas were almost empty with very few options, e.g. there were no cookies or chocolate from Sitojaure to Alesjaure (6 days, 100km). There was also a shortage of screw-on gas canisters. I got lucky by scoring one in Vakkotavare, where a fellow hiker left almost a full canister for someone who needs it more (me, merci!). So I’d say that in general resupplying is possible every 1-2 days, but extra care should be taken at the end of the season. 

Food. On this hike, I learned that I need a slightly different food diet than what I had in summer. Colder temperatures required more energy, so I soon realized that a cracker with Nutella for lunch will not get me far. From fellow hikers, I was inspired to get tuna, which was much more wholesome than Nutella (I know, I know…). On this hike I also had a warm breakfast – oatmeal, cooked with milk powder and flavored with dried berries or jam. This was the best upgrade to my diet and a great way to get myself warm after a cold night. 

Top 5 items, I appreciated during this hike:

  1. Satellite communicator – I hiked alone and most of the time didn’t have a phone signal, so my satellite communicator (Garmin inReach mini) was my best friend. The best investment this year, giving me and my family peace of mind. 
  2. Synthetic jacket – I wore my jacket (Rab Women’s Cirrus Flex 2.0 Hoody) everywhere, even when sleeping. It was warm and comfortable, especially during windy days when I needed a snug hood.
  3. Tent – I had some windy nights and my tent (Big Agnes Copper Spur HV UL1) held up perfectly. It was easy to set up and pack, spacious enough for all my stuff – my companion through warm and cold nights 🙂
  4. Beanie – I got it for Kungsleden and wore it almost every day. This particular beanie (Mountain Equipment) is not super special or something, it’s just that I really appreciated having a beanie during windy days and cold nights.
  5. Gloves – similar to beanie, on most days I could not function without my gloves (Audimas Ski-Dri). Those are actually meant for skiing, but they worked perfectly fine on this trip too.  

3 items I would not take if I did the same trip again:

  1. Sleeping bag – I would definitely take a sleeping bag, just a different one 🙂 Grüezi-bag Biopod Downwool Subzero 185 is a comfortable sleeping bag, but not warm enough for September on Kungsleden. I cannot really blame the bag as its comfort temperature is +2°c (comfort limit -4°c), while on some nights I had -2°c. So yeah, its indications are pretty accurate, it’s just that I had no time to arrange a warmer sleeping bag, so had to hike with what I had.
  2. Poncho – I took it as an emergency and never used it. With the ferocious Arctic Circle winds, I’m not sure if this cheap plastic poncho would have lasted more than 10 mins anyway. 
  3. Extra power bank – I knew that besides Saltoluokta I will not have electricity the whole trip, which sounded daunting given all the electronics I had. So I took an extra power bank, which turned out to be unnecessary. An awesome thing about no signal areas is that they don’t drain batteries that much and I had no signal from Vakkotavare to Abisko (5.5 days). Besides, Saltoluokta was kind of in the middle of my trip, so I could charge everything there. I was consciously saving the battery of my devices, especially Garmin (e.g. no Bluetooth connections with my phone, except when messaging), but overall I was pleasantly surprised by how energy-efficient my devices were. 


Special note on rain pants – those, who read my guides for Walker’s Haute Route or Tour du Mont Blanc, know that on both of those trips I took rain pants and never used them. Well, on this trip I used them for 4 hours in total (see the picture above)! 🙂 but this time I did not include them in my “I would not take” list simply because I consider myself lucky for such rainless weather as I had. If you look at the blogs of other Kungsleden hikers, they all had their fair share of rain with some of them even advising to not hike Kungsleden if you cannot tolerate pouring rain. I didn’t have it, but I’d say I dodged a bullet this time. If I was back, I’d still take them. All that water in the streams and lakes comes not from nowhere 😉

Daily journal

So how was it? I wrote my experiences and adventures in the daily journal below. For each day you’ll find not only my stories, but also more pictures and practical tips for that particular stage. If you still miss any information, feel free to post your question(s) in the comment section (at the bottom of each daily journal) or contact me via a contact form.  

Kungsleden day 1: Kvikkjokk to Parte

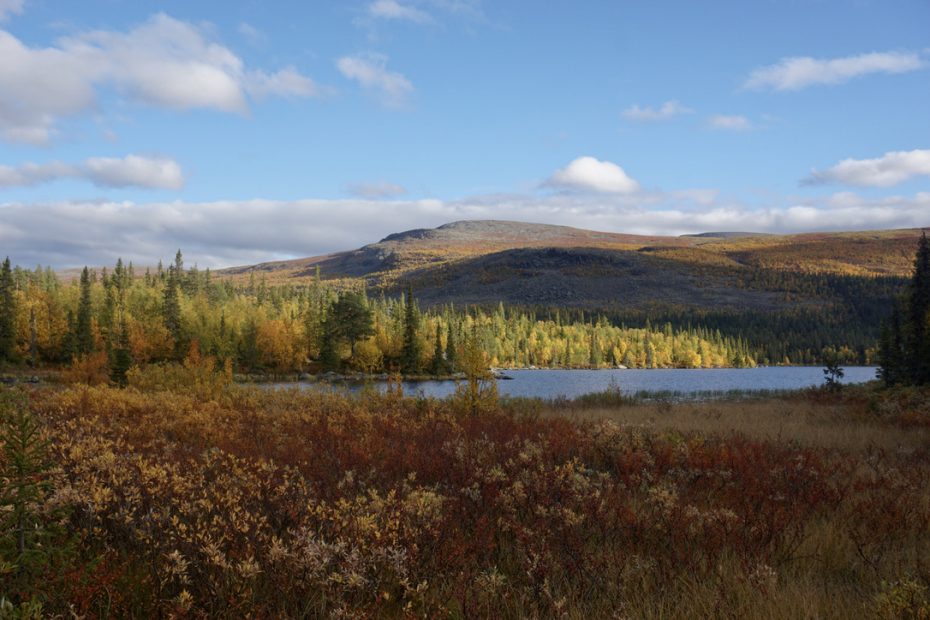
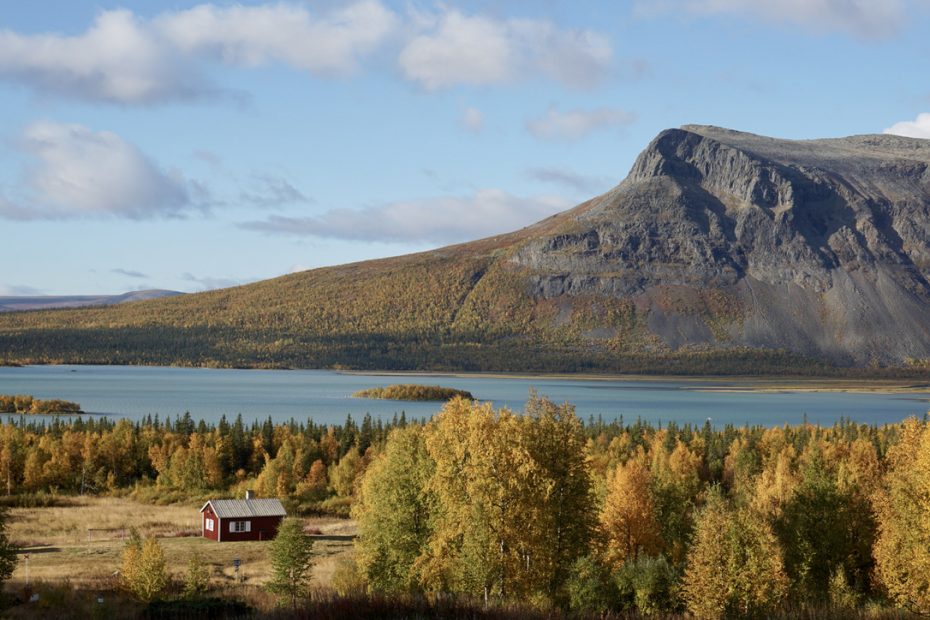
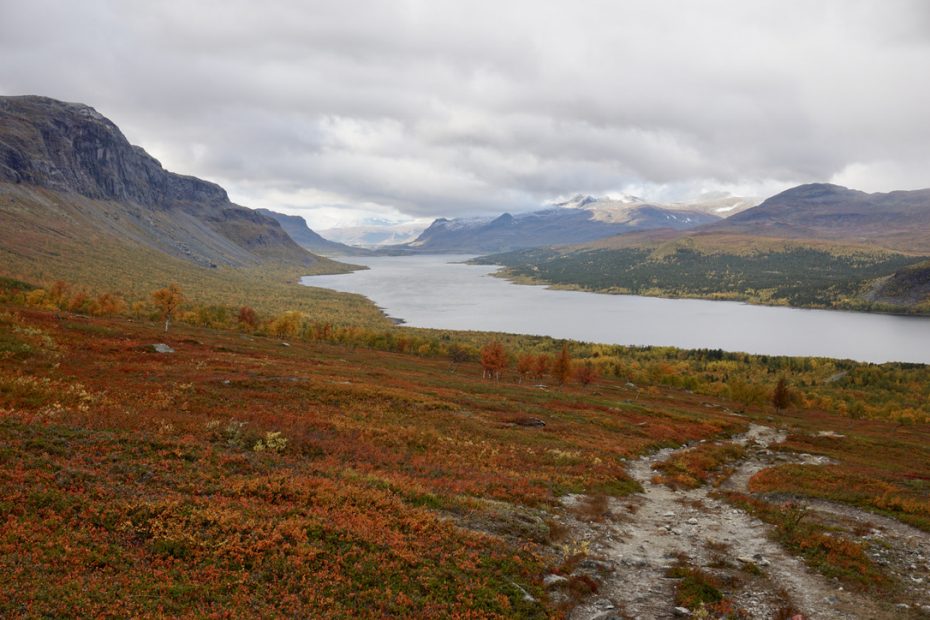
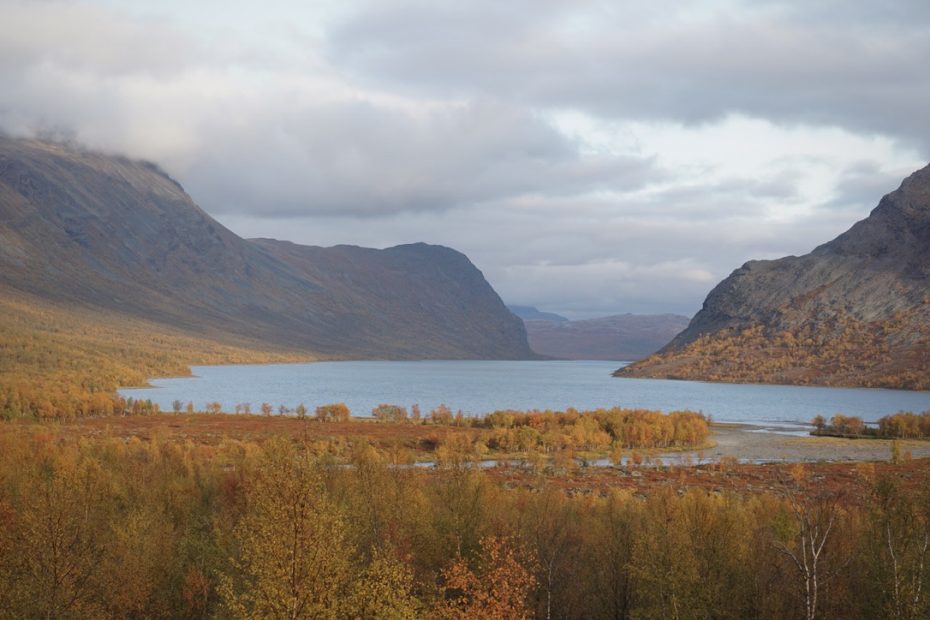
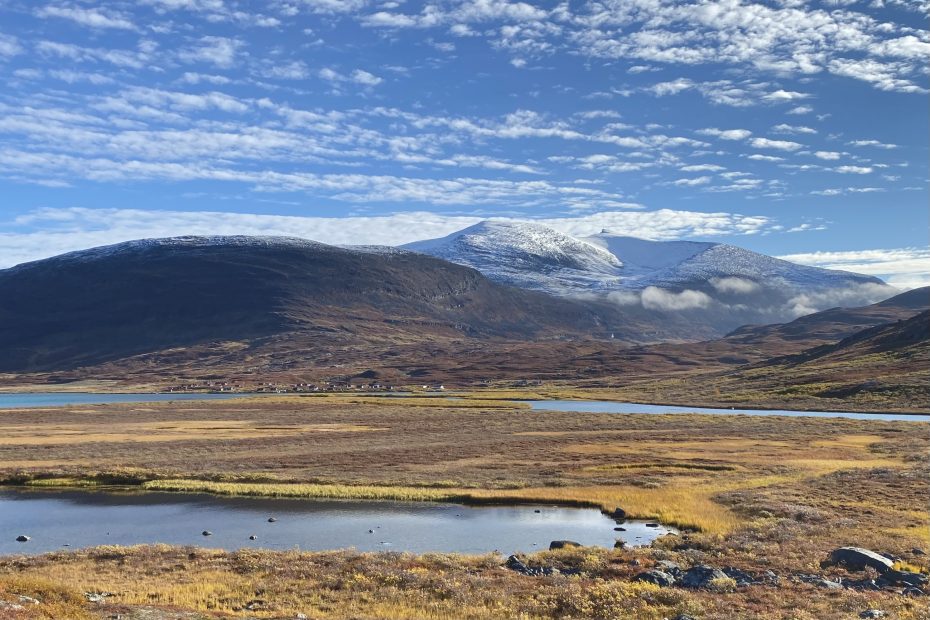
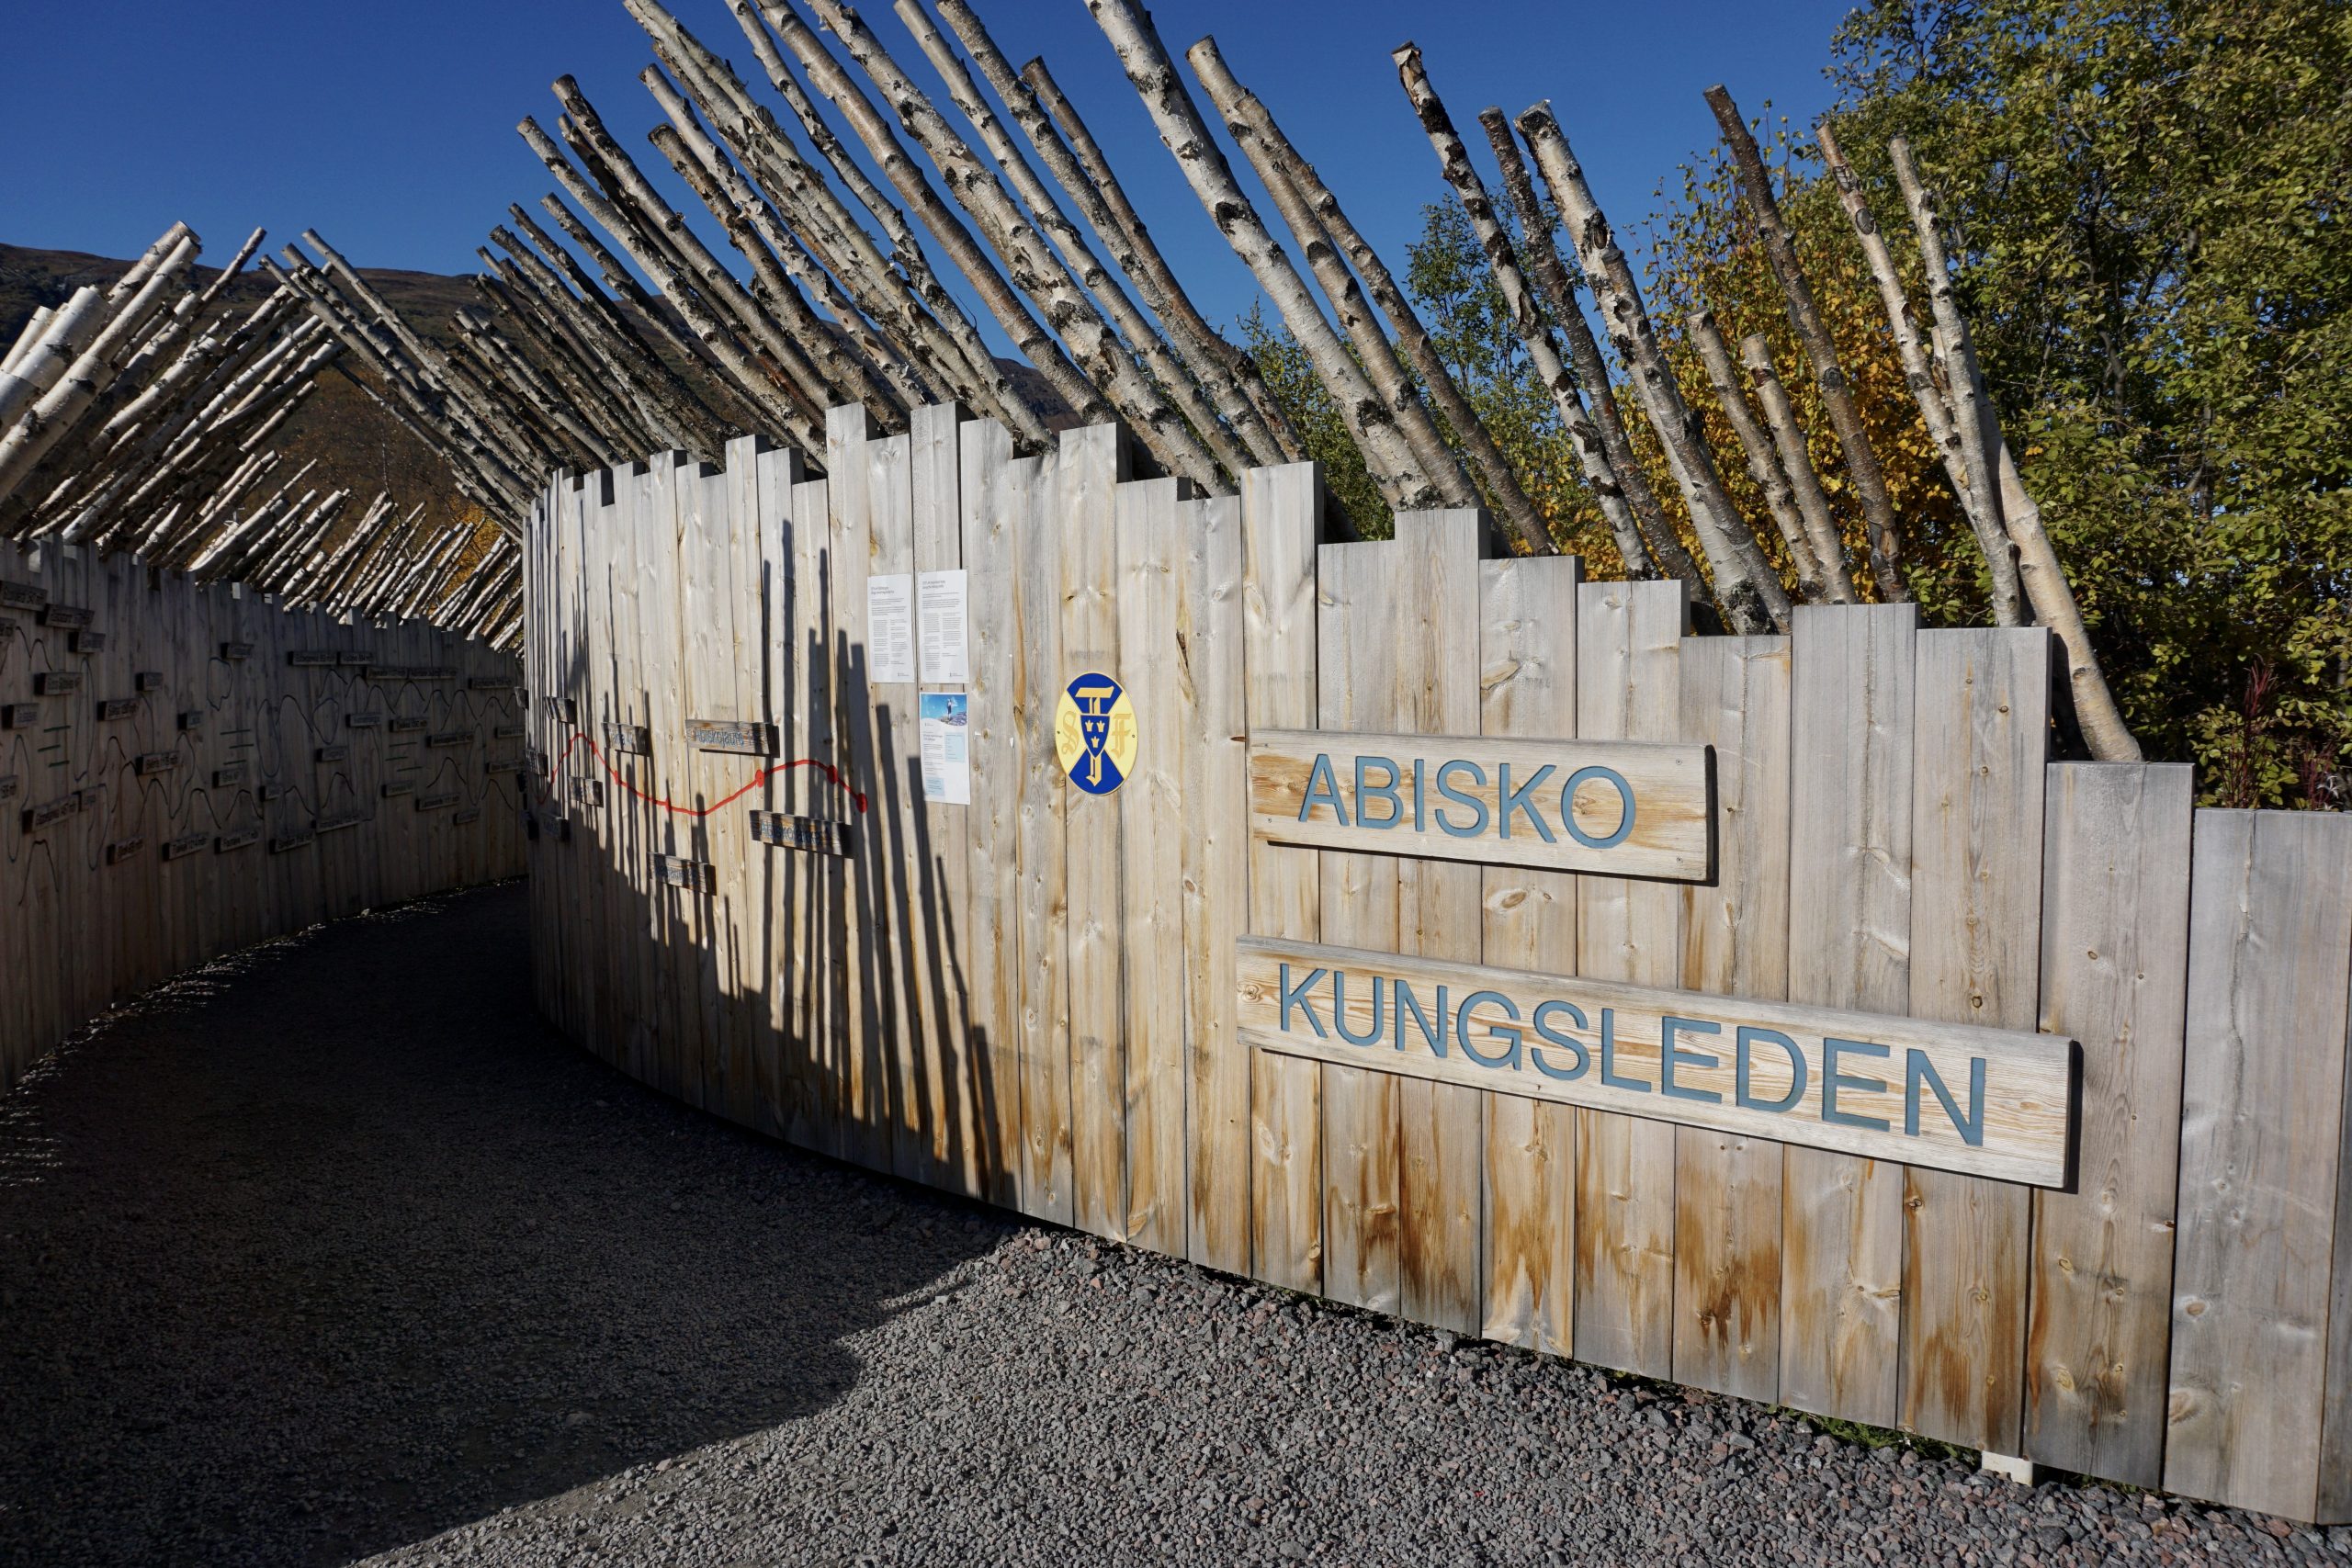
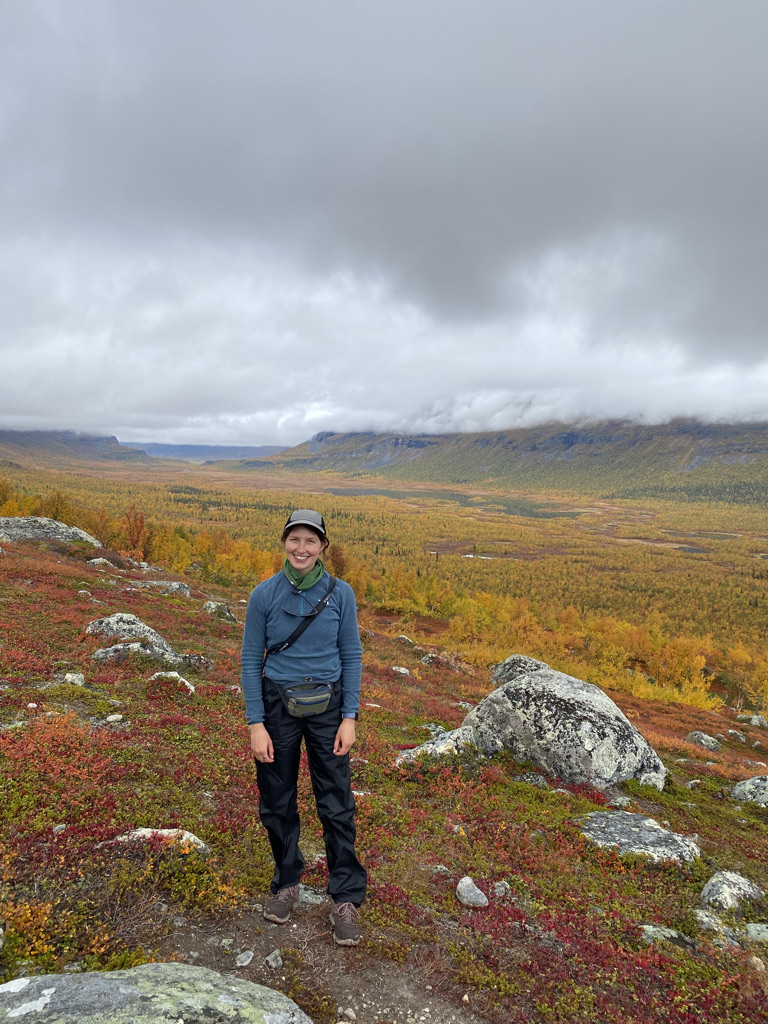
Day 1: Amazing autumn colours

Here I am, in the Arctic Circle! I don’t know if it’s due to my long trip to get here or due to the weather, but I can actually feel it.

That red, again! :)

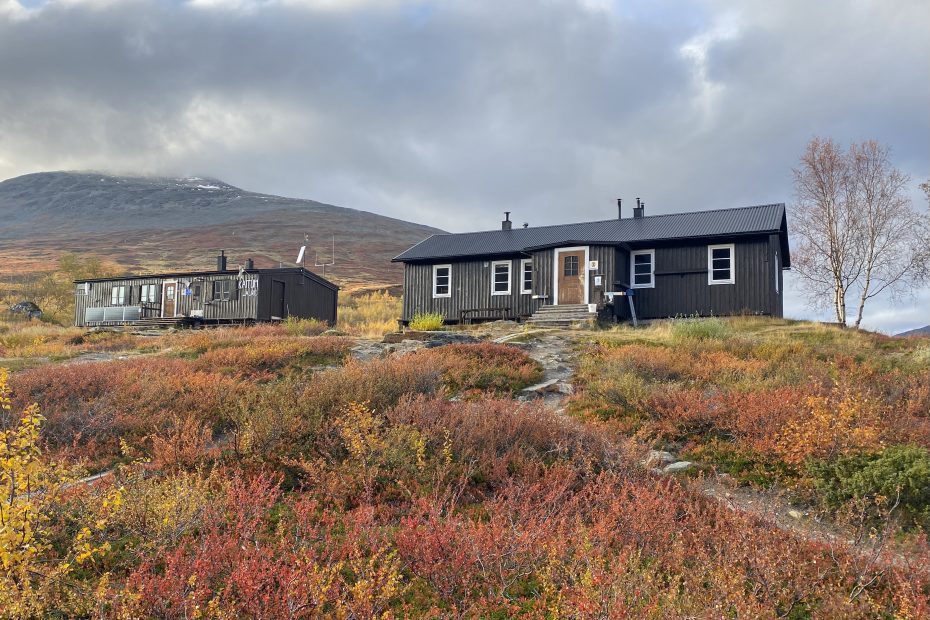
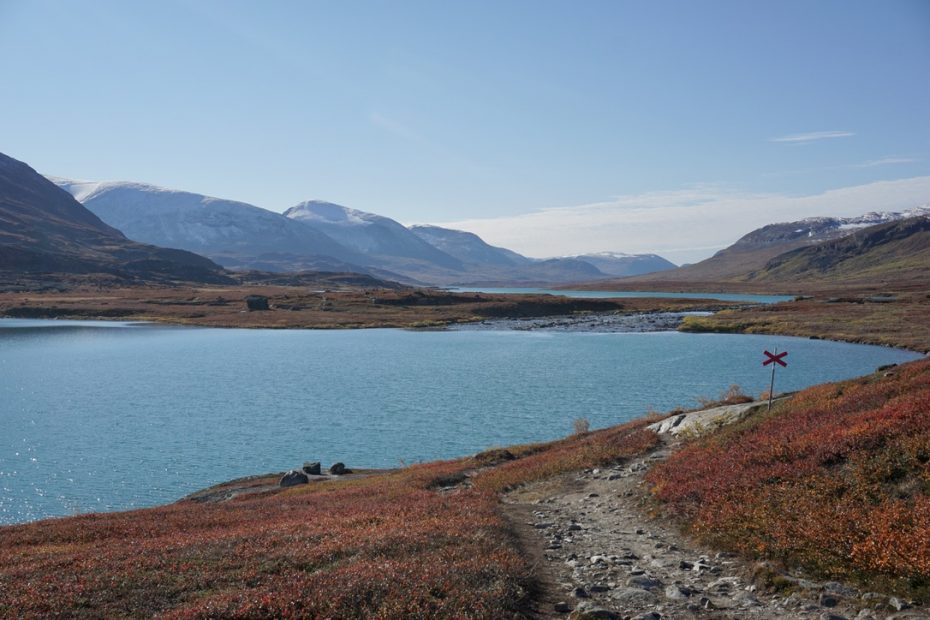
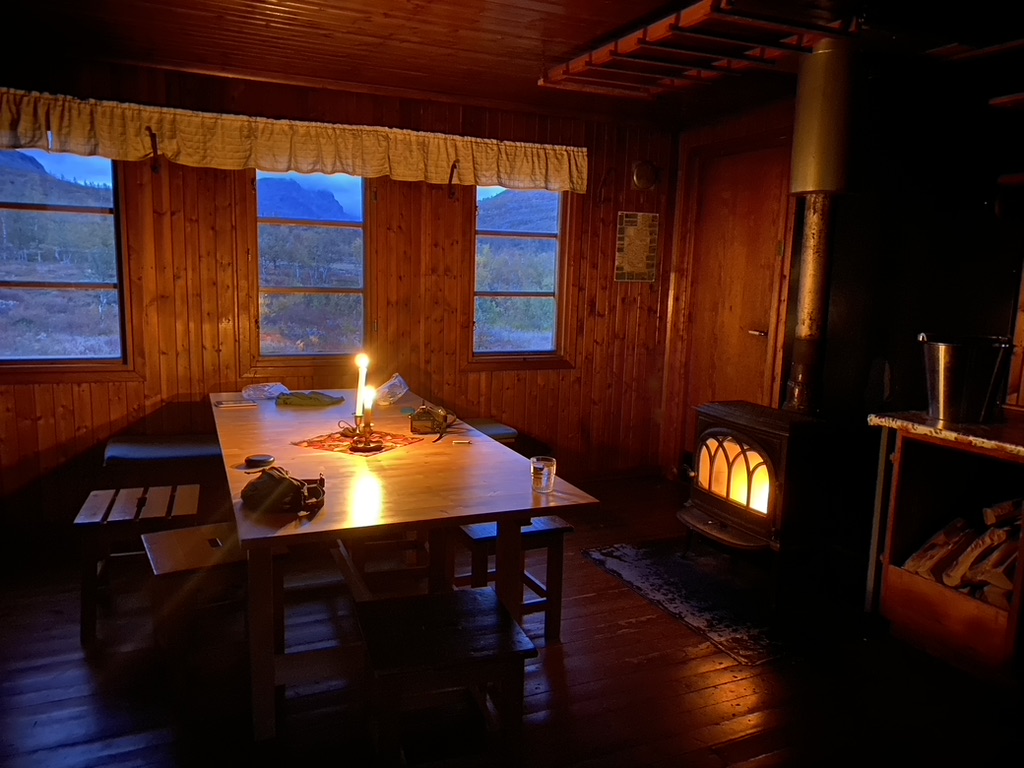
Day 2: Fjällstugas are awesome and the first lake crossing

The hut has no electricity or heating so you need to use candles for light and a wooden stove for warmth. I felt like I’m back in time, in my grandma’s place.

And here it is, Skierffe at its finest

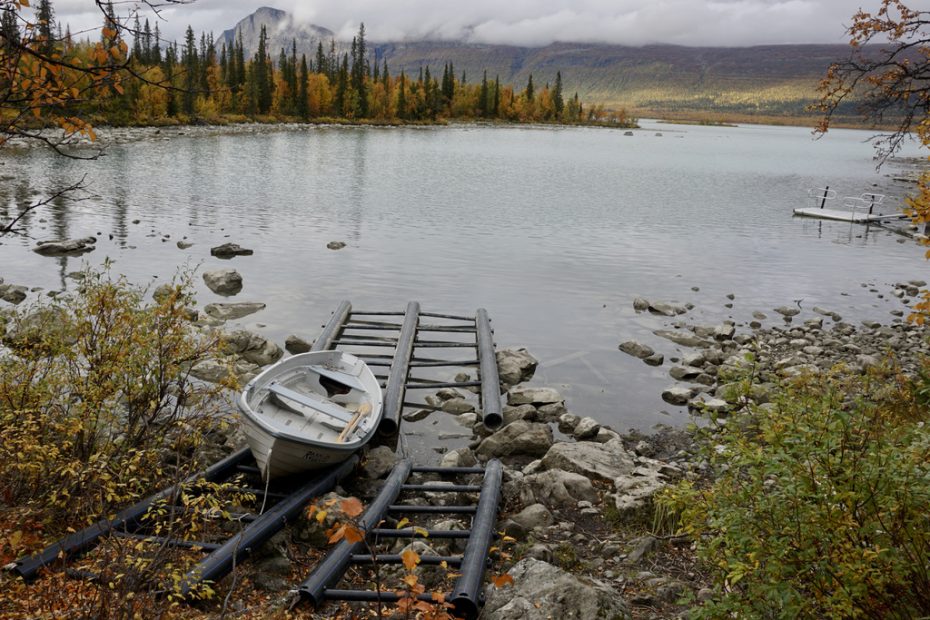
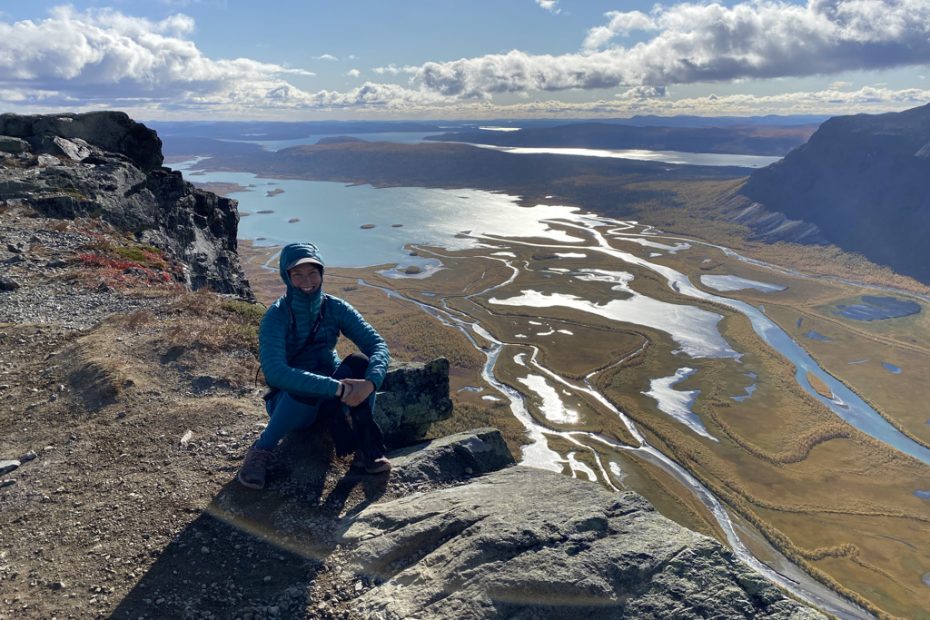
Day 3: Summitting Skierffe & will the boat come?

As the weather was supposed to be good, everyone in the hut was planning to summit Skierffe, which promised epic views from the top. I was no exception.

Kungsleden day 4

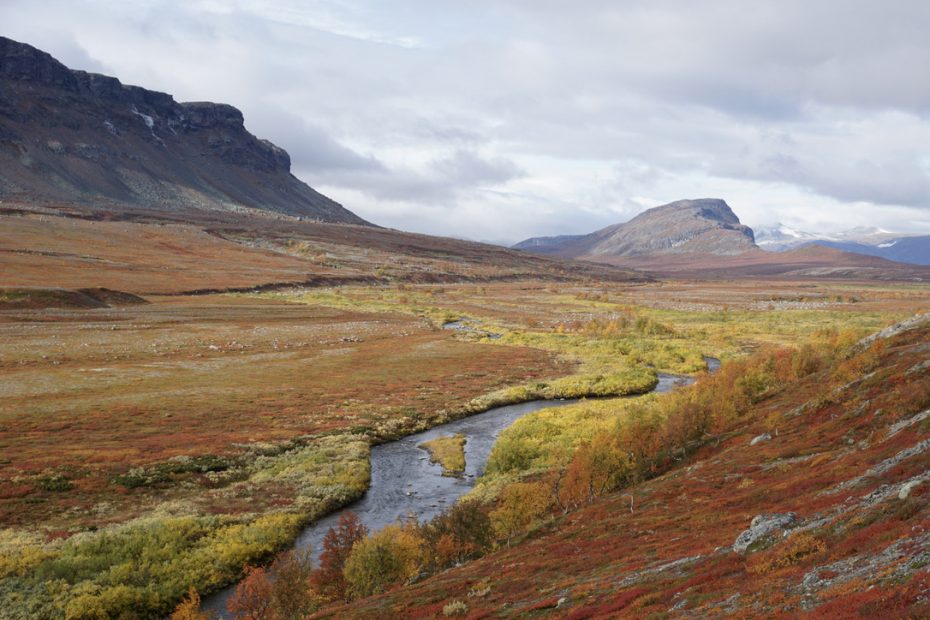
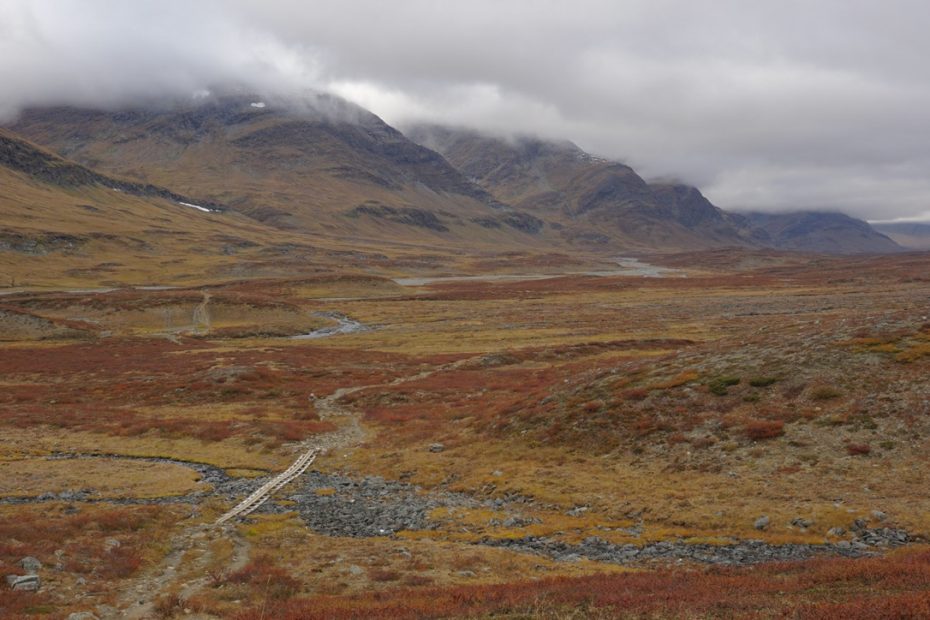
Day 4: Walking towards a warm bed and a shower

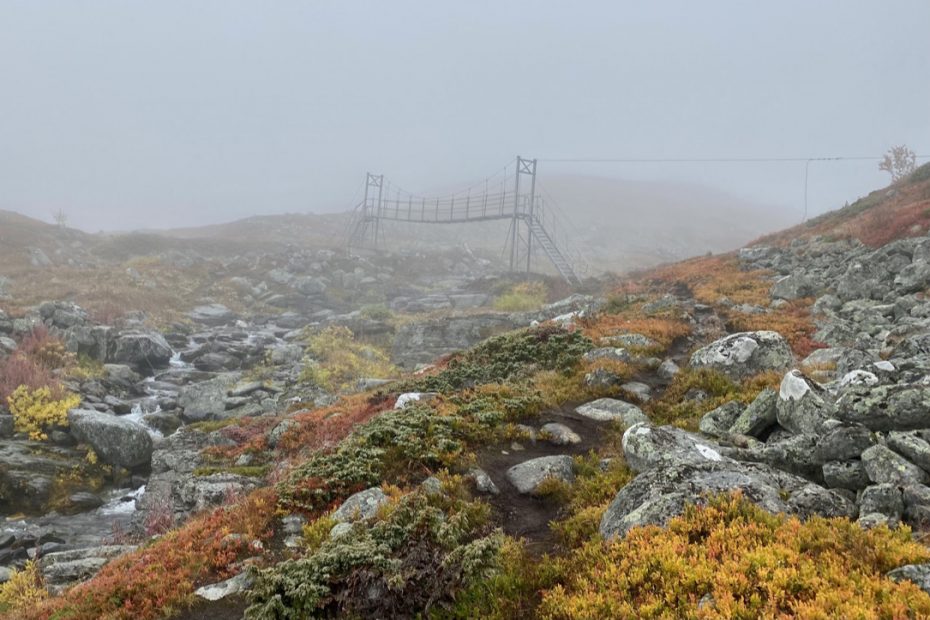
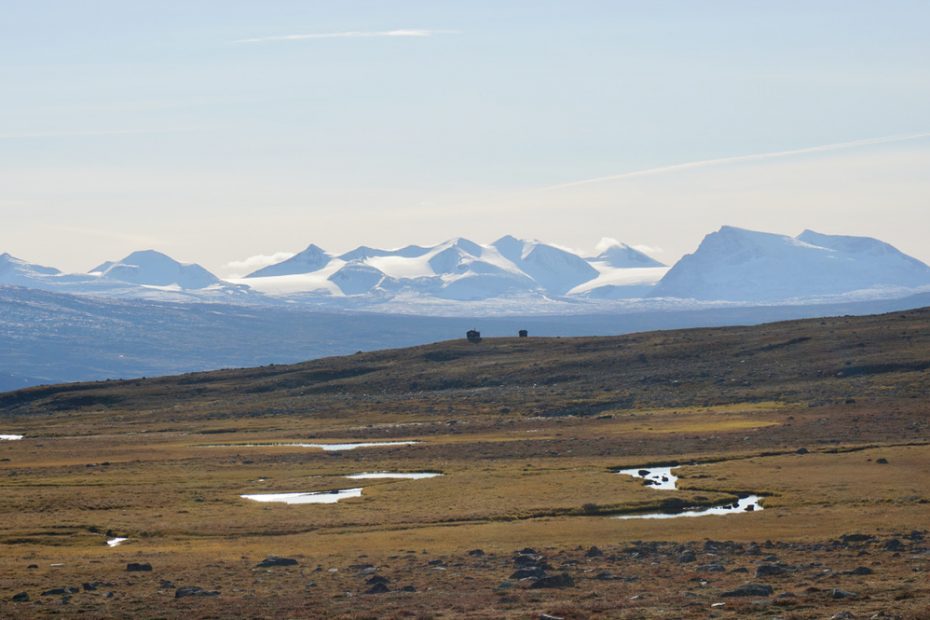
The day looked rather grim with overcast skies and rain clouds in the distance, but hey, it’s dry here! As I walked through a bare plateau, my main enemy was the wind. That bloody wind.

Kungsleden day 5

Day 5: Hitchhiking for the first time and a perfect day for hiking

The whole morning I was wondering what to do. It felt such a shame to lose a perfect weather day to waiting for a bus. Then during breakfast, I met another solo hiker, a girl from France.

At the lake

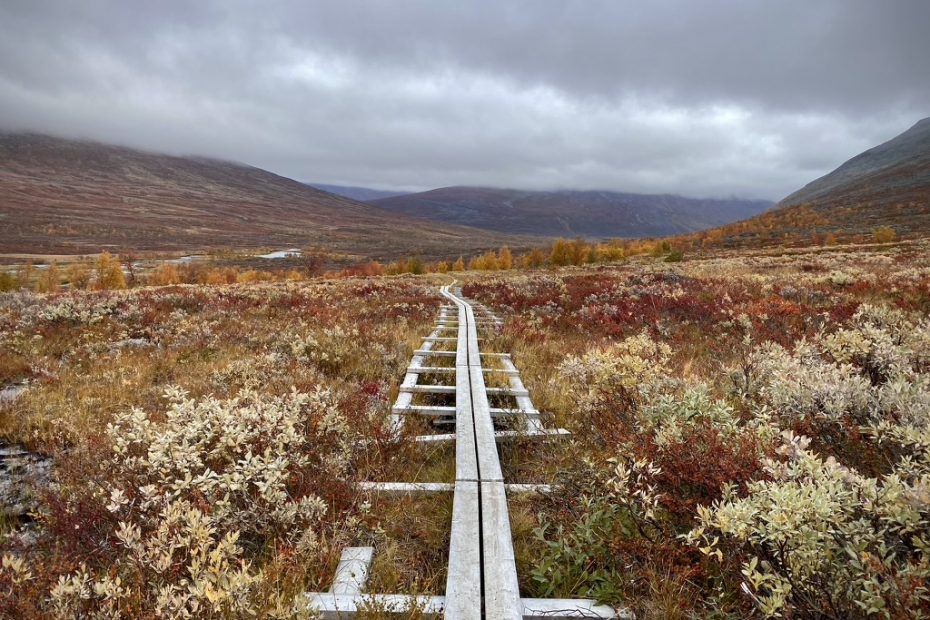
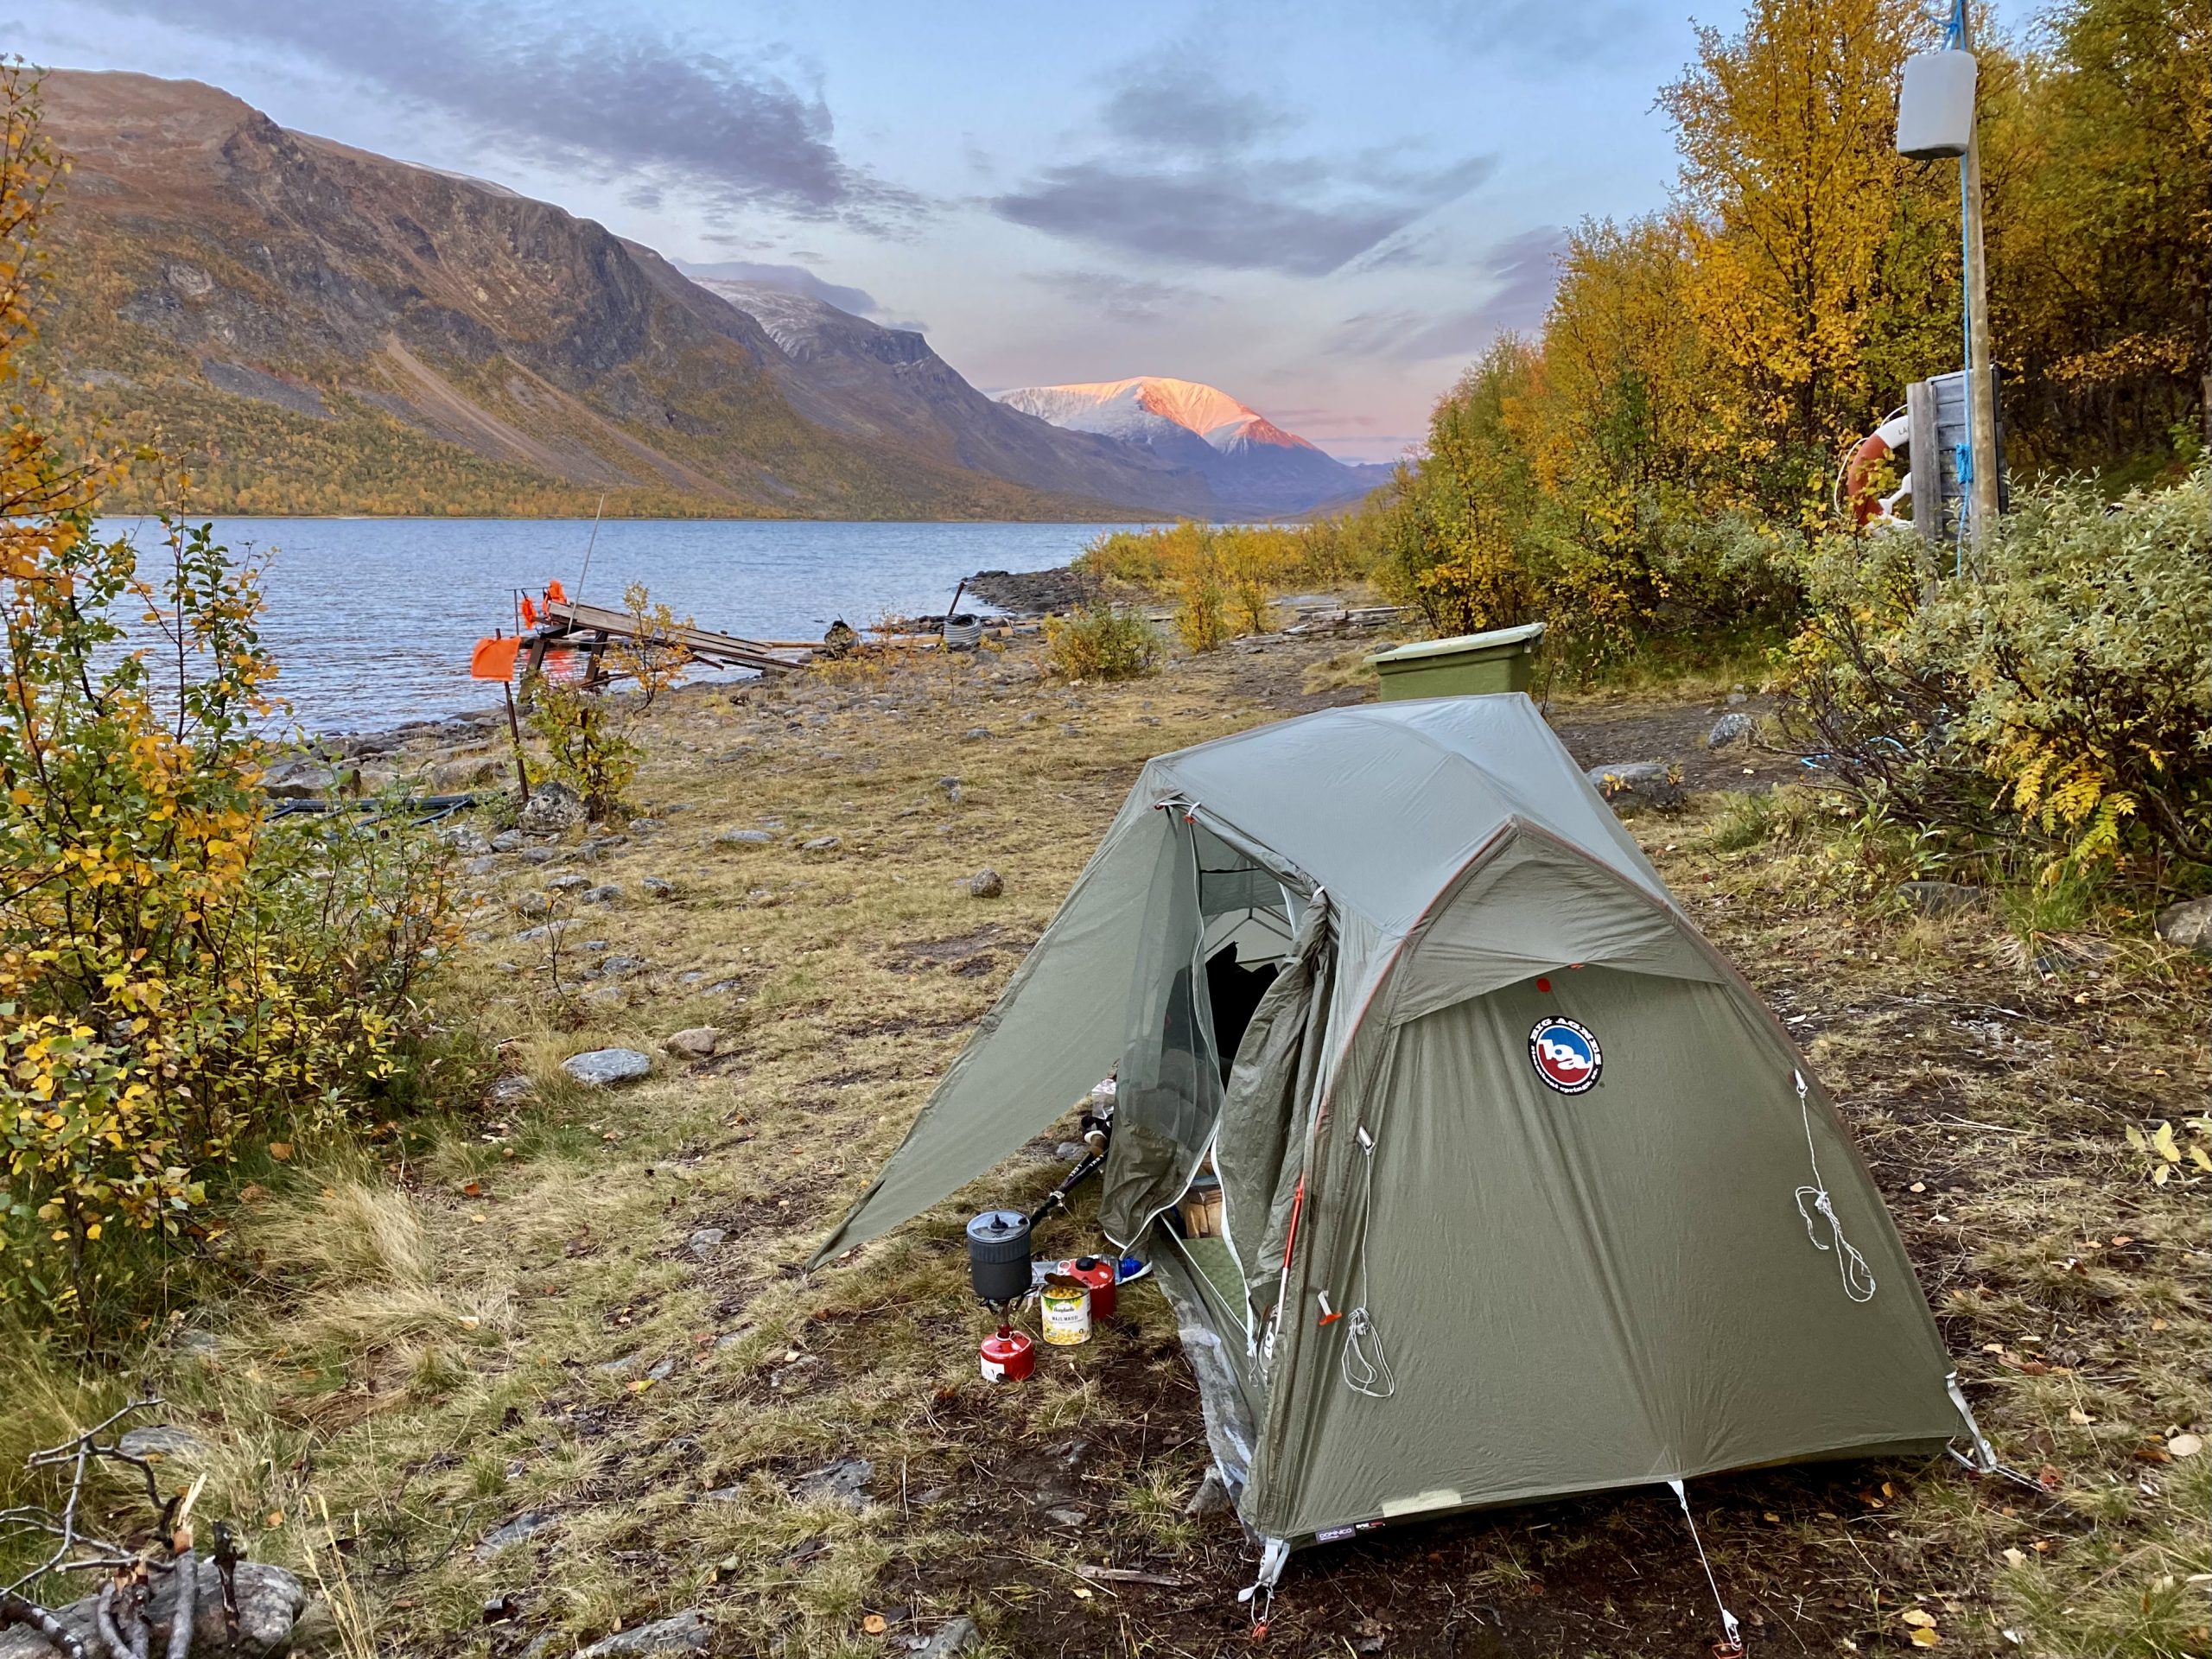
Day 6: Not feeling like hiking

The original plan of today was to reach Singi, which was 21km from Sitojaure. However, plans are meant to be broken and I ended up staying in Kaitumjaure Fjällstuga, hiking a mere 9km.

Kungsleden day 7

Day 7: Entering the highway of Kungsleden. Or is it that busy?…

Singi marks a new stage on Kungsleden as from here the trail should be much more crowded. Singi is a turning point for many hikers who want to climb the tallest peak of Sweden, Kebnekaise (2098m).

Kungsleden day 8

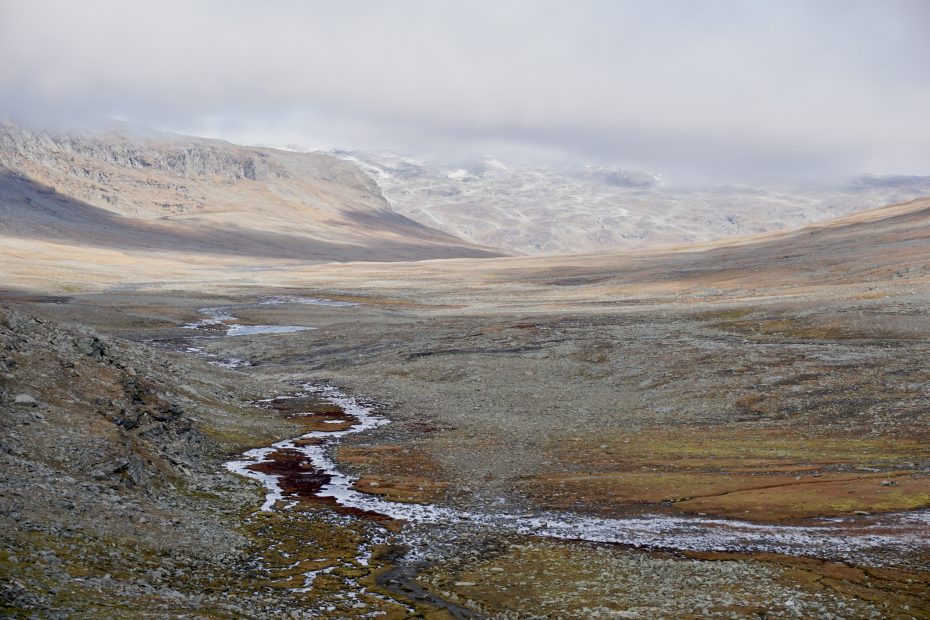
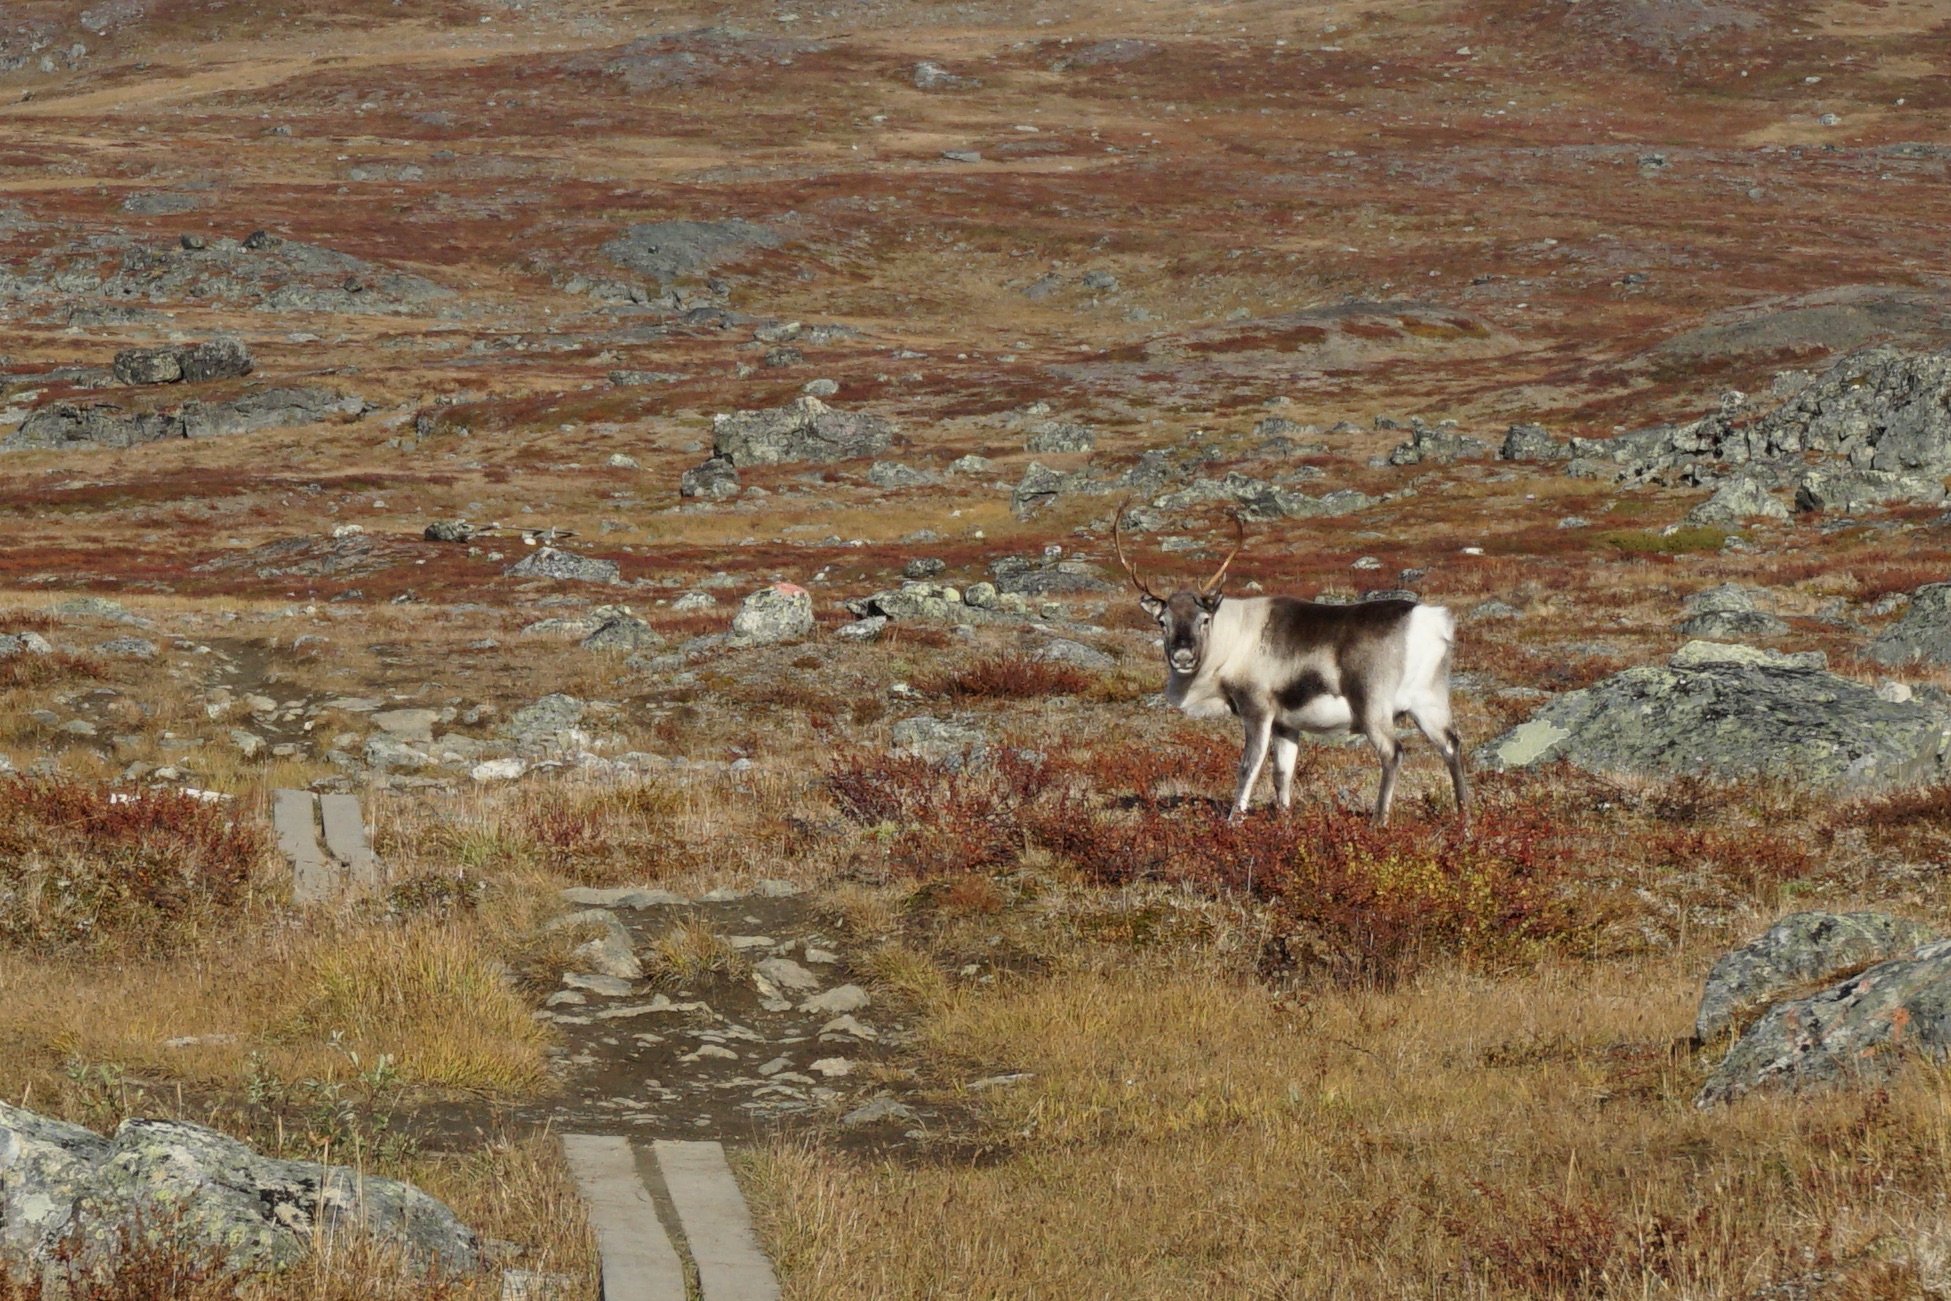
Day 8: Crossing the highest pass and reindeer bonanza

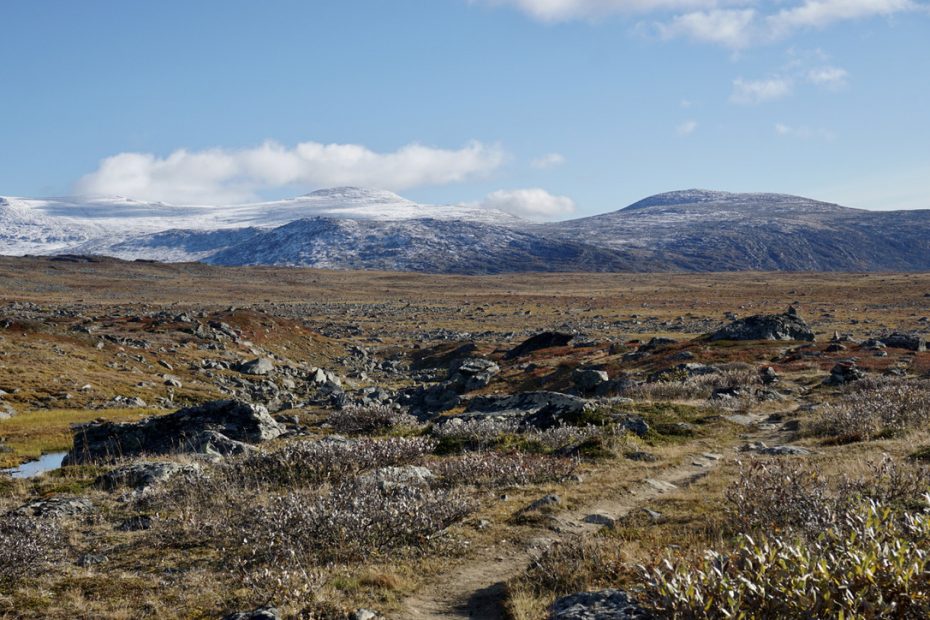
Today I’m crossing the highest point on Kungsleden – Tjäkta pass (1150m). While elevation is not necessarily a challenge on this trip, this was by far the coldest pass I crossed in the whole year.

Kungsleden day 9

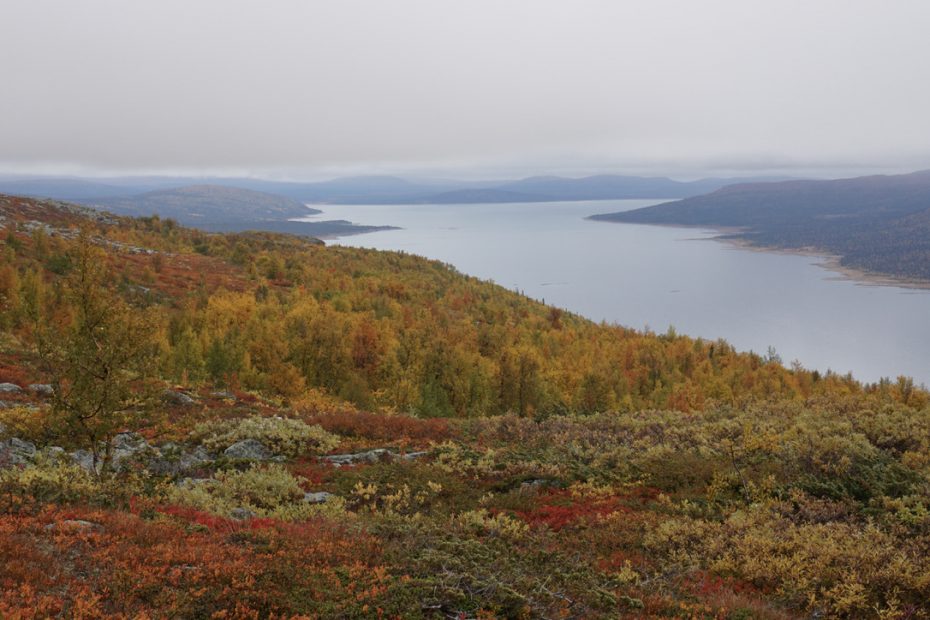
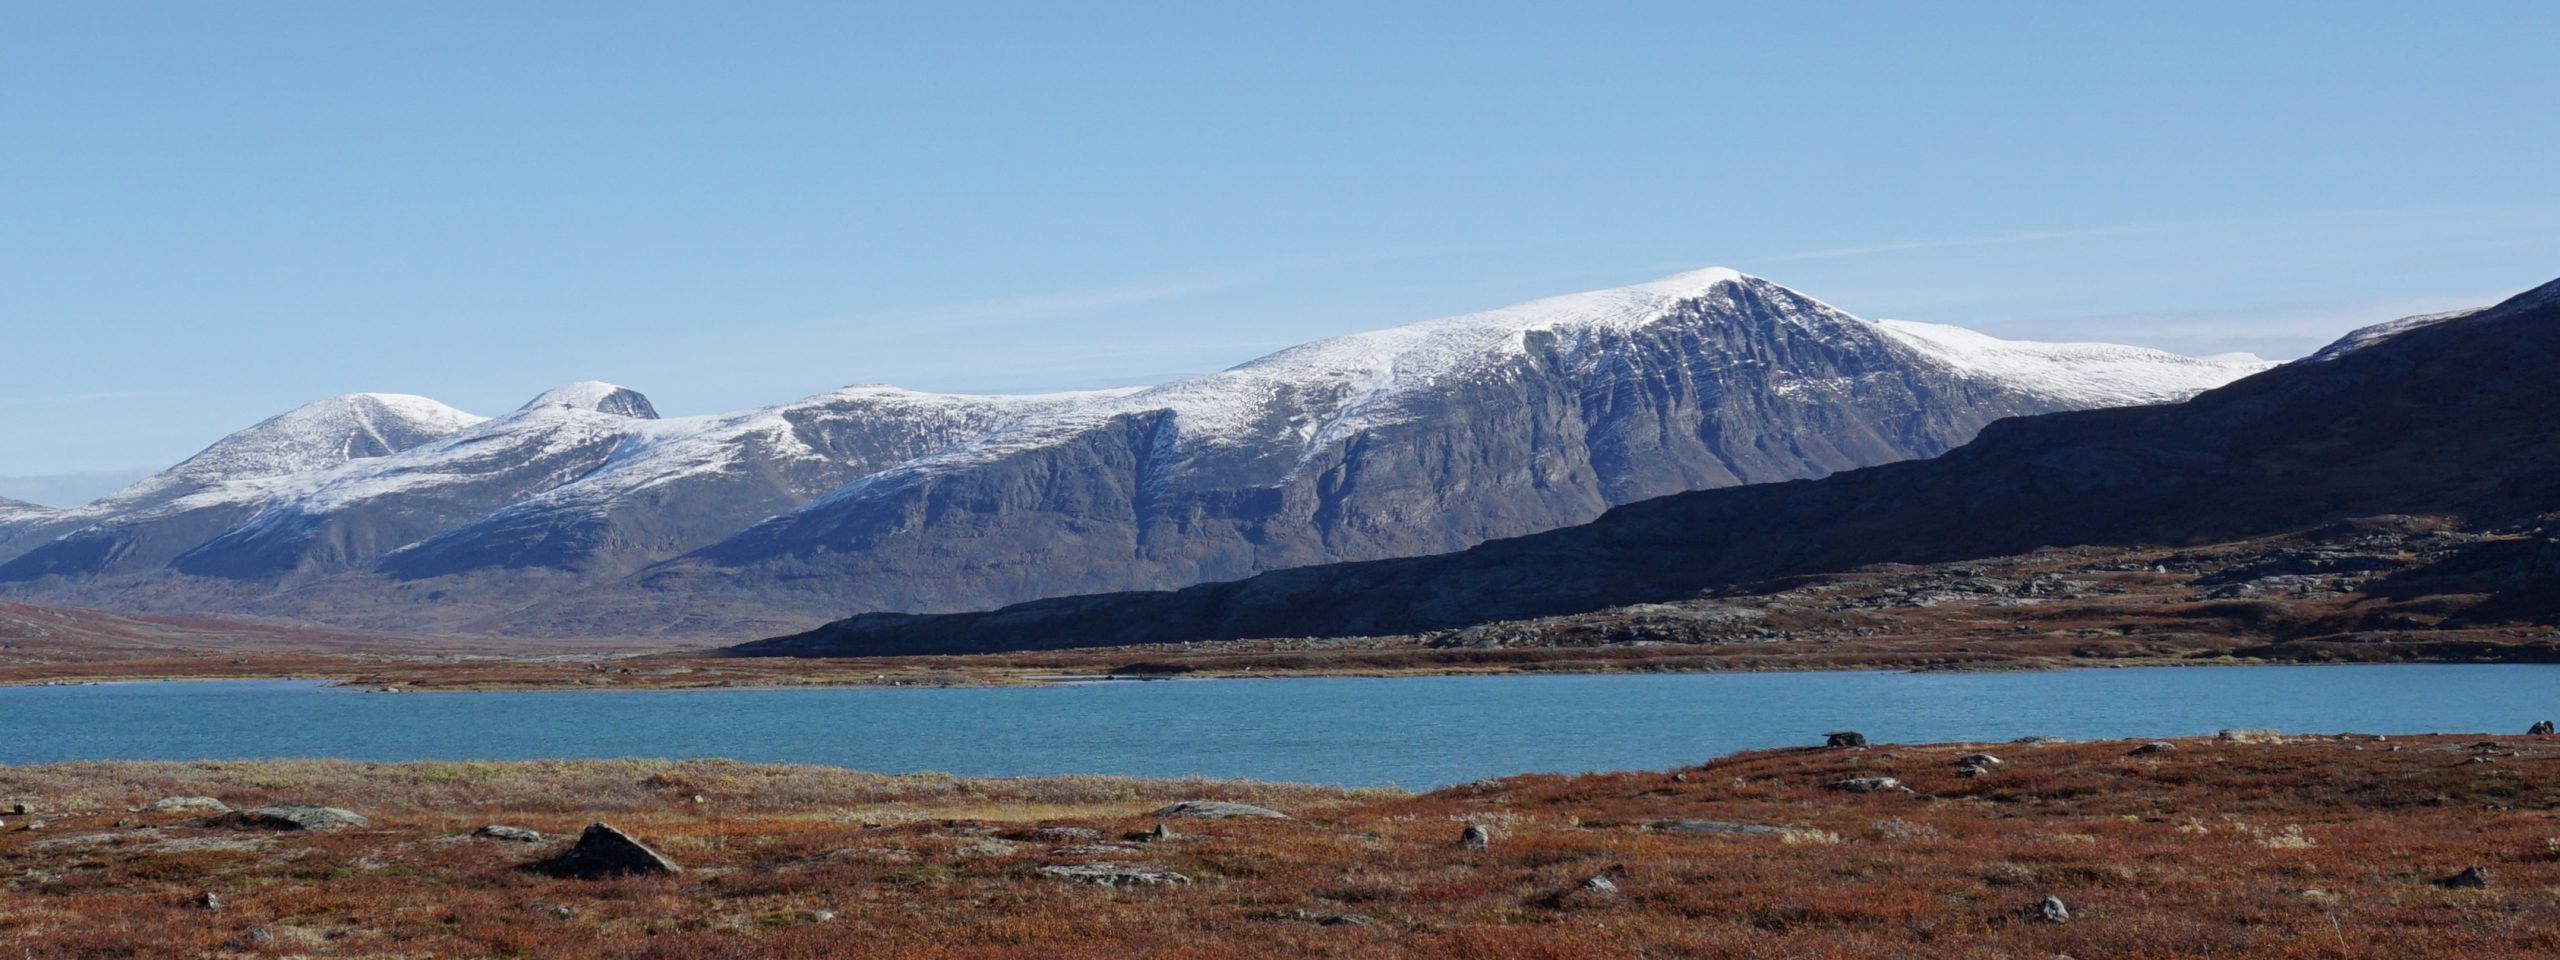
Day 9: The views keep on surprising me, what a treat!

Although the night sucked, today looked very promising. I woke up to blue skies and even a hint of the sun! From Alesjaure I bid my farewell to the landscapes I came from yesterday.

Little Abisko surrounded by spectacular landscapes

Day 10: Between love and hate on my last day of the hike

The whole night I tried to keep myself warm but to no success. I would wake up every 1-2 hours thinking how I wish the night was over. I didn’t care about sleep anymore, I just wanted to get away from the cold.

For those who prefer video material, here’s a short movie I made about hiking the the Kungsleden in September. How does the landscape look like, how is the weather (I was told that I had an exceptionally good one though!), how is the trail – you’ll find the impressions in this video. Enjoy!

Photos