When many people are forced into a survival situation one of the last things to cross their mind is the need for shelter. Hope of finding their way back to civilization or of satisfying the need for food and water typically trump the thought of one of our basic necessities. You can survive up to 3 days without water, and up to 3 weeks without food, but only 3 hours without shelter in harsh conditions.
In a perfect survival situation you’d have some sort of tent or a tarp to keep you covered. If you find yourself in a survival situation without cloth for shelter, Not all survival situations are perfect knowing what to do for shelter is essential.
Without shelter you’ll be battling the elements head-on and will be dealing with heat loss at a rapid rate.
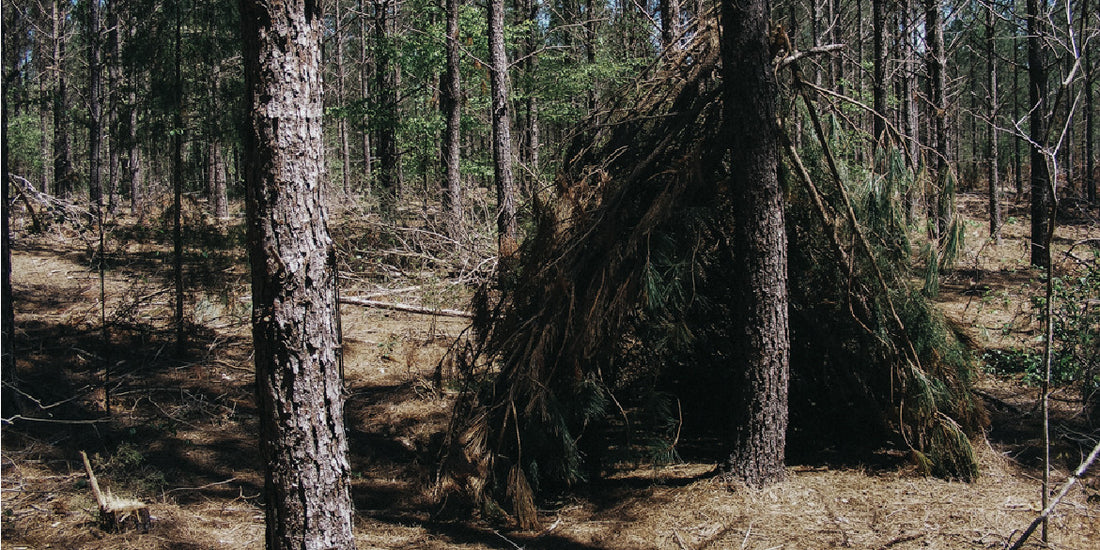
Now, there are many different types of shelters you can build, depending on your location and the resources around you. But the one survival shelter that’s the most universal is the Debris Hut. It can be quickly built out of almost anything in almost any environment and doesn’t require tools.

The key to an effective Debris Hut is preventing body heat from escaping. Body heat can be lost through contact with wind, snow, rain, and even the ground. A solid Debris Hut will therefore act similar to a bivouac: it buffetts your body from the elements and potential ground heatsinks. In short, it insulates you with debris with sticks for structure.
How to Construct a Debris Shelter
- Pick a spot with a lot of debris around you. This is your building material. You’re looking for things like sticks, moss, leaves, and other debris that’s away from the threat of falling trees and/or limbs.
- Find a sturdy pole about 8 feet long and prop it up on a stump or in the crook of a tree. The pole should be able to support your weight (or about 175 lbs). When you lay down underneath it you should be very cozy with just 6 inches between your body and the debris you’re going to pile around the pole.
- Lean shorter sticks along the main pole and leave room for a small doorway. These shorter sticks are called the ribs and will act as the structure for your Debris Hut.
- Take even smaller sticks and lay those on the ribs. These sticks keep all the debris from falling on you.
- Pile heaping amounts of debris on top and make a bed inside. All the debris is going to keep your Debris Hut insulated and prevent you from losing all your body heat. Make sure you pile the softest, driest debris on the inside and closest to your body. When all’s said and done, you should have at least 3 feet of debris piled on top and on all sides of your shelter.
- Find extra sticks to pile on top of the debris on the outside of your shelter to keep your insulation from blowing away with the wind.
- For more protection from the elements you can stuff a shirt or a clothing item full of leaves to plug up the entryway and create a door. Otherwise, plug the entryway with a debris bundle tied with pliant sticks or even just loose debris.


0 Comments