Creating an Andy Warhol Photocopy and Screen Printing Real Effects with Photoshop
Get inspired with this Photoshop tutorial on the work of Pop-Art genius and learn how to Creating a Real Andy Warhol Effect in Photoshop of Photocopy and Screen Printing from an image. Watch the video tutorial Creating an Andy Warhol Photocopy and Screen Printing Real Effects with Photoshop.
Resources


Viewing references to Andy Warhol’s work
Use the links to download the images used in this tutorial for free.
Let’s see some pieces of the work of Andy Warhol, analyse the texture of the photocopy and the screen-printing. In the one of Liz Taylor you can see the screen-printing dots.
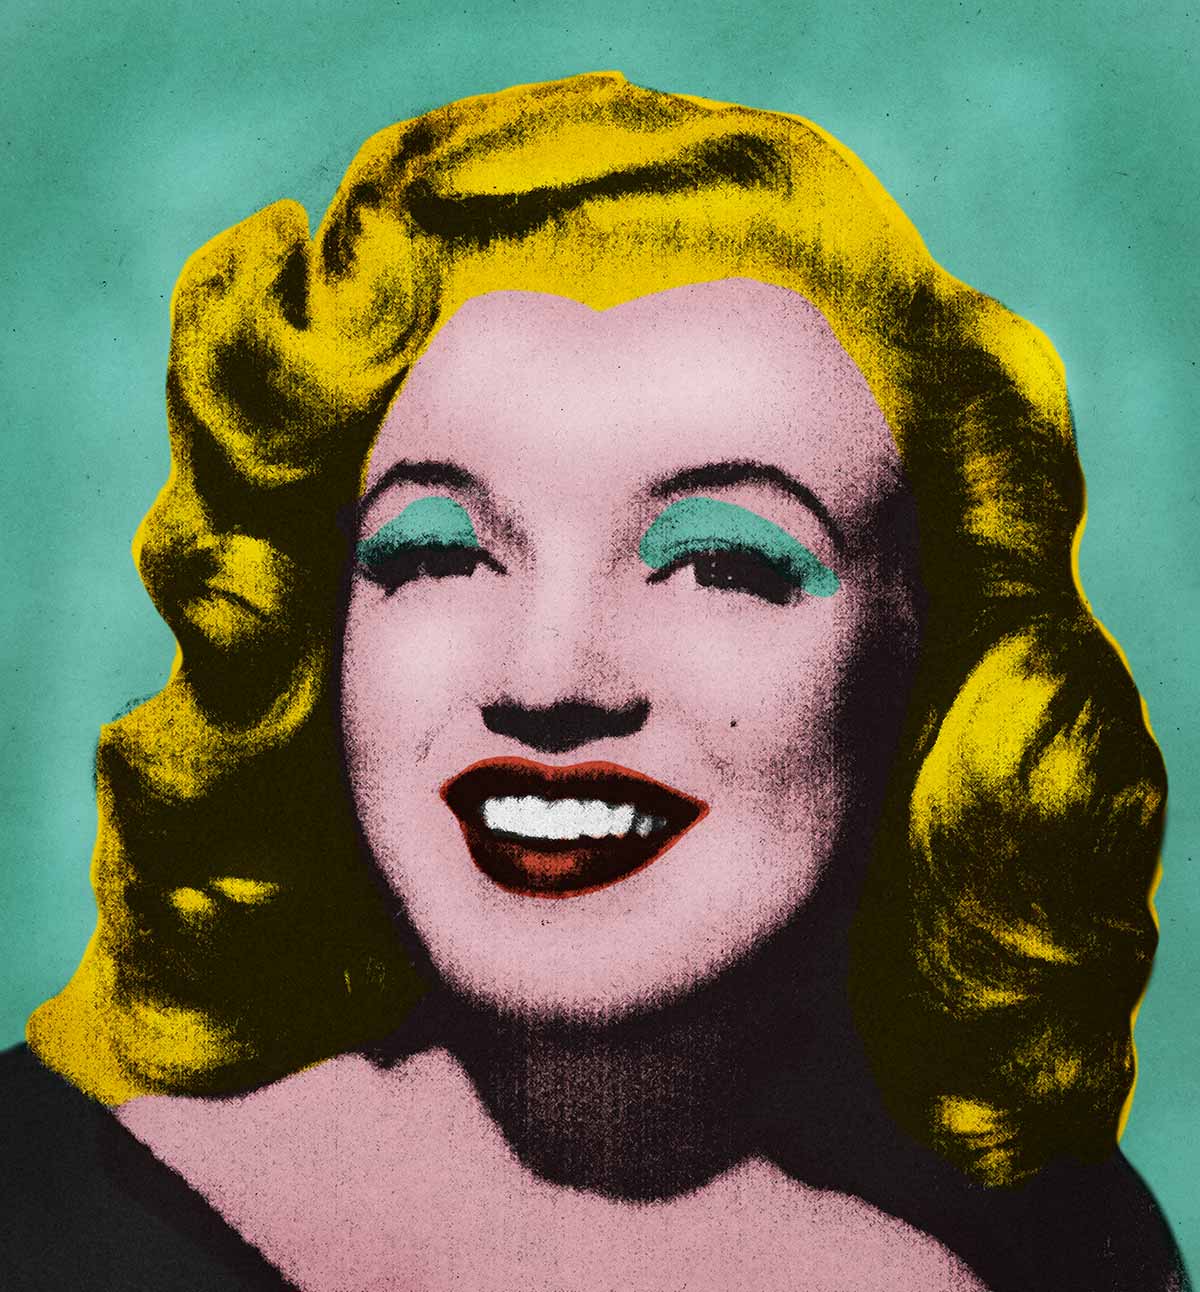
This piece of Marilyn Monroe is the one that we are going to recreate. We will recreate the photocopy texture and the worn copy effect so characteristically found in the work of this Pop-Art genius.
A couple of pieces of Mick Jagger, where the screen-printing dot is also present.
Drag all the images to the Photoshop workspace to open them.
Looking more closely at the effects that we are going to recreate, here in this Mick Jagger piece and enlarge the image to 100% appreciate the aspects of the print …
Lets use this Marilyn Monroe in this tutorial …
Here the effect repeated …
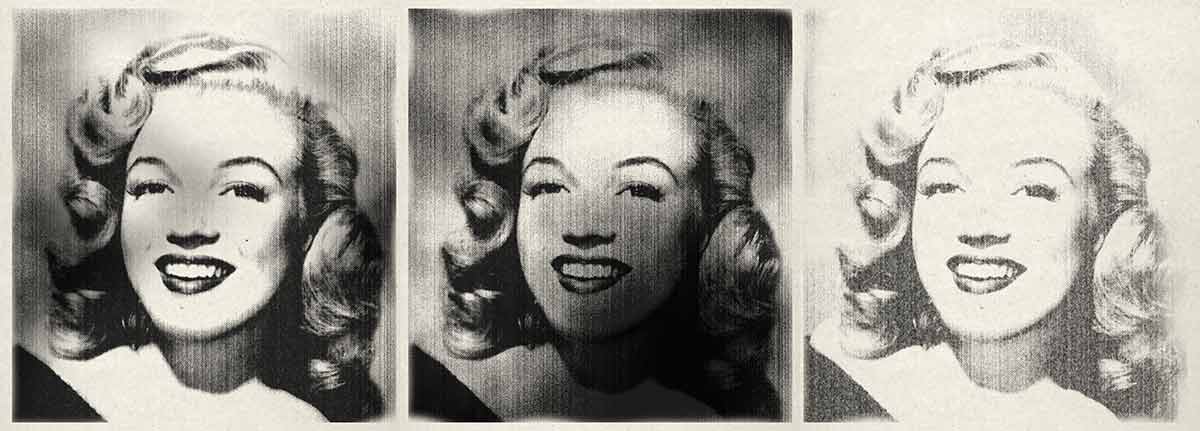
This other of Marilyn Monroe is the one we are going to use as a reference to create the photocopy effect.
In this one by Liz, we can also appreciate the aspects of the print …
Close the images leaving only the ones that we are going to use …
The Photocopy Andy Warhol Effect in Photoshop
Start with the image of the paper, rotate it 90º from the menu Image> Image Rotation> 90º Clockwise.
Go to Image> Image Size reduce the image to 3,000px wide, leaving the height linked to width and in the check Resample making sure Bicubic Sharper (reduction) is selected.
Add the images of Marilyn, using the Move tool to drag the images to the tab of the paper and releasing them in the centre of the document.
Resize Marilyn in the document, although enlarging the image will reduce the quality, in this particular case it works in our favour, as the aim is to degrade the image quality
With the Crop tool, Crop the Image into square format. In the tool’s Properties leave the Delete Cropped Pixels option checked.
Creating Smart Object and removing the yellowish
Right-click on the name of the photo of Marilyn and Convert to Smart Object, name it MARILYN and naming the reference image as DEMO. Move Demo layer above MARILYN and hide it clicking on the eye icon.
In the Background layer add a Black and White Adjustment Layer, clicking the icon with a black and white circle at the bottom of the layers window. This will remove the yellowish hue from the paper; adjust the yellows and reds a bit, to create a little contrast. Add a Levels Adjustment layer to increase the contrast to show more or less background texture.
Click on the padlock of the Background layer to unlock it and select the Adjustment Layers together with Background create a group and name it BACKGROUND.

Applying Filter to Photocopy Andy Warhol Effect in Photoshop
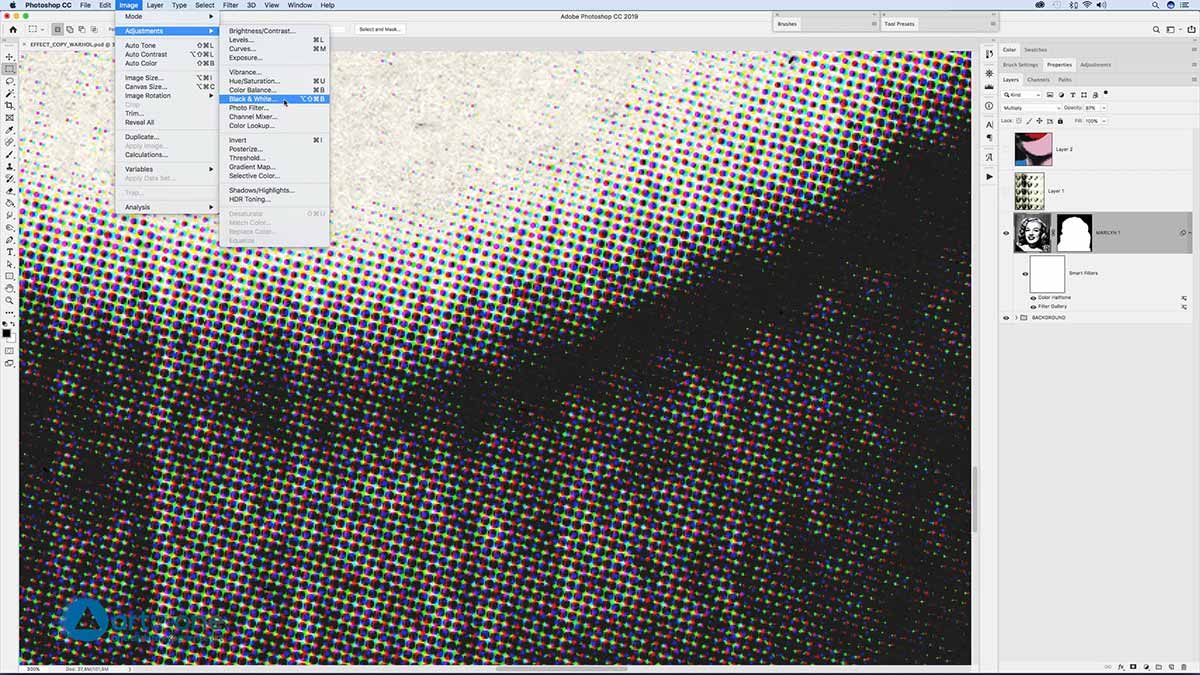
In the MARILYN layer apply Filter> Filter Gallery applying the following effects in order from top to bottom: bearing in mind that as you add filters they appear above the previous filter. Note that positions of filters can be dragged up or down at any point.
Select Distort> Diffuse Glow, adjust it initially; duplicate the filter and apply Sketch> Halftone Pattern and it appears red, it is because the red colour has been selected. When Filter Gallery is applied, especially the Sketch filters make sure the front/background colours have been reset to black and white before applying it. Accept the filter, remove it from the layer and reapply it; the last applied effects automatically reappear in the panel. Now it appears with the effects in black and white.
Duplicate Halftone and apply another Distort> Diffuse Glow and adjust it.
Again duplicate and now apply Texture> Grain adjust the parameters …
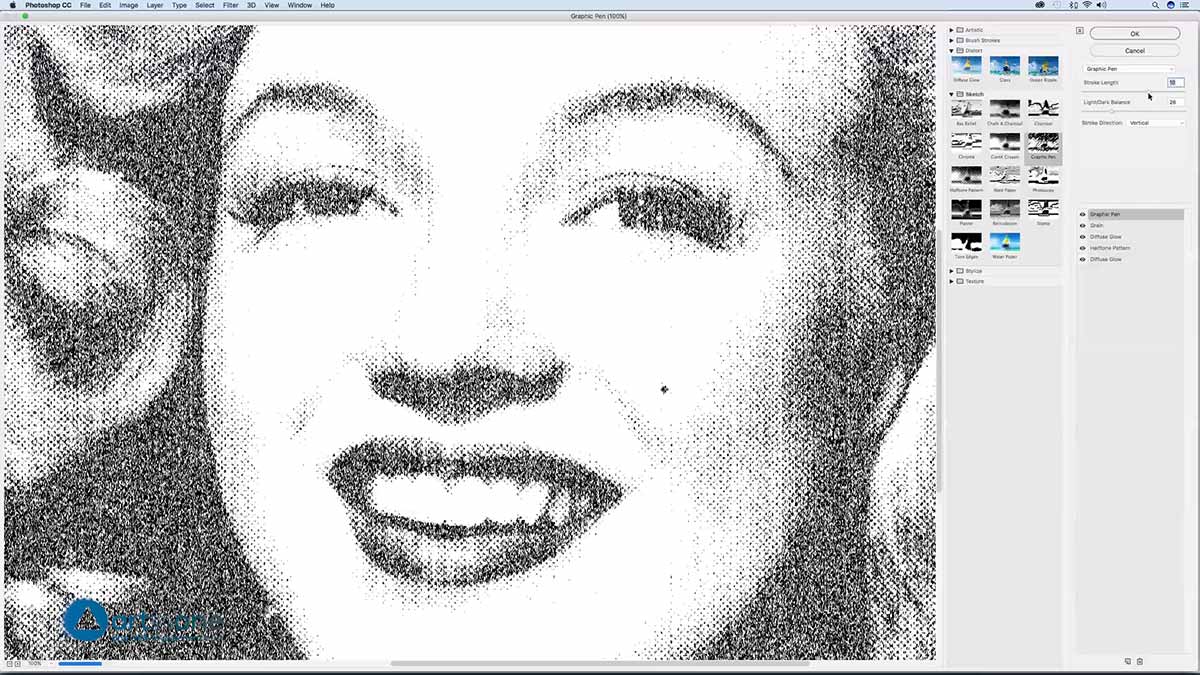
Once again duplicate and apply Sketch> Graphic Pen, adjusting the levels …
Now that there is a good texture base blur it a bit, Duplicate and apply Artistic> Sponge, adjust it with the minimum value of Smoothness. Finish by adjusting the lights and shadows a little more with Grain.
As this last Sponge effect creates a light grey instead of white; go to Image> Adjustments> Levels to adjust the white balance by dragging the black and white sliders at the start of the histogram and from Output Levels reduce the maximum black to 21.
List of Filters and it’s values
1 – Sketch> Torn Edges (Image Balance: 41, Smoothness: 11, Contrast: 1).
2 – Artistic> Sponge (Brush Size. 0, Definition: 0, Smoothness: 0).
3 – Sketch> Graphic Pen (Stroke Length: 3, Light/dark Balance: 60, Stroke Direction: Vertical).
4 – Texture> Grain (Intensity: 20, Contrast: 25, grain Type: Horizontal).
5 – Distort> Diffuse Glow (Graininess: 8, Glow Amount: 2, Clear Amount: 18).
6 – Sketch> Halftone Pattern (Size: 2, Contrast: 1, Pattern Type: Dot).
7 – Distort> Diffuse Glow (Graininess: 10, Glow Amount: 3, Clear Amount: 14).

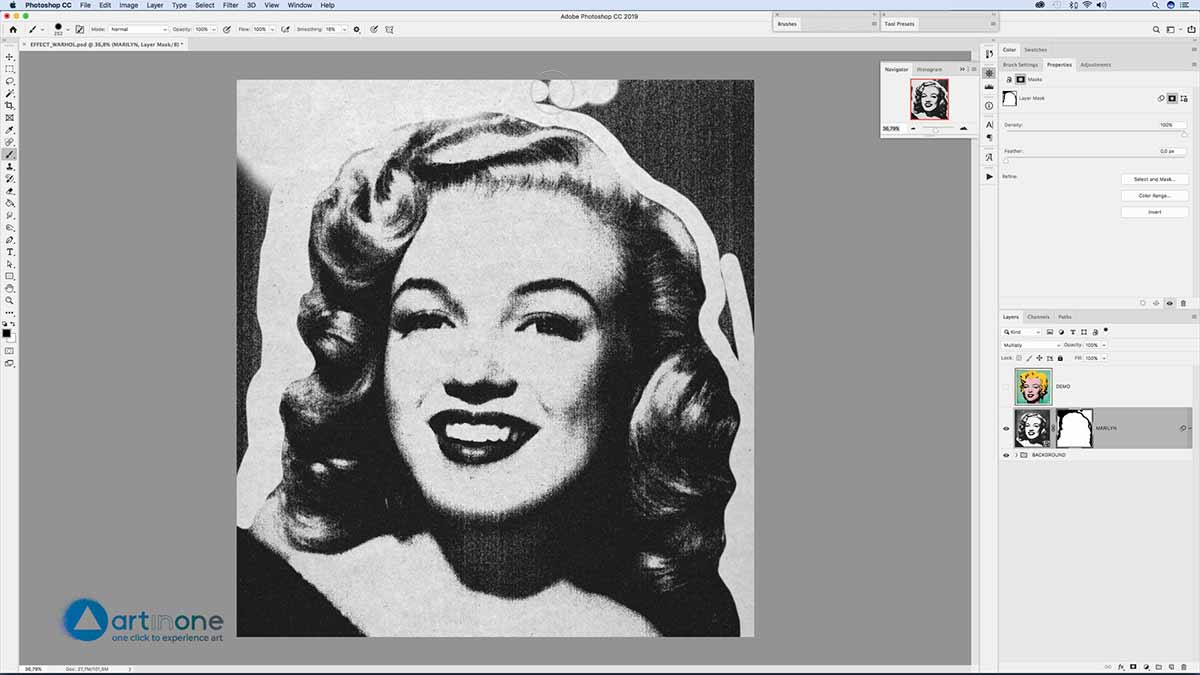
Hiding parts of the texture painting with Black in the Mask
Create the Mask using a black brush around the silhouette of Marilyn, to adjust the diameter of the brush use the slider in brush options or with the keyboard holding down the Ctrl + Alt keys click and drag horizontally adjusting brush width and vertically for hardness. Apply about 20% to the brush in the Smoothing Property so the stroke is smoother and more rounded.
If you spend painting press the X with this keyboard shortcut the background color is reversed by front, as also pressed key D, it have black and white by default.
Coloring Marilyn
Create a New Layer, name it COLOR and blend it in Multiply Mode, unhide the DEMO layer and with the Eyedropper tool select the colour of the face, pressing X switches foreground and background colours take a sample of the hair colour. Hiding the Demo layer paint the Colour layer alternating colours by pressing X. Now load and paint the green colour of the background.
An interesting option to catch the colors of a specific layer, is to Alt + click on the eye of the layer, so only this layer is displayed and then it is important not to click on the eye of another layer if you want to return to the same layer sequence of displayed layers with Alt + click again on the visible layer.
Load the red colour of the lips, colour them in as tip load the skin colour as a background colour, use it to erase and recover as you paint in the lips.
Now paint in the eye blush. As above keep skin colour as a background colour in case you need to make corrections

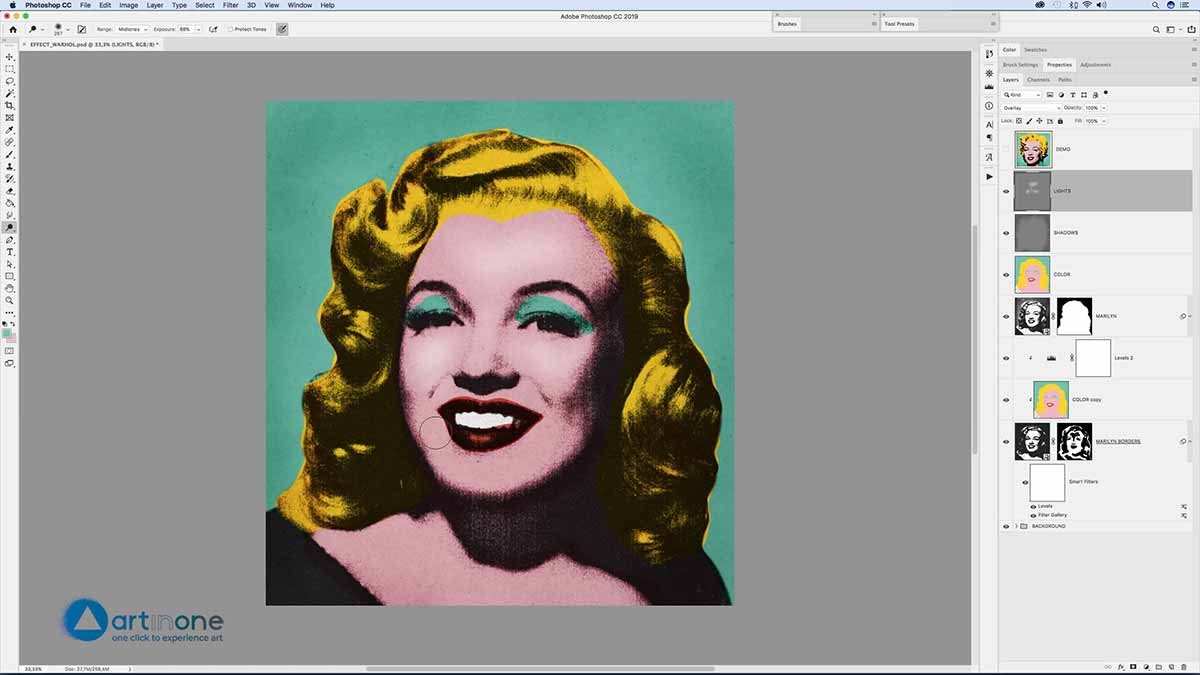
Creating the Saturated Color Effect
Adjust the BACKGROUND Levels to lighten the mid-tones and to make the colours cleaner but maintaining the texture grain and noise.
Duplicate the MARILYN layer to create the colour saturation of the edges. Add a new filter from the Filter Gallery Sketch> Torn Edges adjust the values (Image Balance: 35, Smoothness: 10, Contrast: 1) and adjust Grain by changing the Type to Horizontal.
Also duplicate the COLOR layer, place it on top of the BORDERS layer, pressing Alt and left-click on the dividing line between the two layer to Create Clipping Mask layers, change the blending mode to Screen so that the colour affect greys and blacks.
Go to the Filter Gallery options of the BORDERS layer adjusting the Torn Edges effect Contrast and shape of the Grain.
Now paint using black in the BORDERS layer mask, painting the inner areas of the figure leaving white only the edges so that the colours do not contaminate the rest of the areas.

Increase the contrast of the border colours to darken them more, select the COLOR copy layer and add a Level Adjustment Layer and adjust the mid-tones and black towards the whites. Create Clipping Mask by pressing Alt and left-click on the dividing line between the layers so that this adjustment of Levels only affects the BORDERS layer.
Applying Lights and Shadows
To create highlights and shadows add a New Layer click the new layer icon while holding down the ALT key giving you access to a dialog box with options. Changing the blending mode to Overlay and check the Fill with Overlay option – neutral colour (50% grey) option. Name the layer SHADOWS, duplicate the layer pressing Ctrl / Cmd + J, name this additional layer LIGHTS.
With the two new layers at 50% grey and using Overlay mode to blend they disappear. Using the Dodge and Burn tools with a soft edge brush, make sure the in the properties options the Range has Mid-tones selected.
When the Burn tool is selected be sure to use a very low value Exposure. With the Dodge tool set the Exposure to slightly above 50%.
Use Dodge to clarify the face, the details of the eyes and the hair. With Burn create the Vignette. To balance the lights apply a filter Blur> Gaussian Blur.
Finish by double-clicking on any of the MARILYN layers edit the Smart Object and clarify the image by adding a Levels Adjustment Layer. Add a New Layer to paint Marilyn’s signature mole. Selecting the Burn tool darken the areas between each of her teeth to give more definition.
End by erasing to better define the red of the lips and painting some areas of the edges of the mask with white to integrate it all better.
Screen Printing Andy Warhol Effect in Photoshop
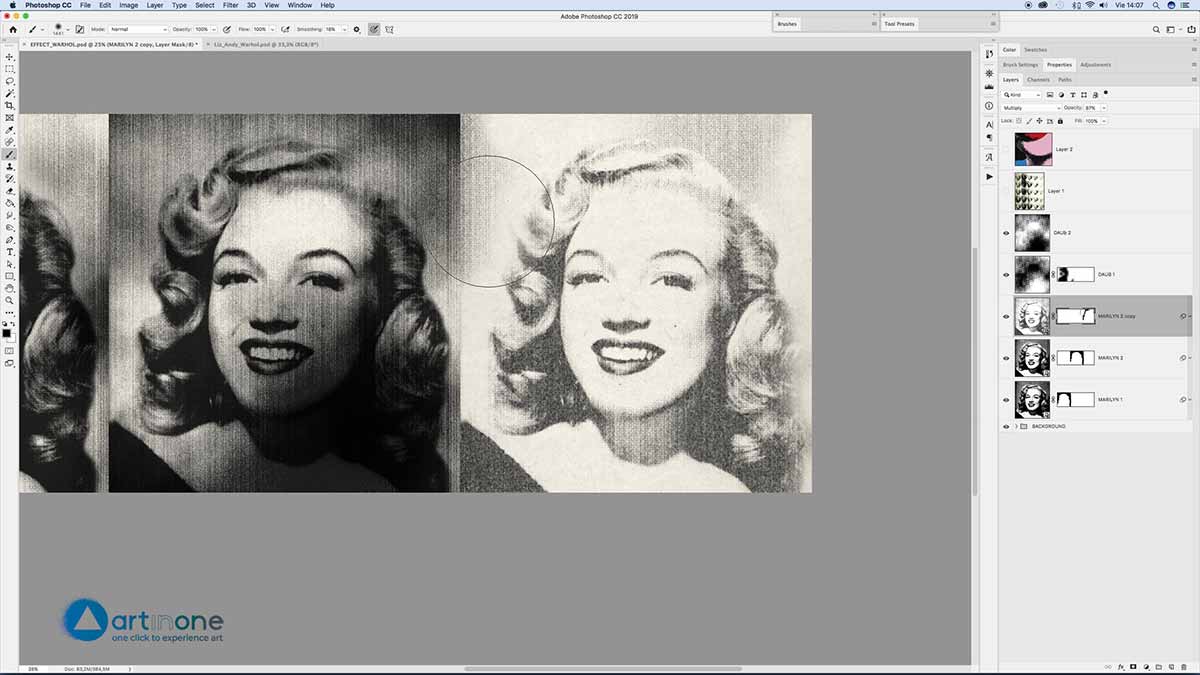
Select all the layers except BACKGROUND and MARILYN and delete them by dragging them to the Trash. Open the file with the repetitions and copy an area with them, to use as a reference.
Click on the Properties of the Black and White Adjustment Layer; check the Tint option, click on the colour to define a colour as close as you can to that of the reference paper.

Applying Filters to Screen Printing Effect
Open the Elizabeth Taylor file and crop a portion where the print dot is visible. Add this to the Marilyn file.
Edit the Filter Gallery to adjust the effects and remove the Sponge effect.
Go to Filter> Pixelate Filter> Colour Halftone with Max. Radius of 5 and 45º in all 4 channels. Edit the filter with a double-click and vary the angles with the following general values C: 15, M: 105, Y: 75, K: 45, these generate a dot that can show the various colours.

Make an adjustment in Image> Adjustments> Black & White moderating the different colours to achieve a thicker or more open print dot depending on whether we deviate the colours towards whites or blacks.
Finally edit the Colour Halftone filter again and adjust all the angles to 45º. With all the angles equal, the Black and White adjustment is no longer necessary as the colour patterns now overlap.
Create a New Layer to generate random spots to add to the image, click on Filter> Render> Clouds, Select a small portion, expanding it to the edges of the document. Go to Filter Gallery and apply the last used applied effects. Blend the layer in Multiply mode so that the white disappears and the screen is added. Adjust the opacity to 87%.

With the Crop tool enlarge the canvas to the right, Use the grid to determine the midpoint and visually able to expand the canvas to twice it’s width.

Making copies
Select the paper and with the Alt key pressed drag using the Move tool to create a copy, in the mask layer paint the blank areas that the enlargement have left in back link the mask to the layer. Duplicate the layer and it’s mask and invert the mask colour using Ctrl /Cmd + I.
In the stain layers create a Mask, with a large sized brush at 0% hardness hide parts of the layer using the colour black.
To finish repeat the process of enlarging the canvas using the Crop tool and the grid. Copying the PAPER layer and the MARILYN layer, edit the Filter Gallery to clarify the plot and generate a lacklustre appearance by modifying the Graphic Pen Filter’s Stroke Length: 10, Light / Dark Balance: 28.
Paint on his mask in this case with white to reveal part of the original background.
If you liked this tutorial surely you will like this Create Amazing Pop Noodles 3D Lettering with Adobe Photoshop Brushes.
Vídeo tutorial Create Real Photocopy and Screen Printing Effects of Andy Warhol.
Translate the captions to any language. Activate Captions. In the configuration icon, Captions> Automatically Translate and select your language.
Sign up to download the file!